Manage System Settings (Enterprise Edition)
Manage Licenses
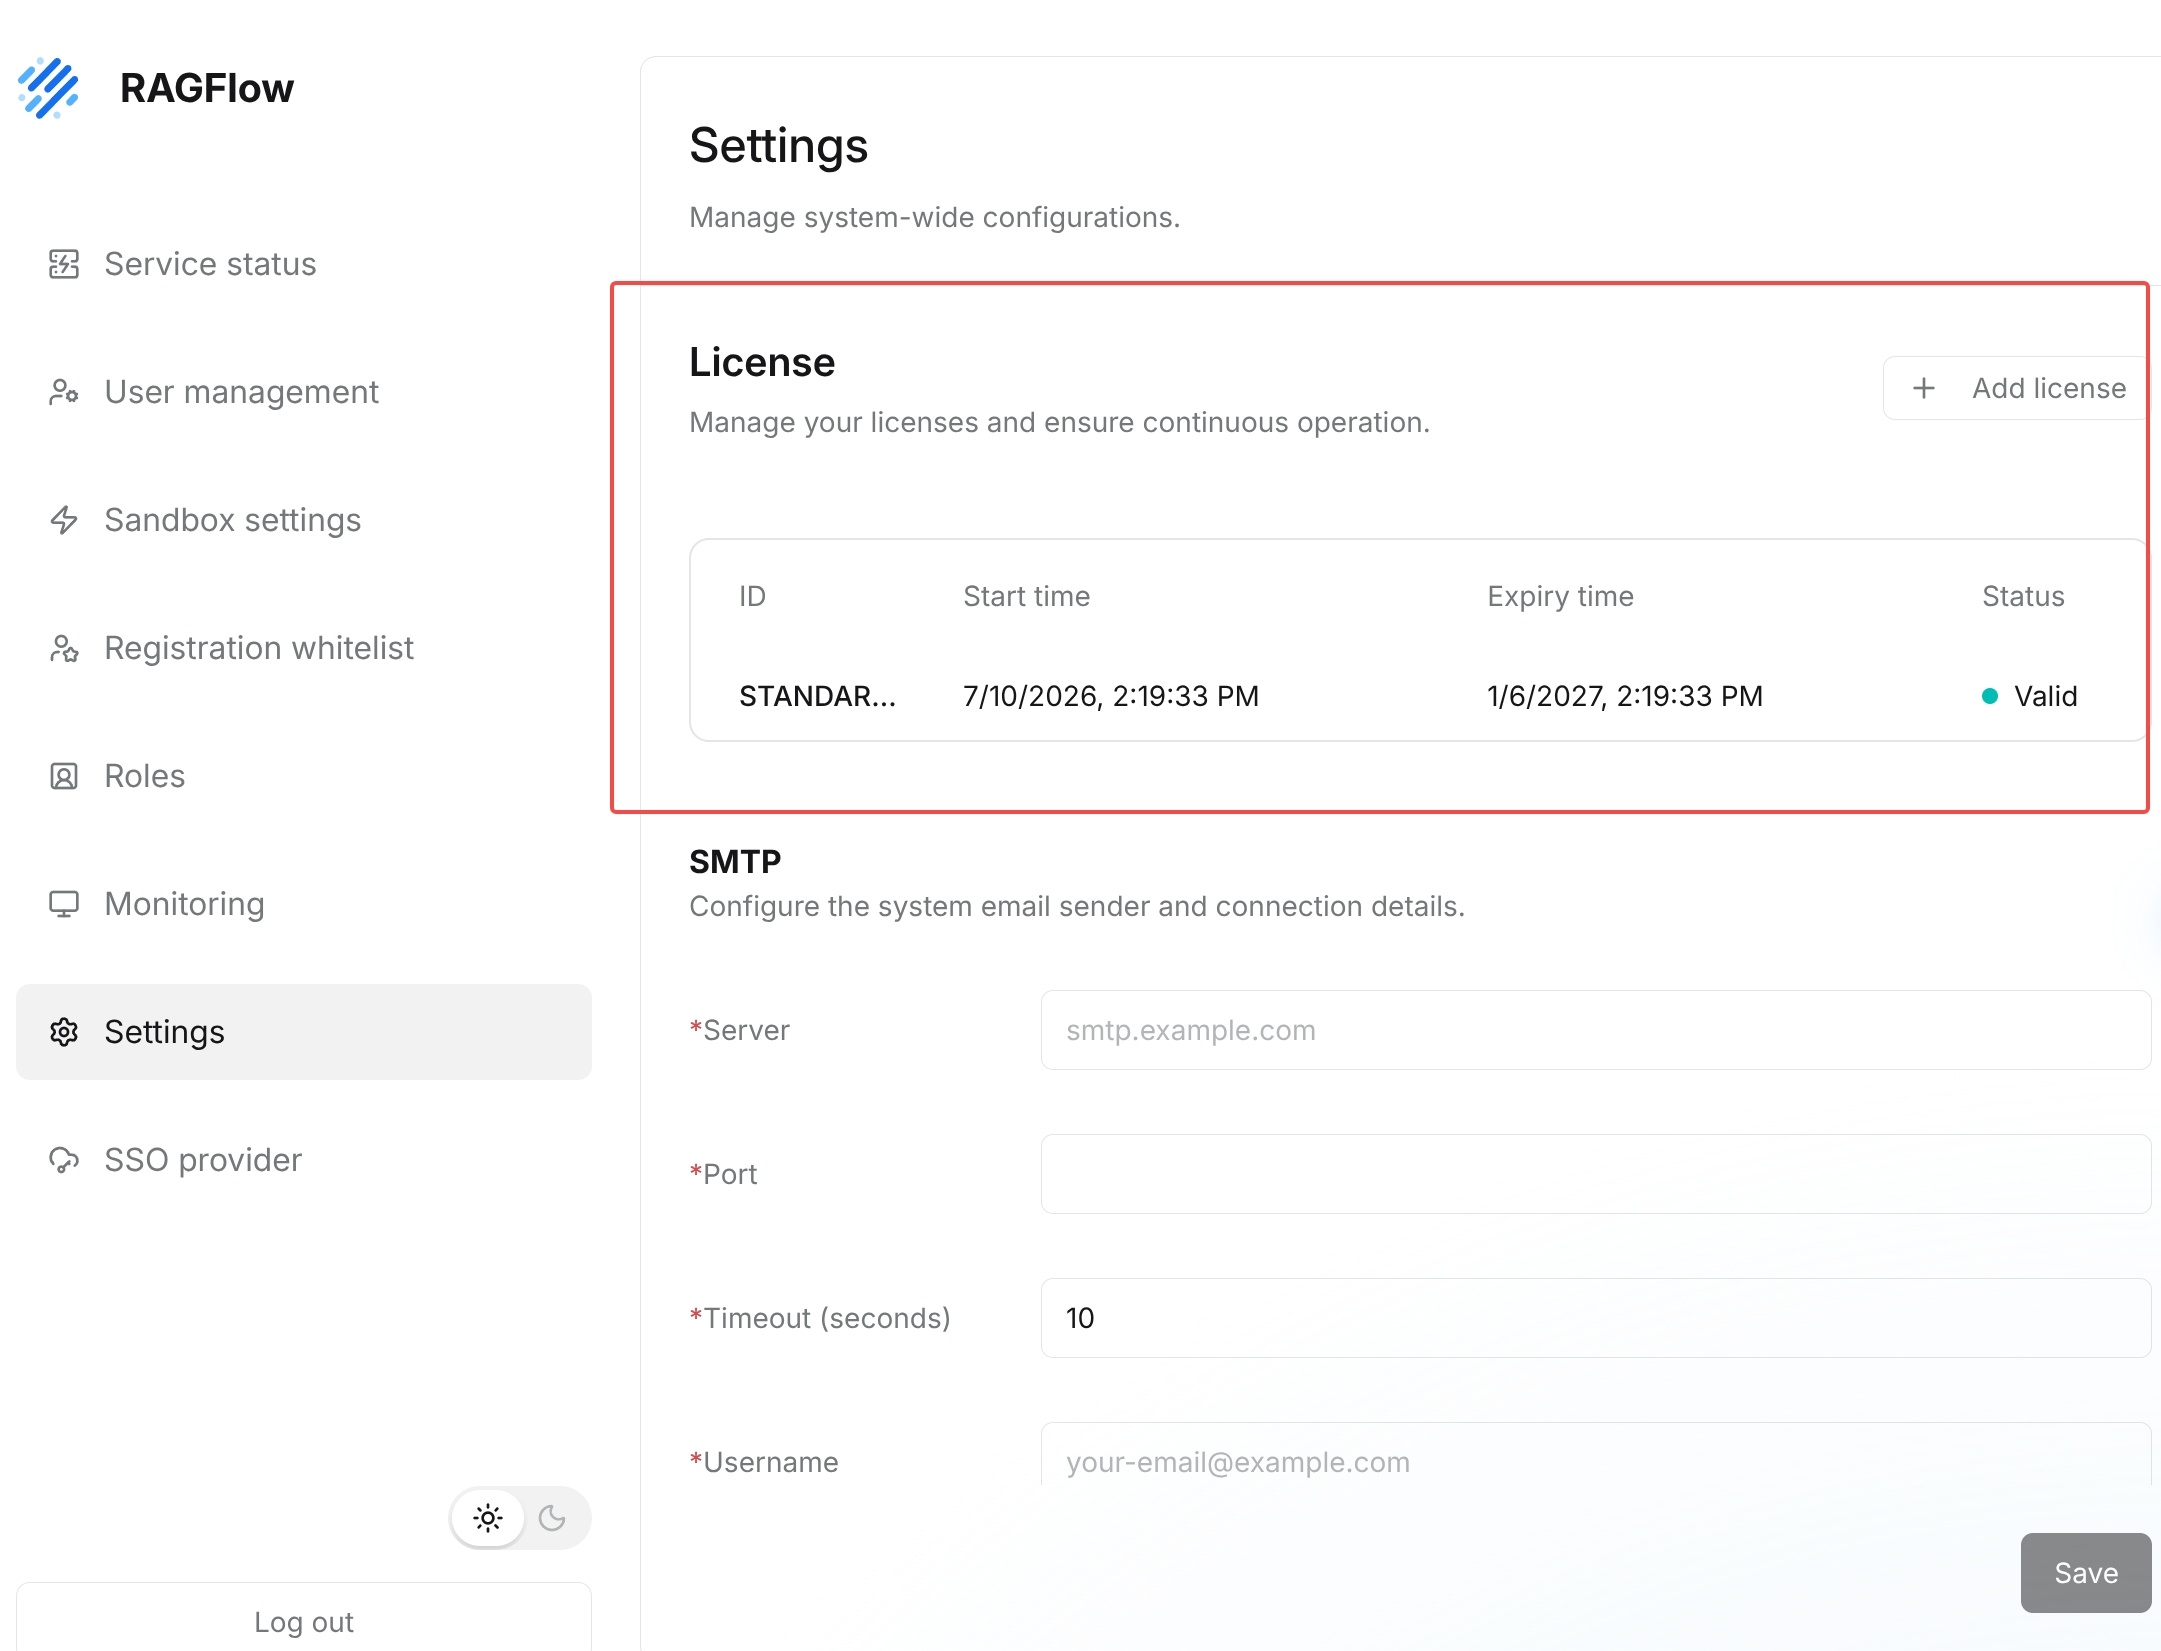
Enterprise Edition system settings include the License module, which is used to manage licenses and confirm that the system remains available. The current page displays the license ID, Start time, Expiry time, and Status, and provides Add license.
Administrators should regularly check license status and expiration time to avoid license expiration affecting Enterprise Edition capabilities. After adding or updating a license, confirm that Status is normal.
Configure System Email
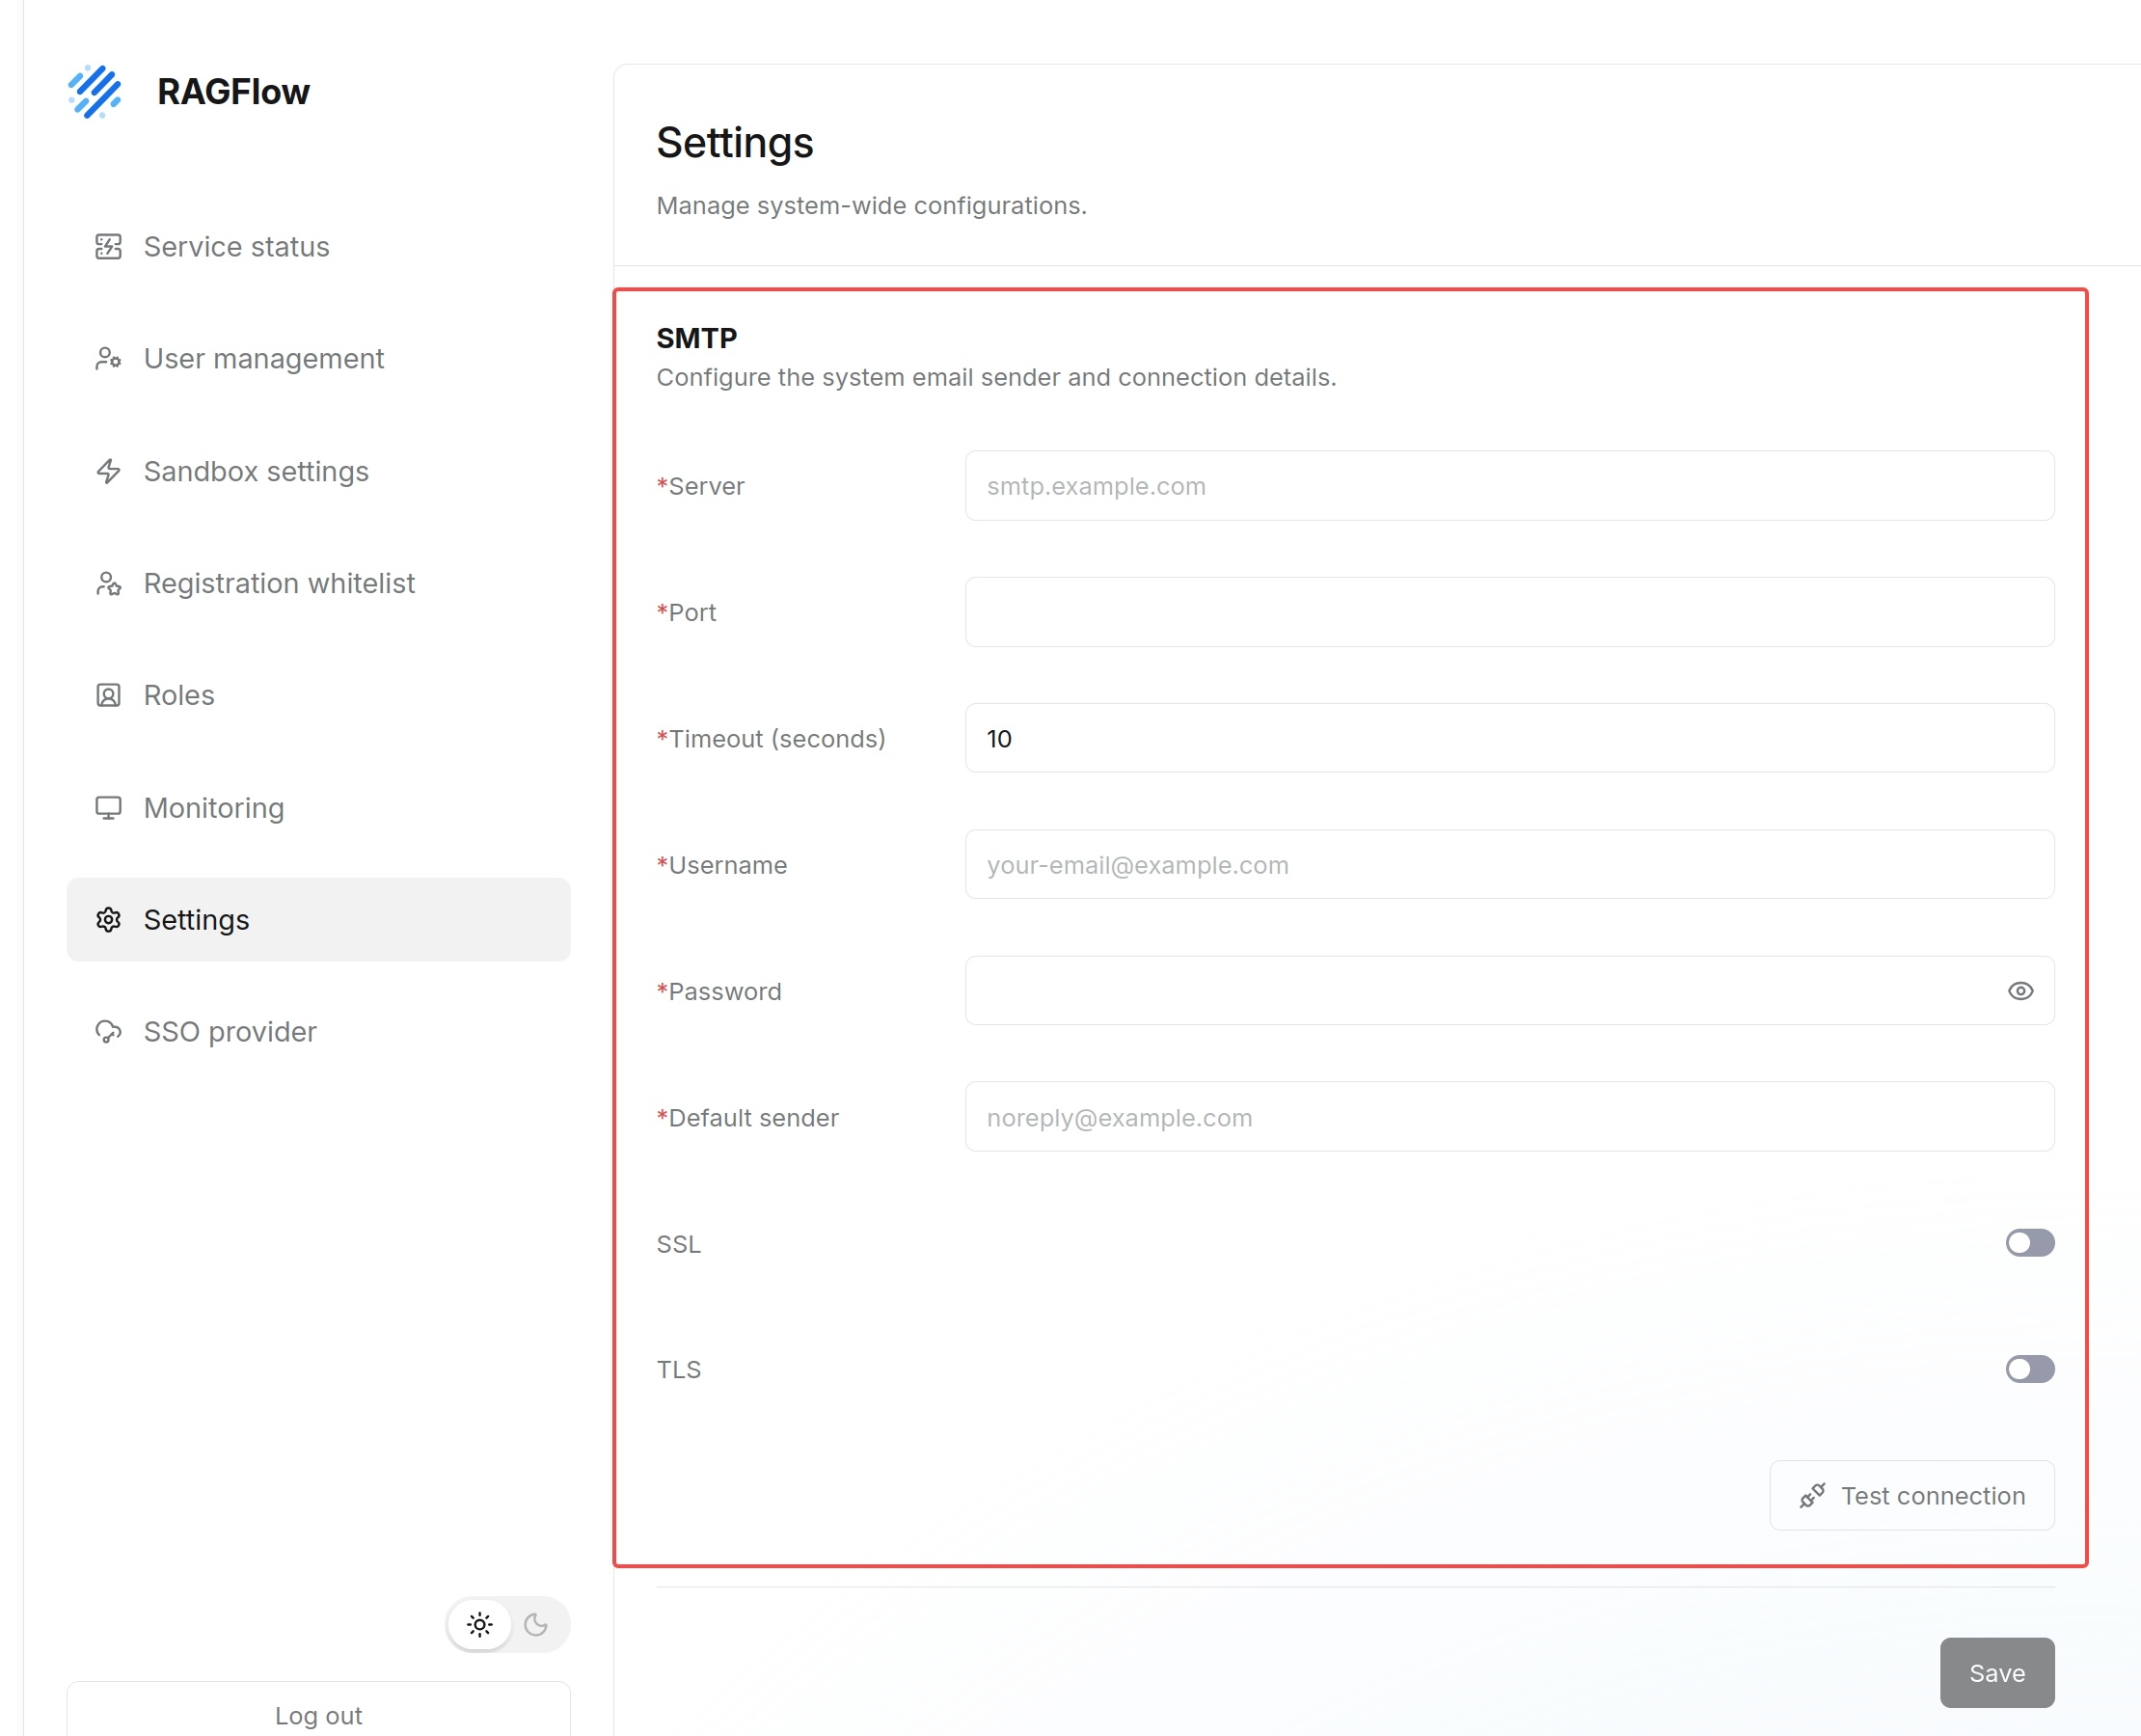
SMTP (Simple Mail Transfer Protocol) configures the system email sending service. After successful configuration, the system can send verification codes, password reset emails, notification emails, and other email messages.
| Configuration item | Required | Description | Example or recommendation |
|---|---|---|---|
Server | Yes | SMTP mail server address. | smtp.example.com |
Port | Yes | SMTP service port. Keep it consistent with the SSL/TLS configuration. | SSL: 465; TLS: 587; no encryption: 25 (generally not recommended). |
Timeout (seconds) | Yes | SMTP connection timeout, in seconds. | Keep the default value 10. |
Username | Yes | Email account used for sending mail. | your-email@example.com |
Password | Yes | Email login password or SMTP authorization code. Some email providers require an authorization code instead of the login password. | Fill in according to your email provider's requirements. |
Default sender | Yes | Sender email address displayed when the system sends email. It is recommended to keep it consistent with Username. | noreply@example.com |
SSL | As needed | Whether to enable SSL encrypted connection. | Usually enabled when using port 465. |
TLS | As needed | Whether to enable TLS (STARTTLS) encrypted connection. | Usually enabled when using port 587. |
Test connection | Recommended | After configuration, click Test connection to verify that the SMTP service can connect normally. | Save the configuration only after the test succeeds. |
Different email providers use different server addresses, ports, and authentication methods. Configure SMTP according to the parameters provided by your email provider. Usually, you only need to enable either SSL or TLS. Fill in the configuration according to the email provider's guidance.
Configure System Notifications
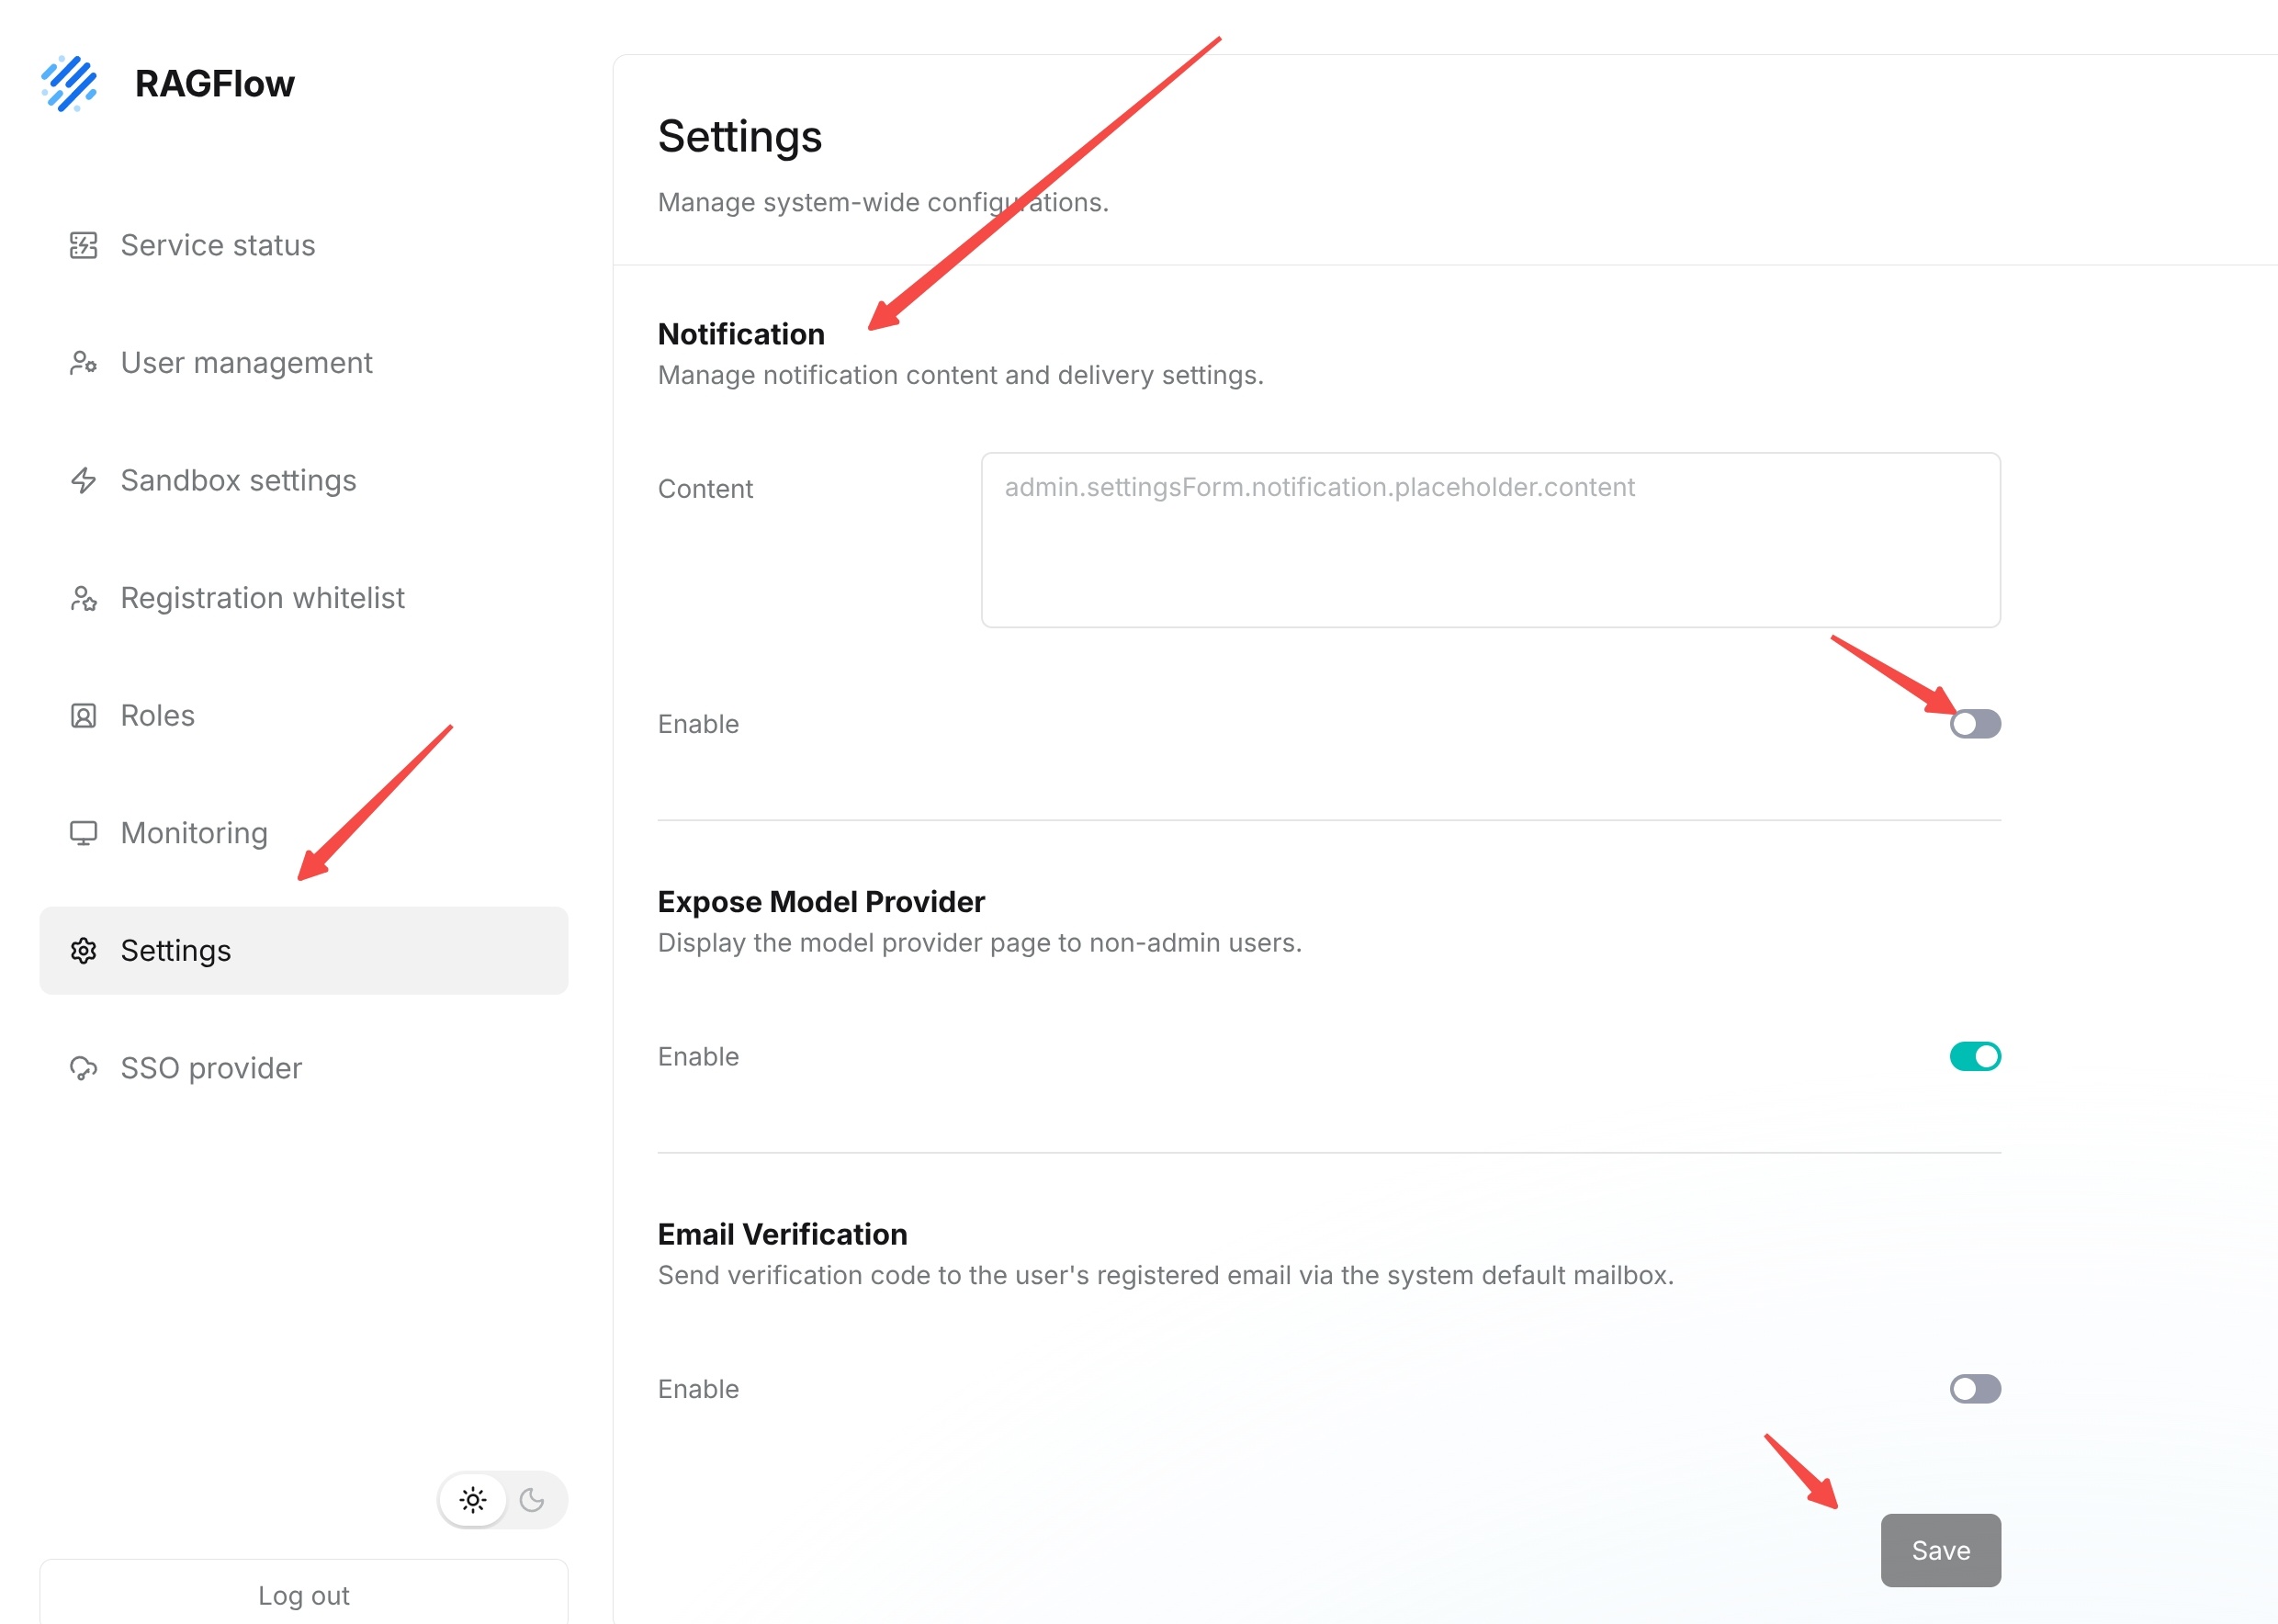
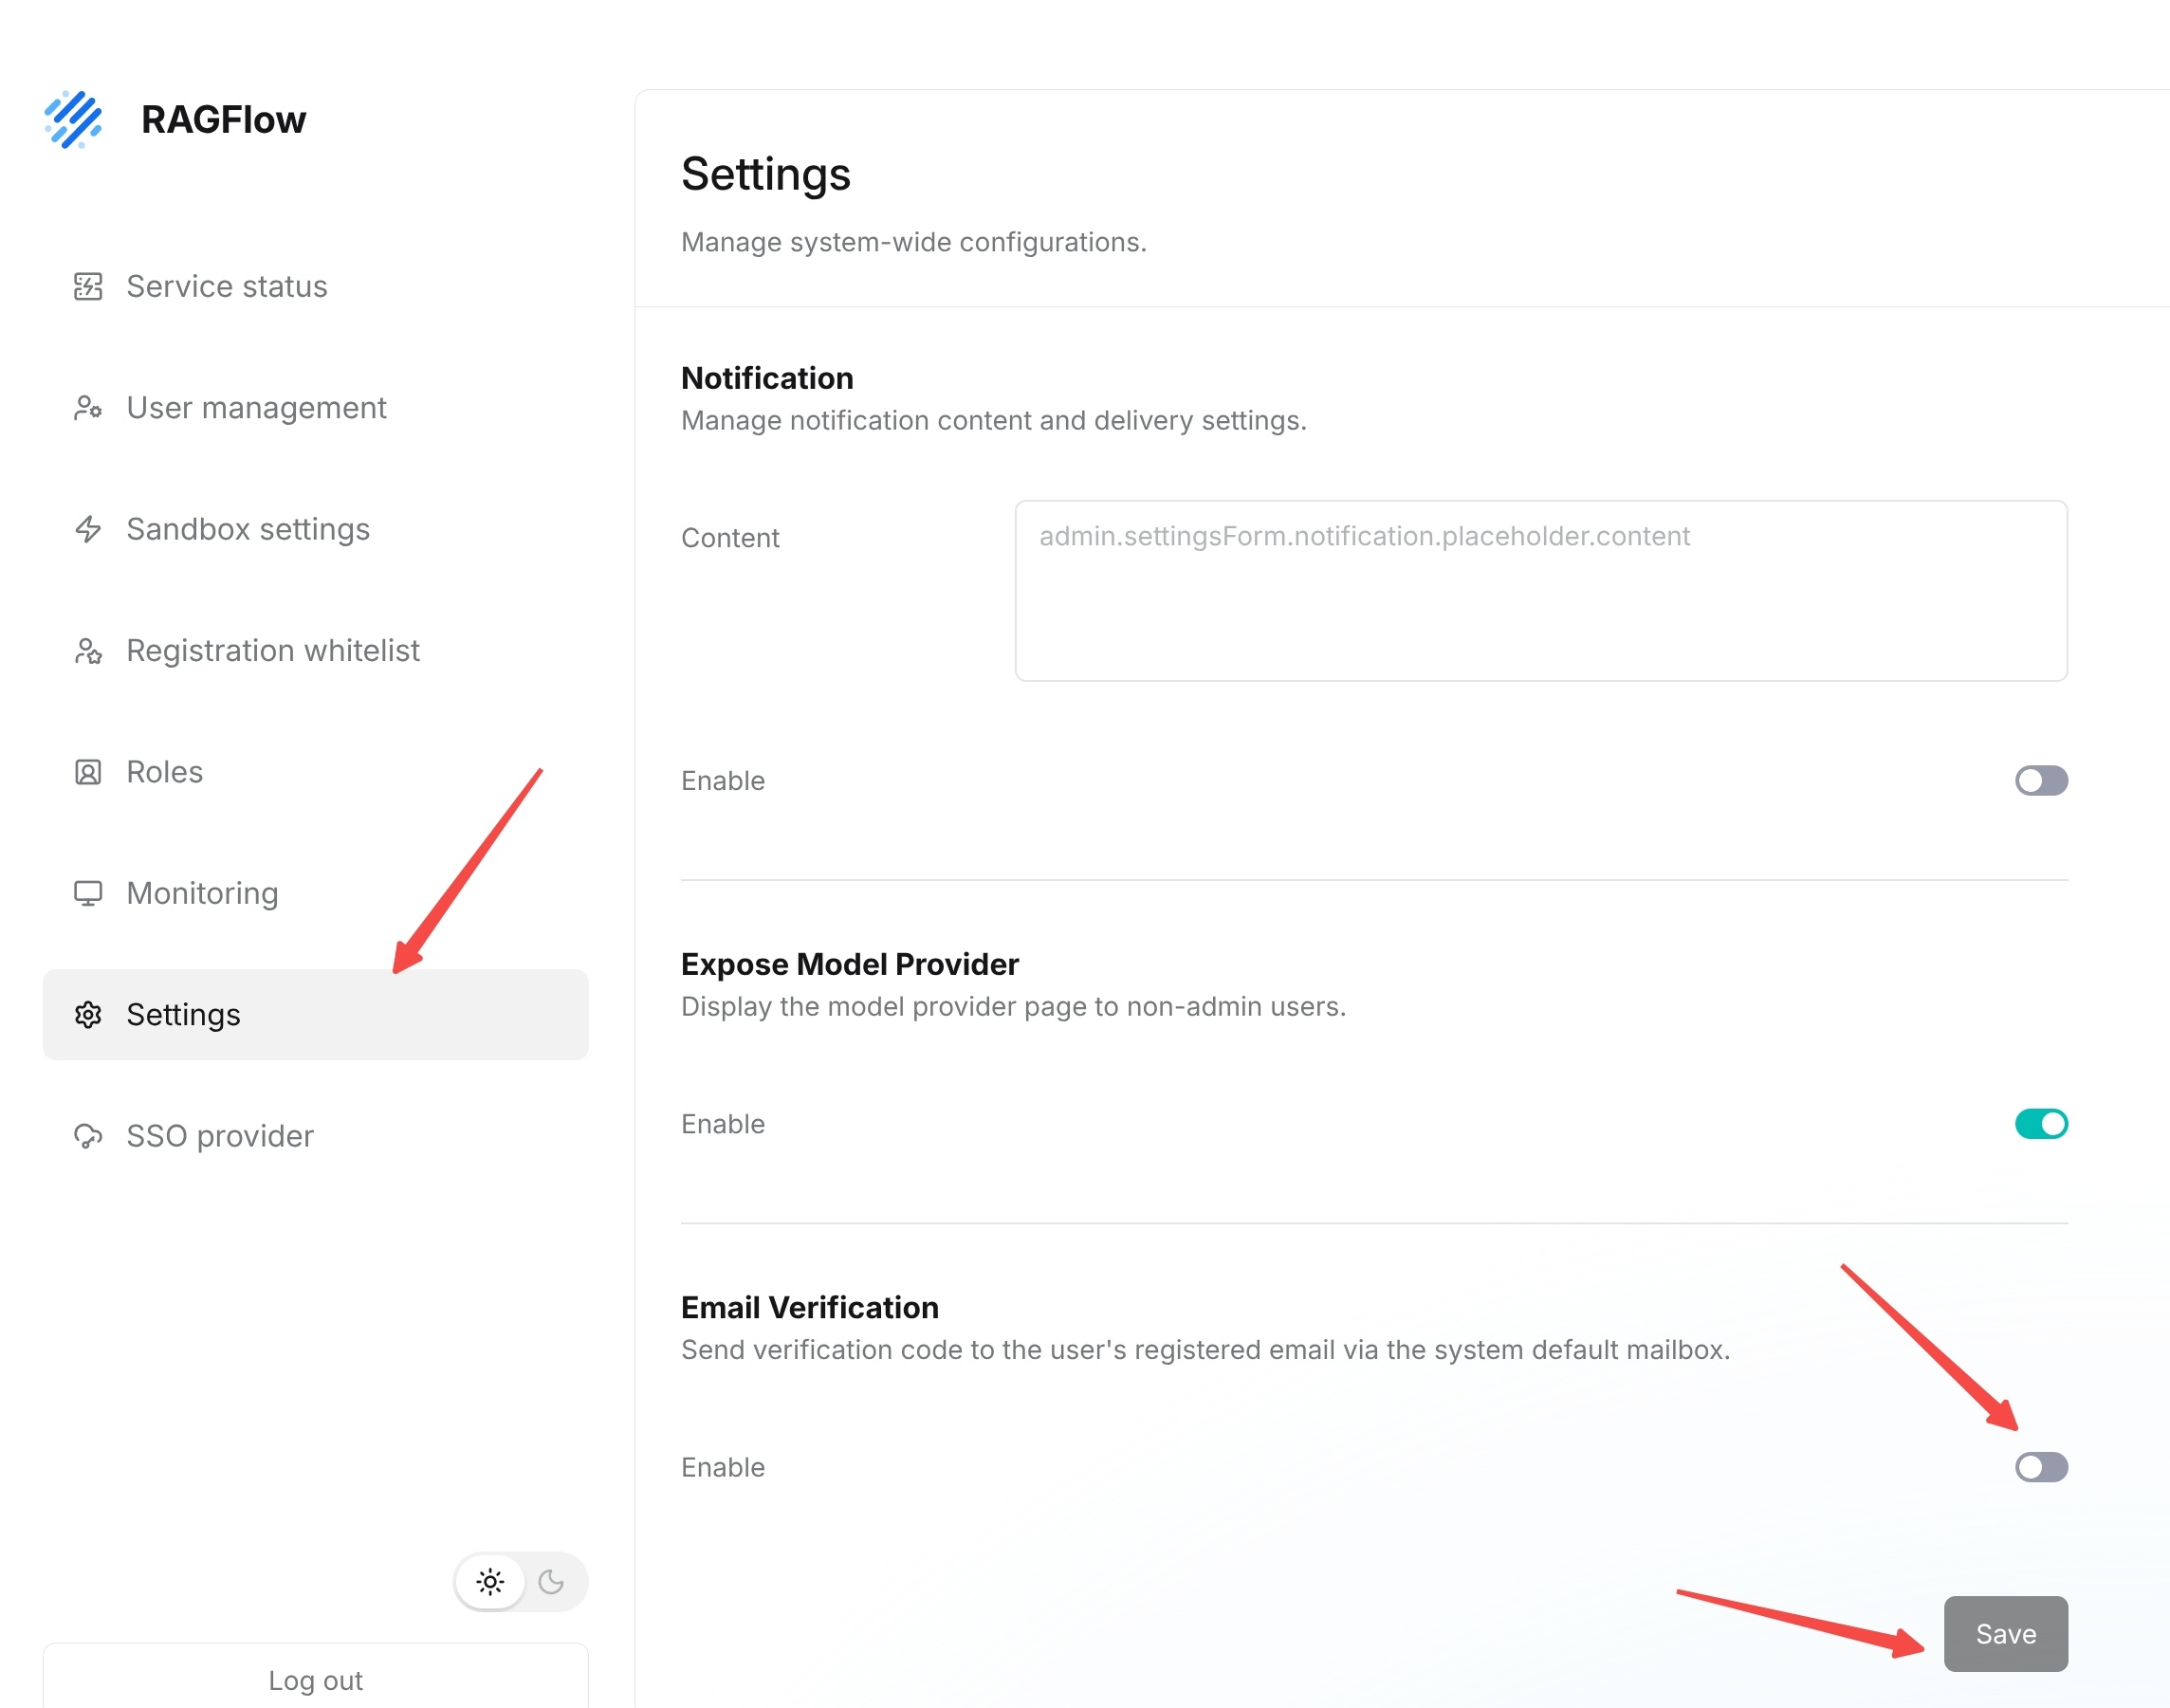
Notification manages system notification content and enablement status. Administrators can enter notification content in Content and use Enable to control whether the notification takes effect. This feature applies to system announcements, maintenance notices, downtime notices, or other information that needs to be displayed uniformly to users.
- Go to the Settings page.
- Find the Notification area.
- Enter the content to display in
Content. - Turn on the
Enableswitch. - Click Save.
Set Model Provider Page Visibility Scope
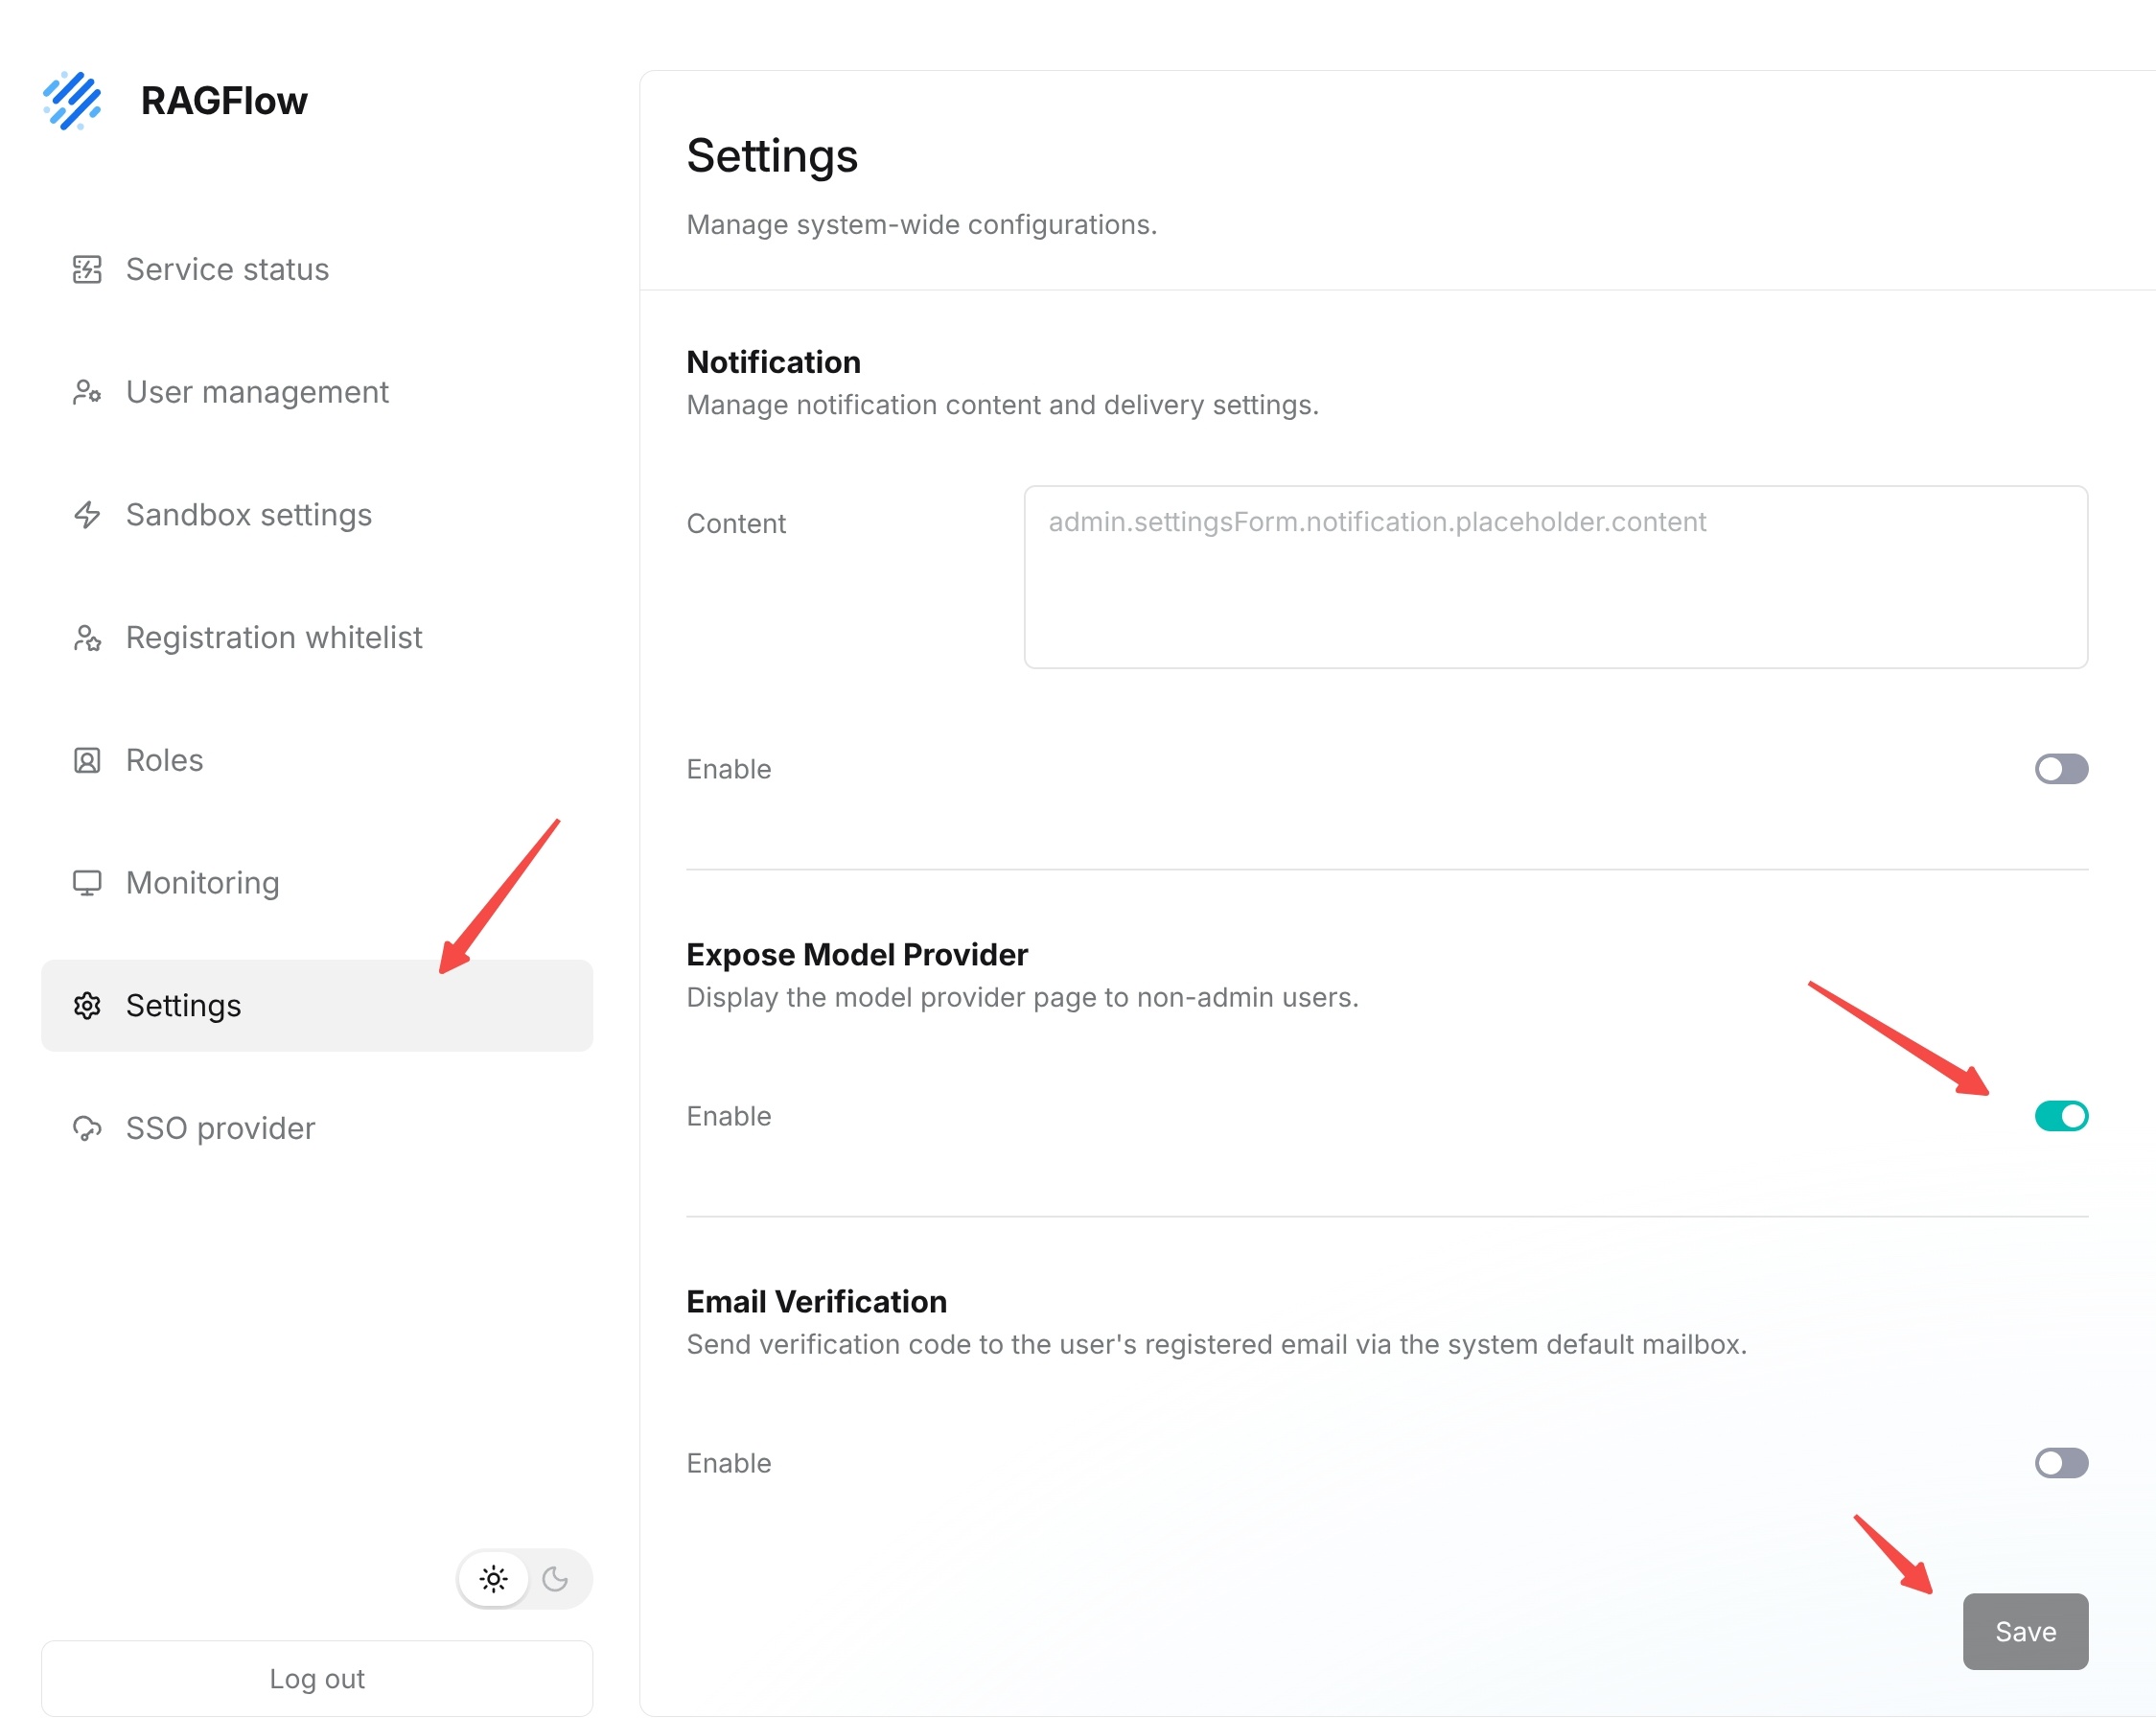
ExposeModelProvider controls whether the model provider page is displayed to non-administrator users. When enabled, non-administrator users can also see the Model Provider page entry. When disabled, the page is visible only to users with corresponding management permissions.
- Go to the Settings page.
- Find the ExposeModelProvider area.
- Turn the
Enableswitch on or off according to the enterprise permission policy. - Click Save.
Enable Email Verification
EmailVerification controls the registration email verification code feature. When enabled, the system sends a verification code from the default email account to the user's registration email address to verify that the registration email is genuine.
- Go to the Settings page.
- Confirm that SMTP has been configured correctly and that Test connection passed.
- Find the EmailVerification area.
- Turn on the
Enableswitch. - Click Save.
Configure SSO Identity Providers
SSO provider selects a unified login identity provider for the organization. Administrators can choose one identity provider mode from None, Cloud IDP, and LDAP.
Cloud IDP configures a third-party cloud identity provider. The current page provides Google, GitHub, and Feishu. LDAP configures an enterprise directory identity provider and is suitable for organizations that use internal directory services.
- Go to the SSO provider page.
- Select
None,Cloud IDP, orLDAPaccording to the organization's identity management method. - If you select
Cloud IDP, enable the corresponding identity provider fromGoogle,GitHub, andFeishu. - If you select
LDAP, enable the default LDAP configuration or click Add to add a new LDAP configuration. - Click the settings button on the right side of the corresponding identity provider and fill in the identity provider parameters as required by the page.
- After configuration, verify the login flow with a test account before switching to production use.
Note: Before switching the production identity provider, make sure at least one administrator login method remains available. Otherwise, a configuration error may prevent administrators from entering the Admin UI.