Manage User Accounts
View and Search Users
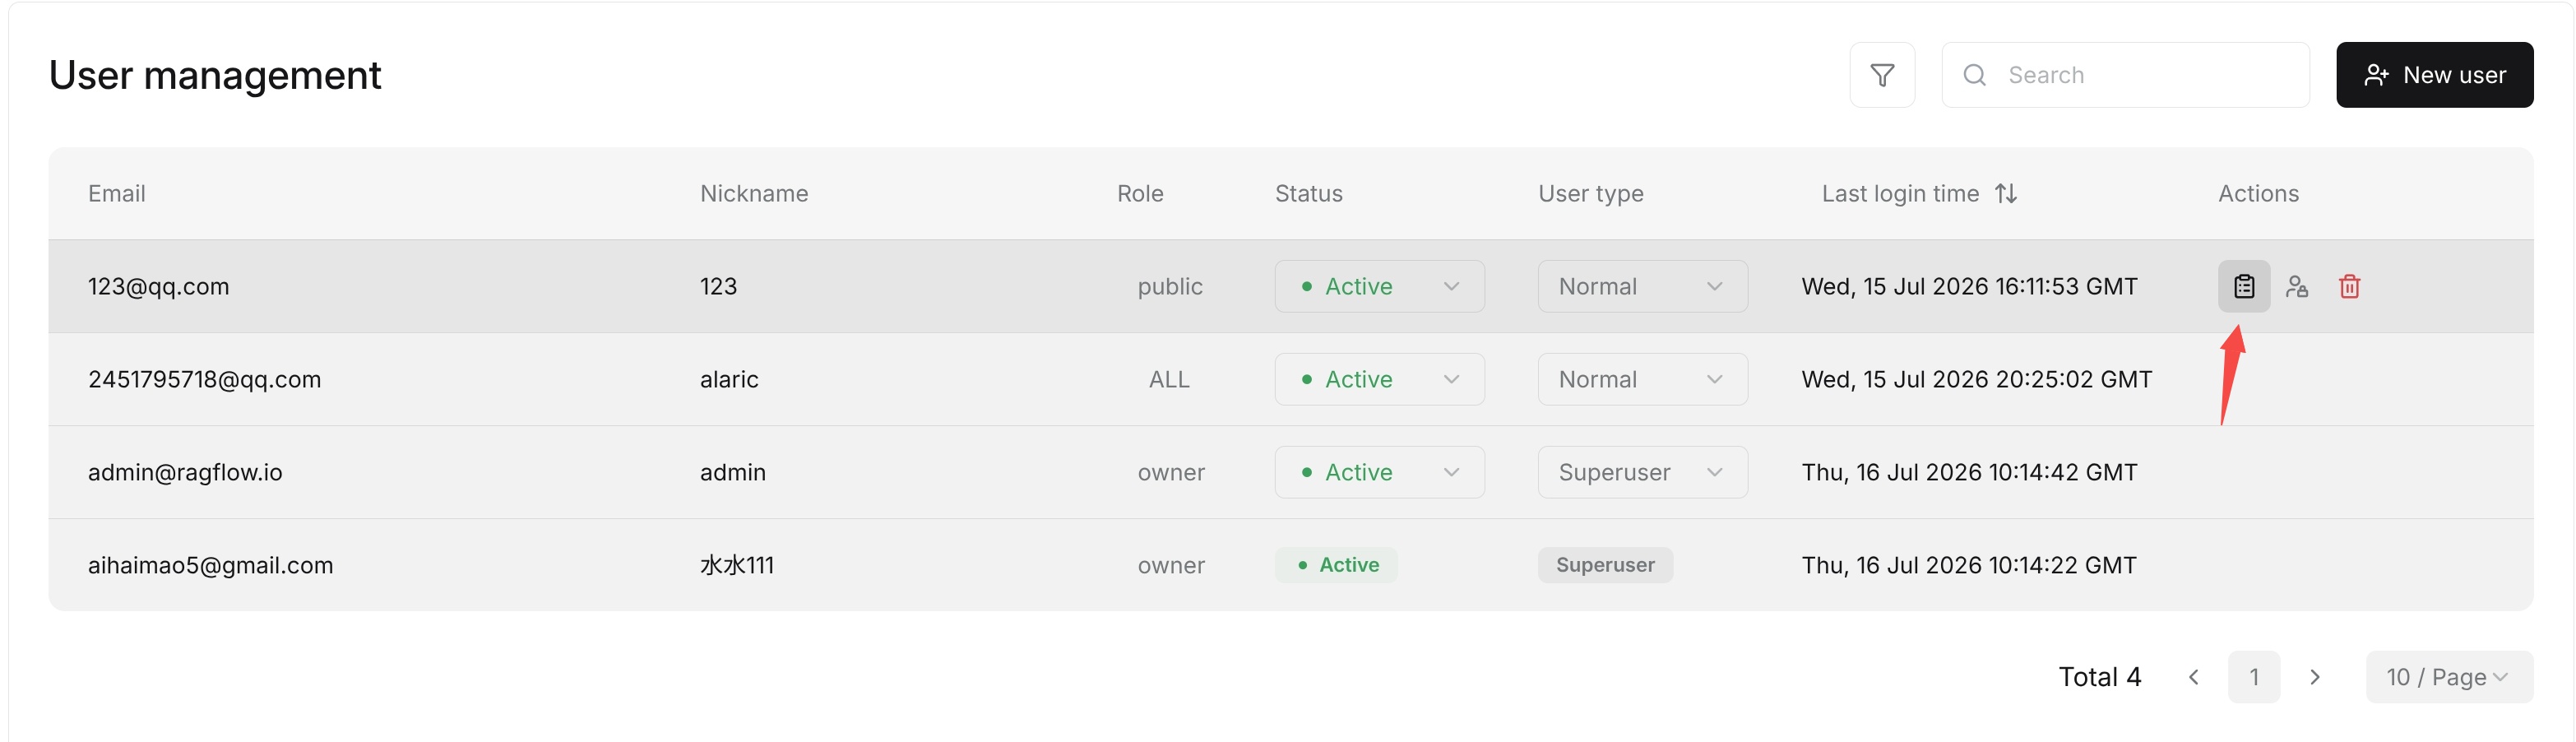
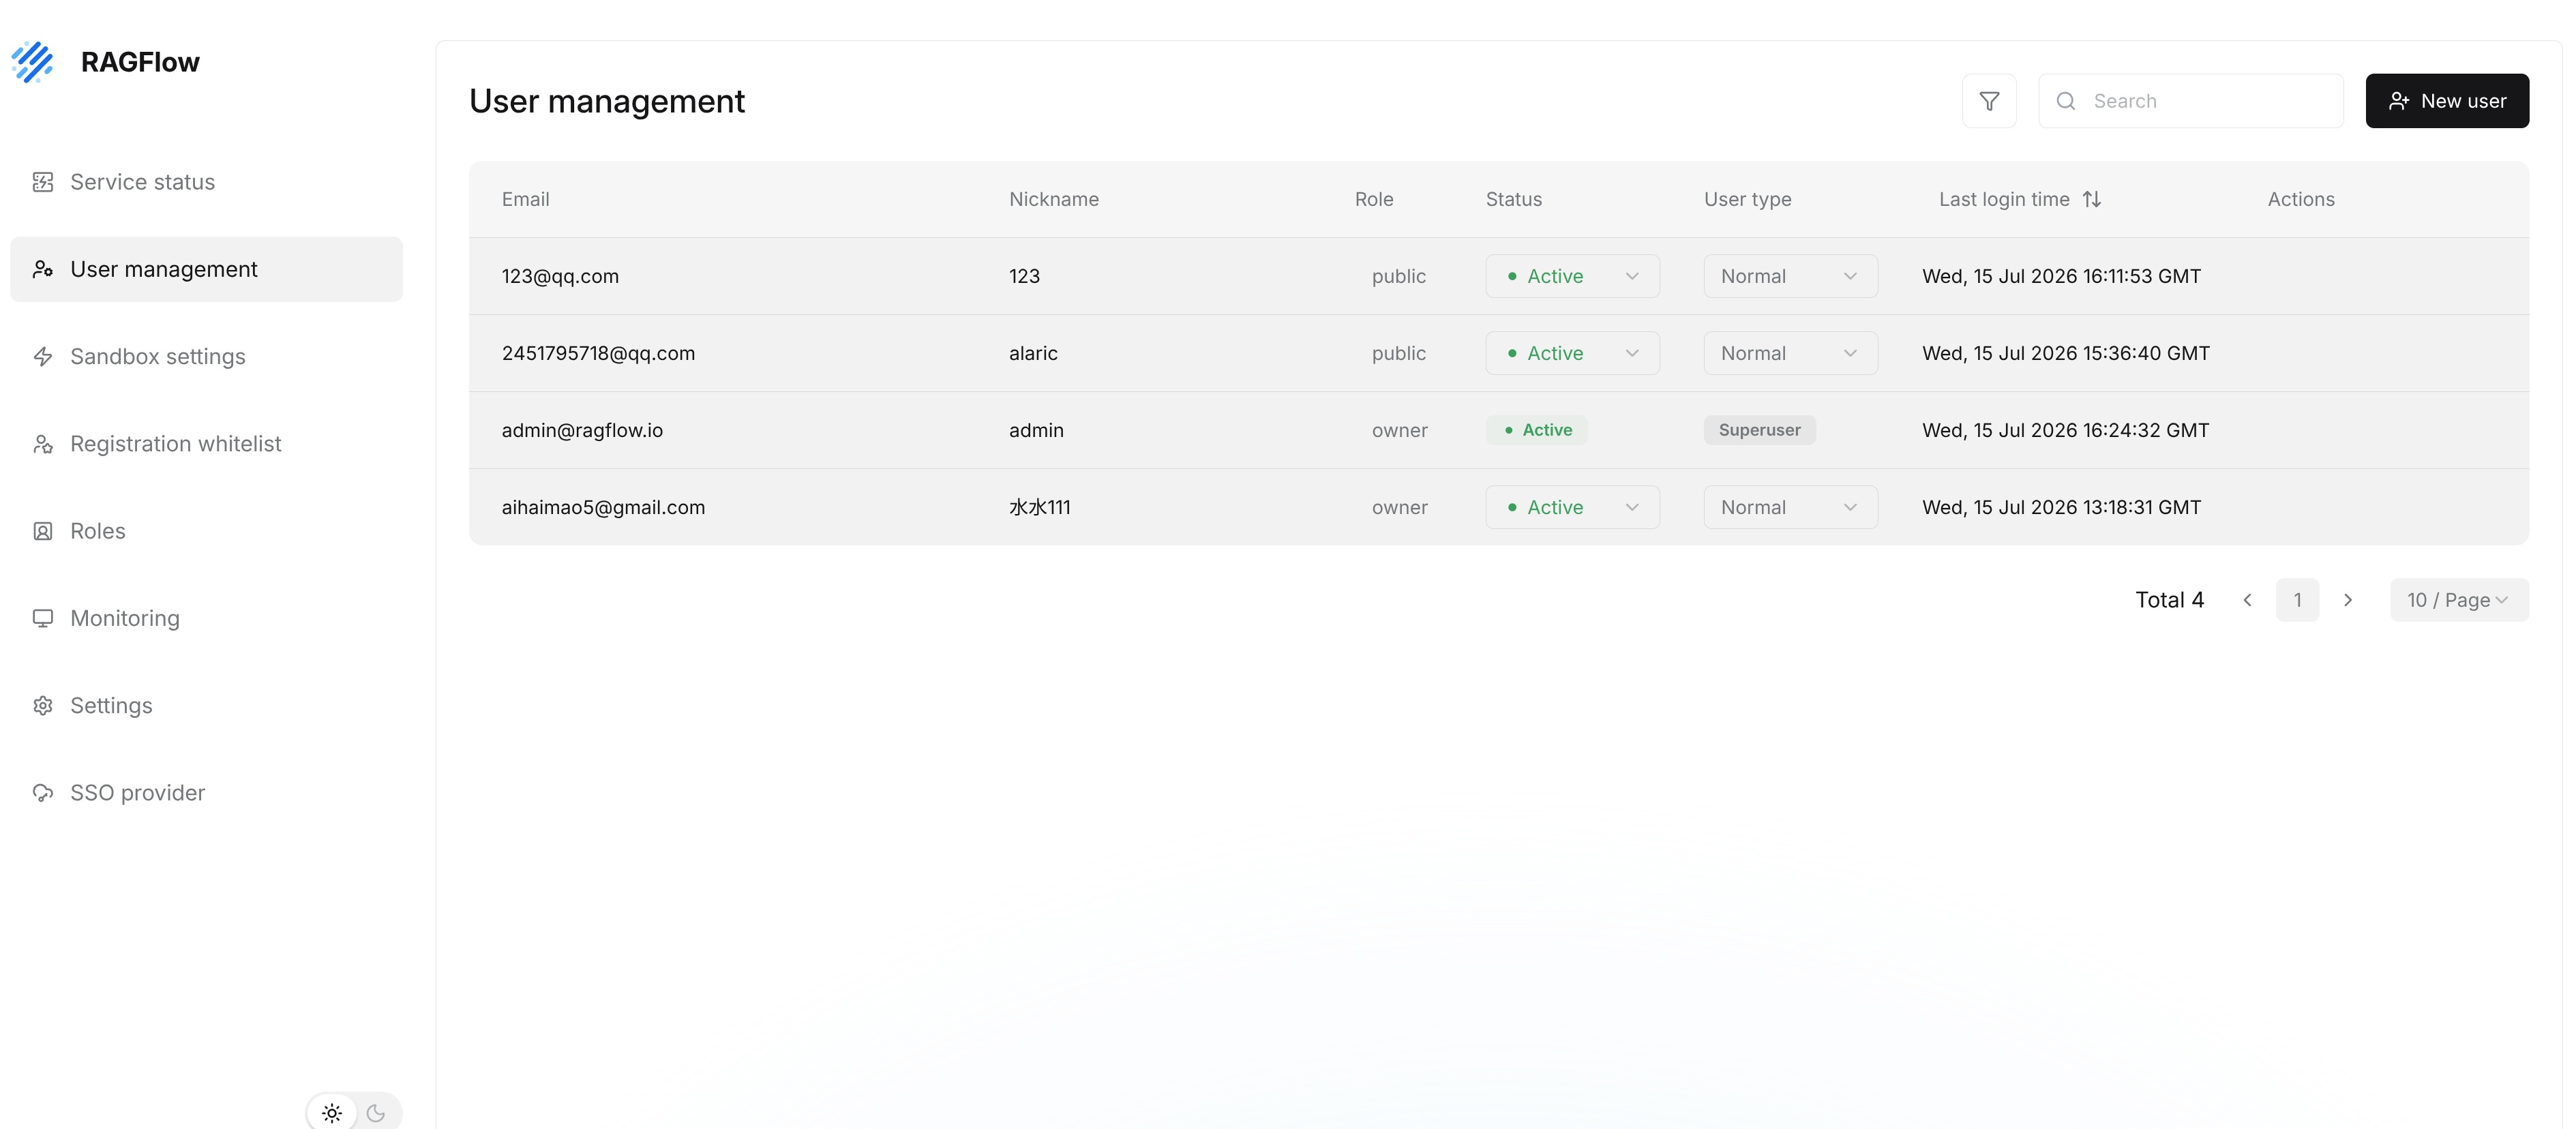
User accounts are managed on the User management page. Administrators can view the user list, including Email, Nickname, Status, User type, and Last login time.
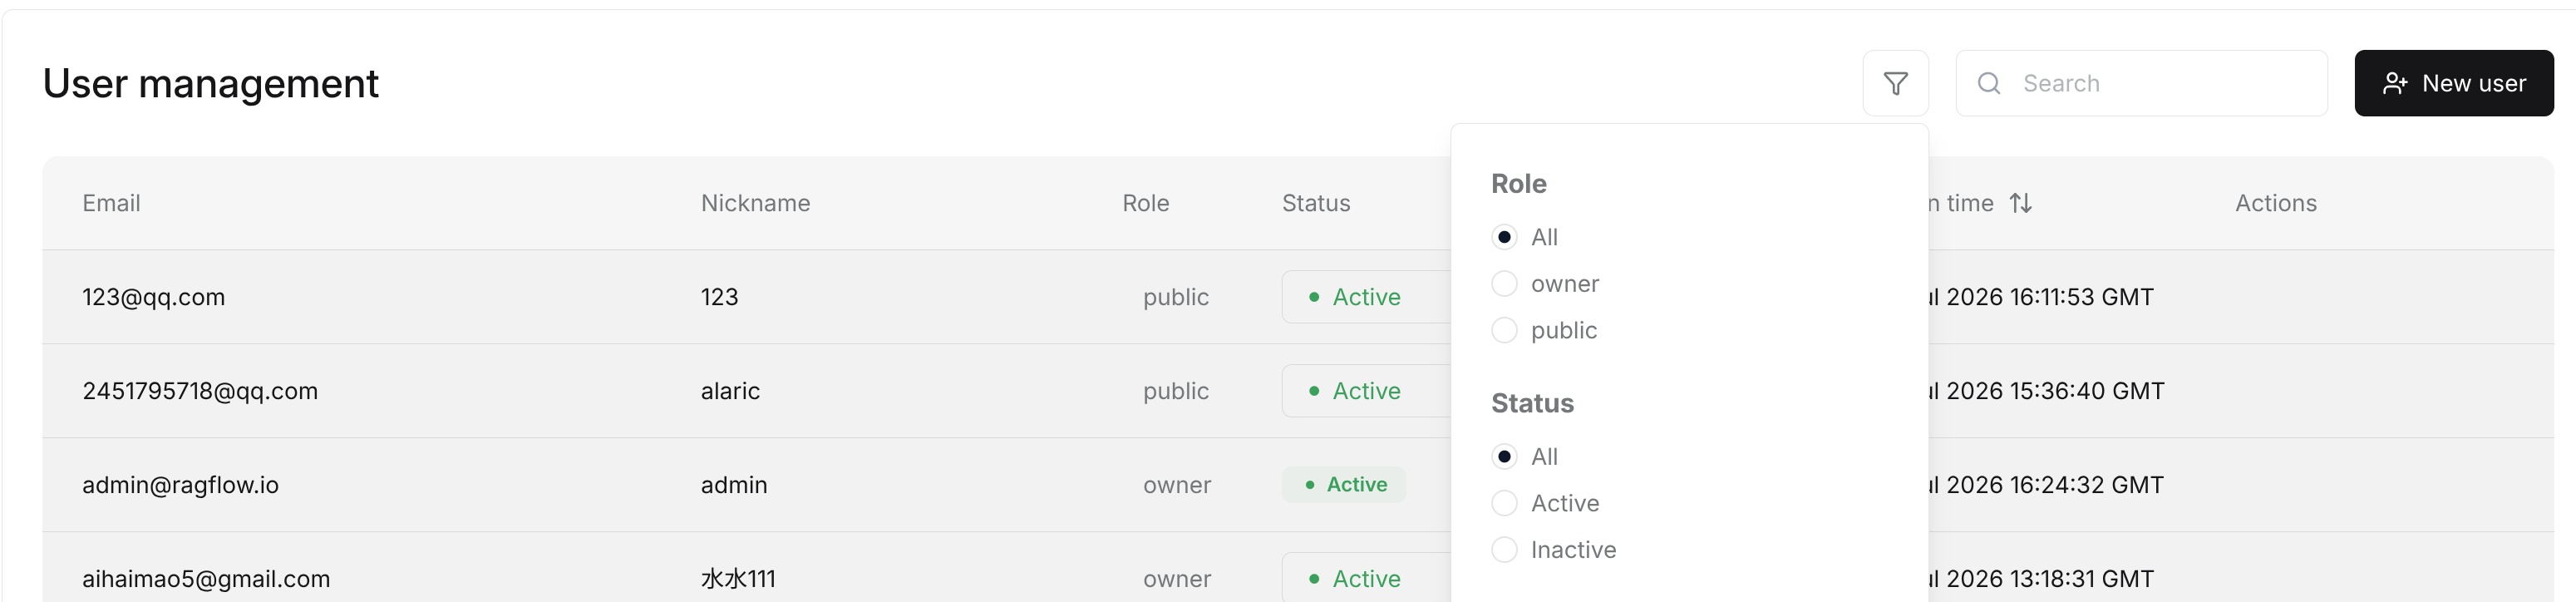
Use the search box in the upper-right corner to search users by Email or Nickname. You can also filter Active or Inactive users by Status.
Create a New User
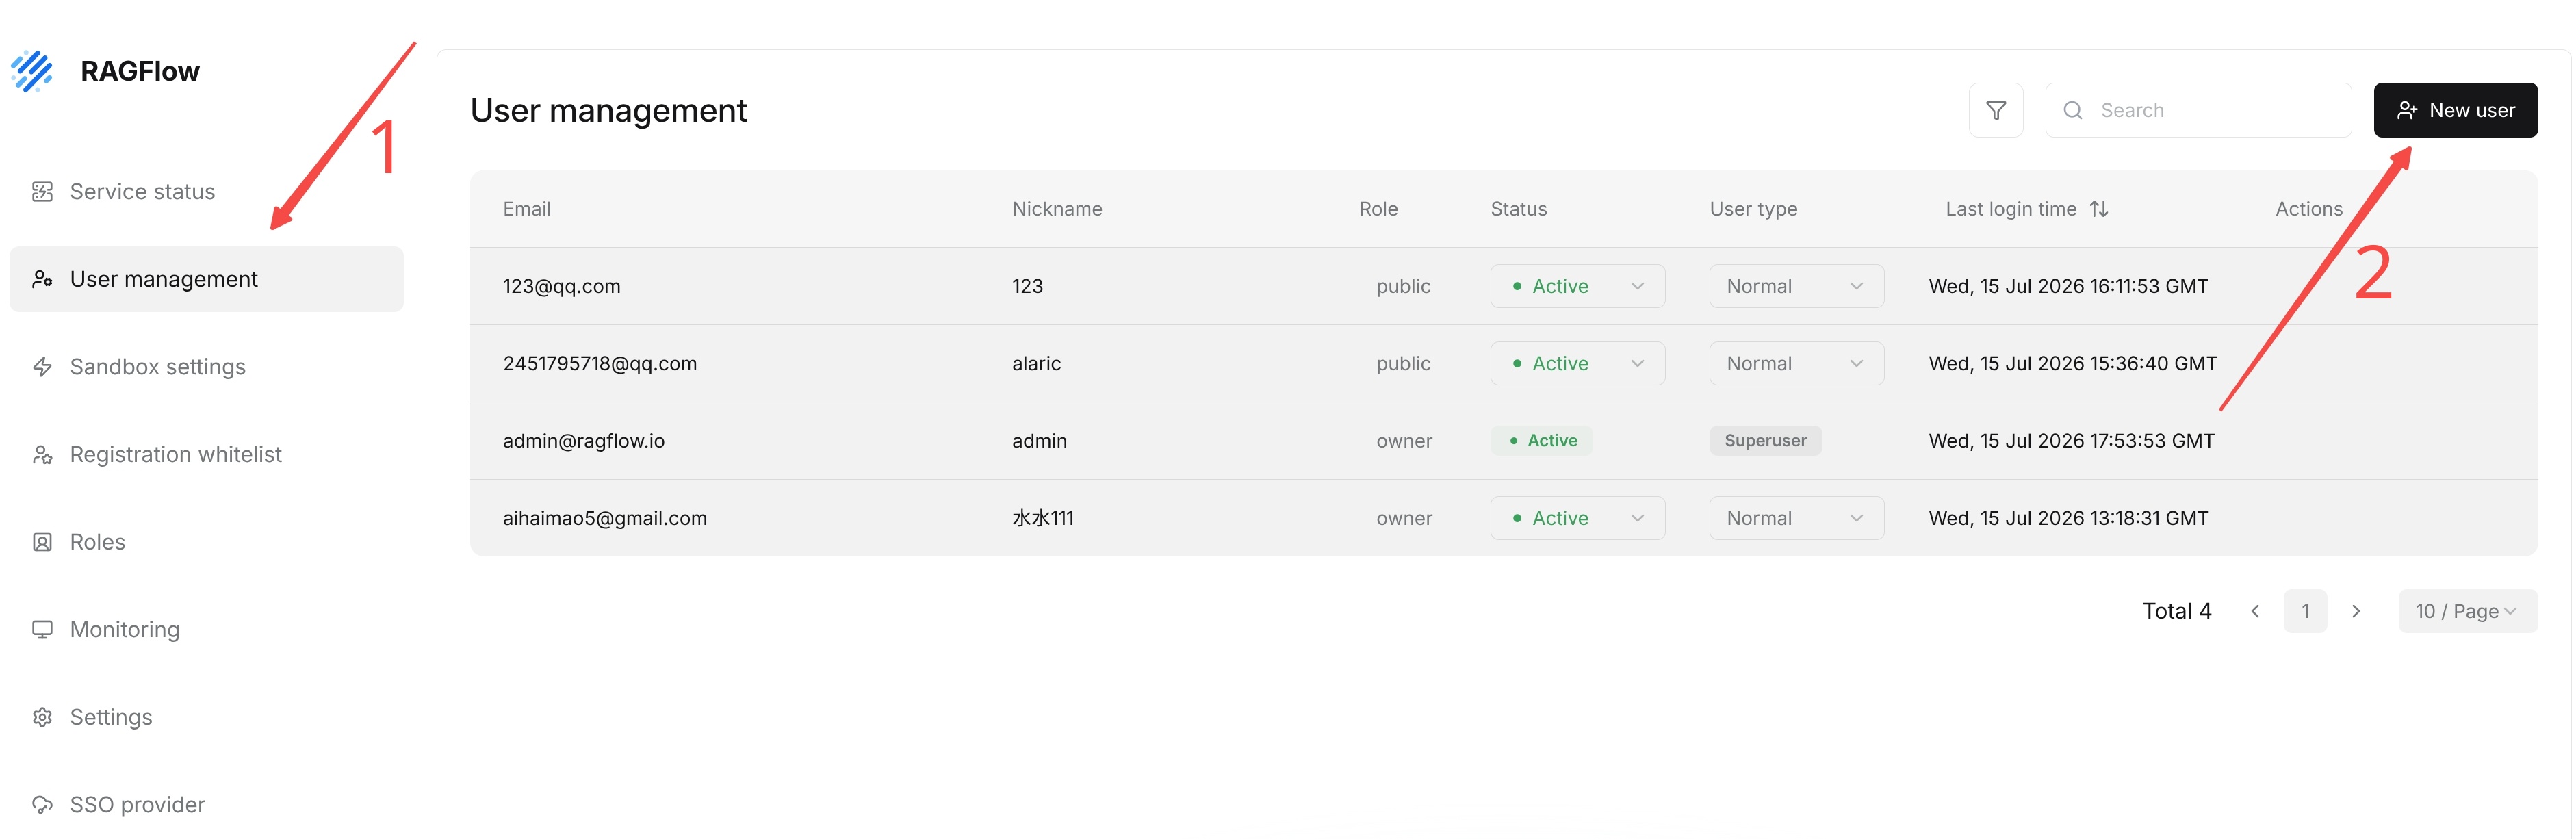
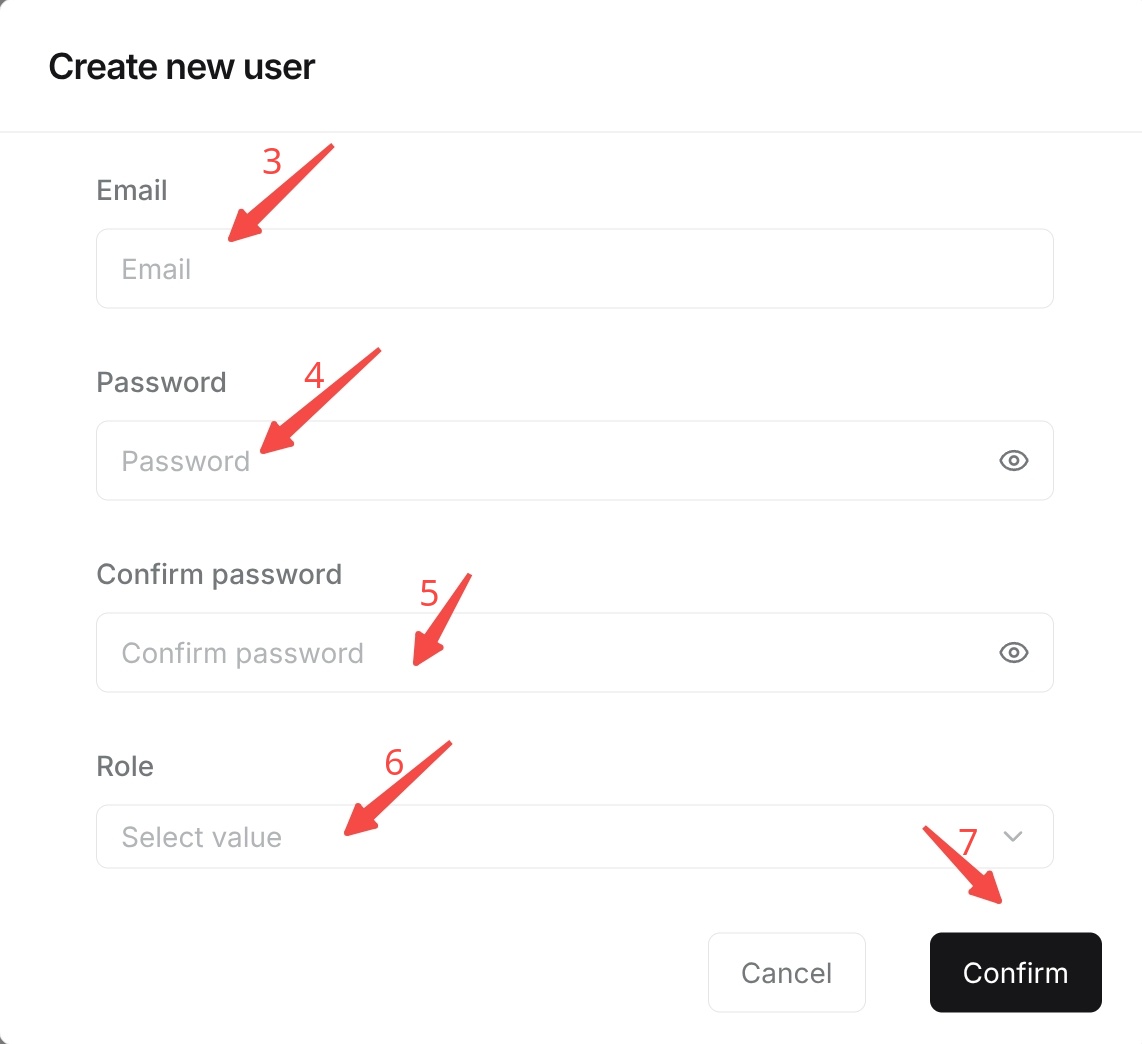
To create an account for a new member, go to User management and click New user. In the dialog, fill in Email, Password, and Confirm password.
- Go to the User management page.
- Click New user.
- Enter the user's
Email. - Enter the initial password.
- Enter the same password again in
Confirm password. - Click Confirm to create the account.
After creation, return to the user list and confirm that the account appears and that its status matches expectations. Then send the login information to the user through a secure channel.
Caution: Email must use a valid email format. After email verification is enabled, users must complete email verification before they can use the account normally. If email verification is not enabled, the system only validates the email format.
When creating a new user, the password and confirmation password must match. The frontend validation for the current create-user form requires at least 6 characters. Password reset requires a new password of at least 8 characters. In production environments, use a stronger unified password policy.
Disable or Restore an Account
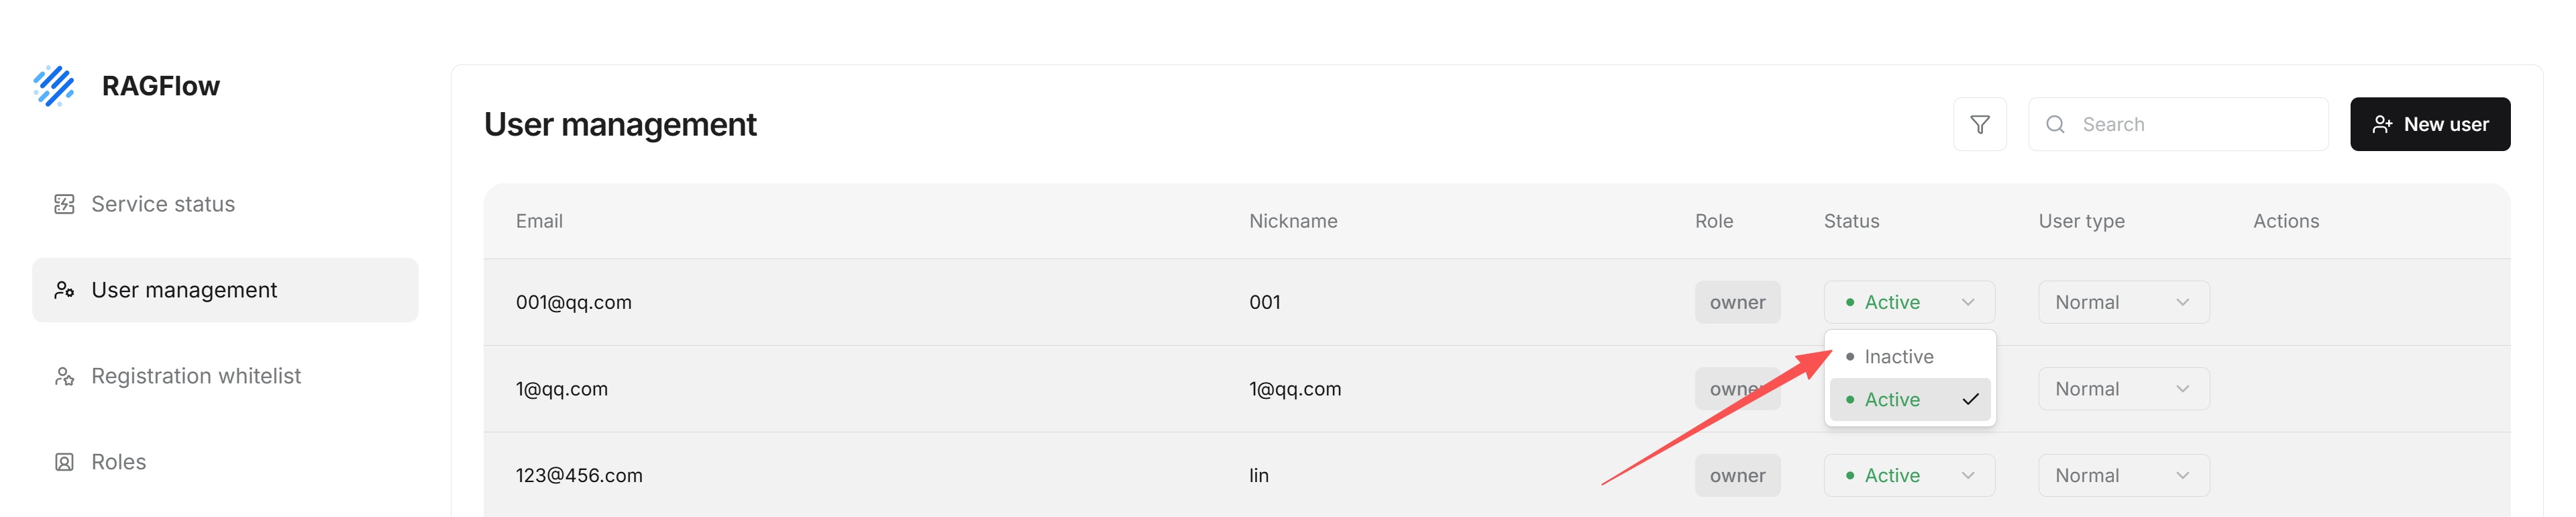
The Status field in the user list controls whether an account can log in to the system.
| Status | Meaning |
|---|---|
Active | The account is enabled and can log in and use the system normally. |
Inactive | The account is disabled. The user cannot log in, but the account and related data are retained. |
- Go to the User management page and find the target user in the user list.
- In the
Statuscolumn of that user's row, click the current status dropdown and selectActiveorInactiveas needed.
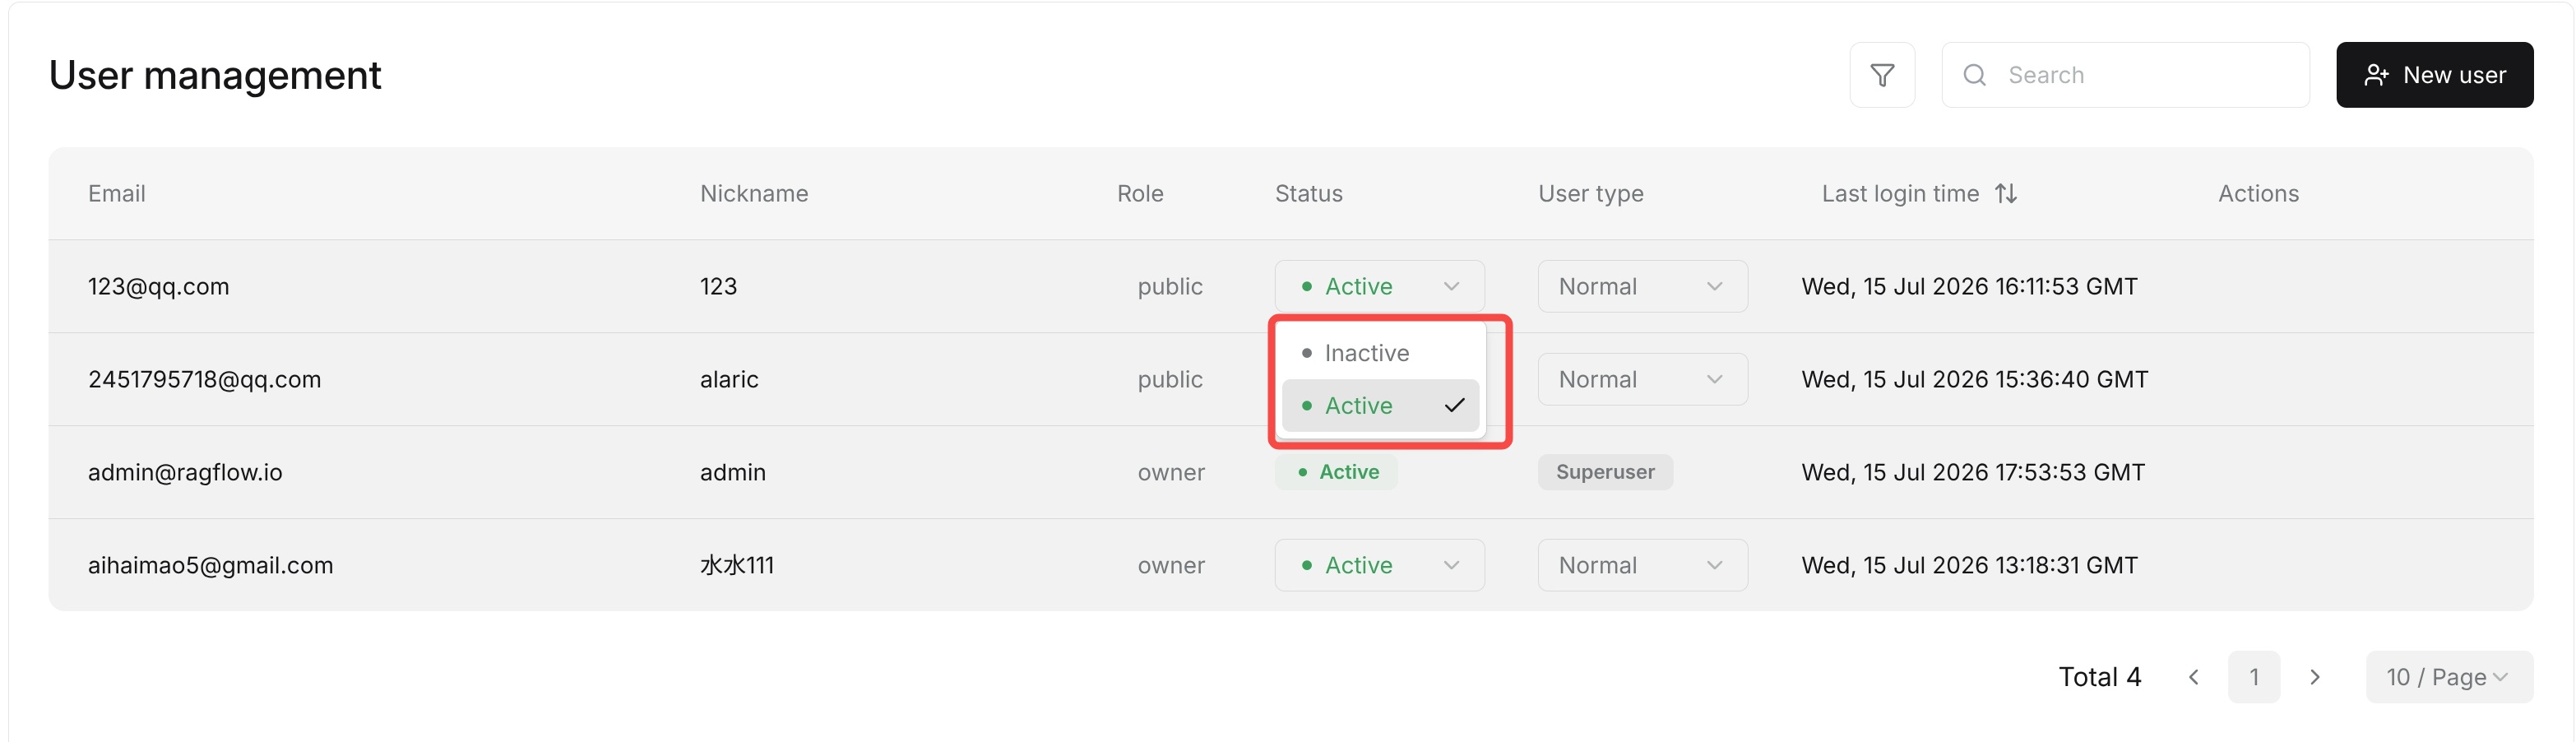
Caution: The currently logged-in administrator cannot disable their own account. Disabling an account does not delete user data; it only prevents the user from logging in. If you need to permanently remove a user, confirm that the account no longer needs to be retained before deleting it.
Set Backend Administrator Identity
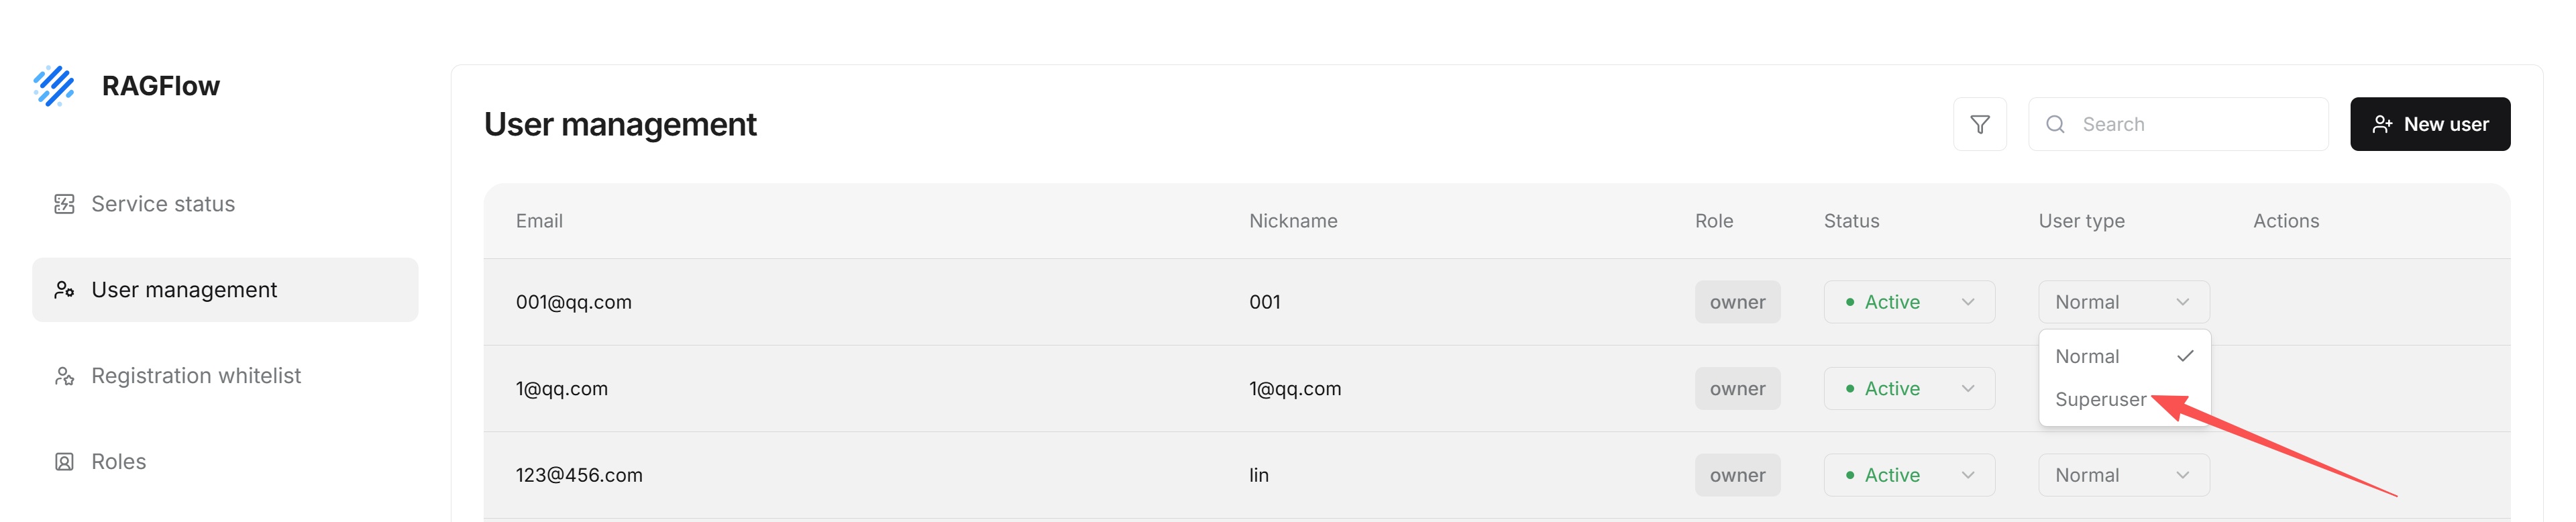
User type distinguishes Normal from Superuser. Normal is a regular user type. Superuser can enter the Admin UI and perform system-level management operations.
- Find the target user on the User management page.
- Open the selector in the
User typecolumn. - Select
NormalorSuperuser. - Wait for the system to submit the change and refresh the user list.
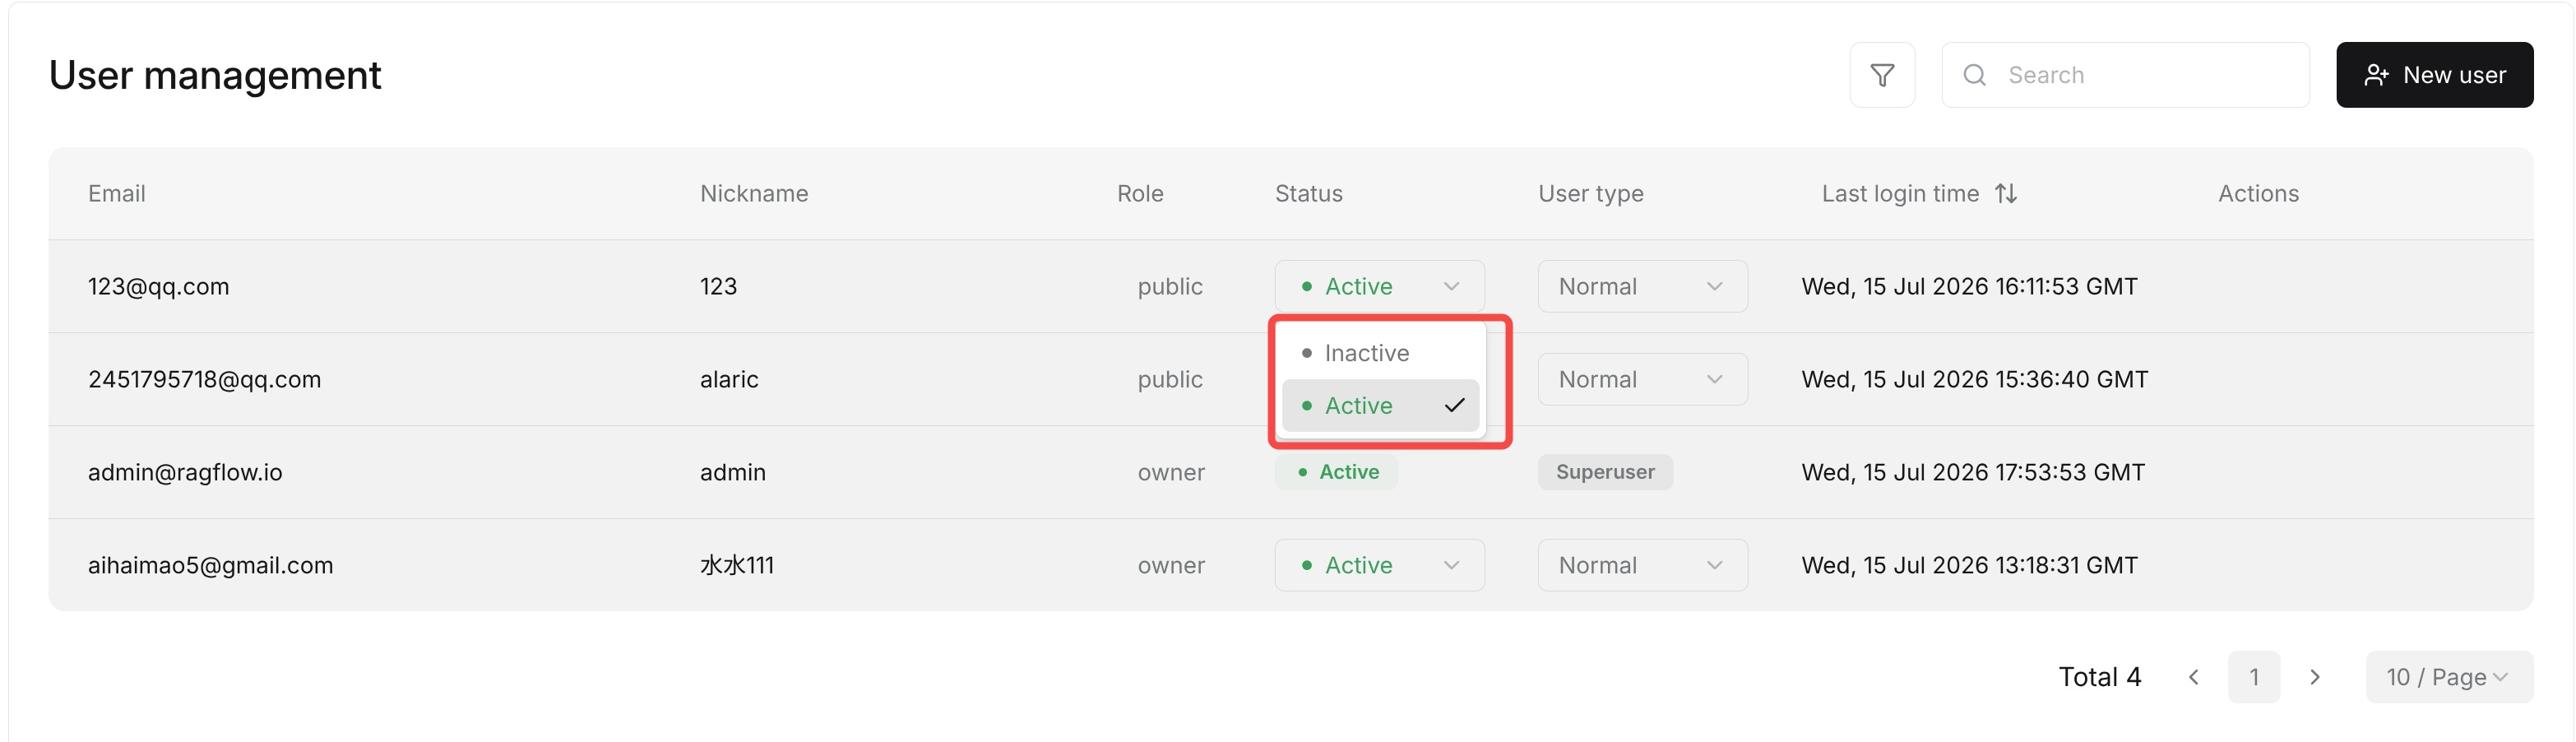
Caution: The currently logged-in administrator cannot modify their own Superuser type in the list.
Reset User Passwords
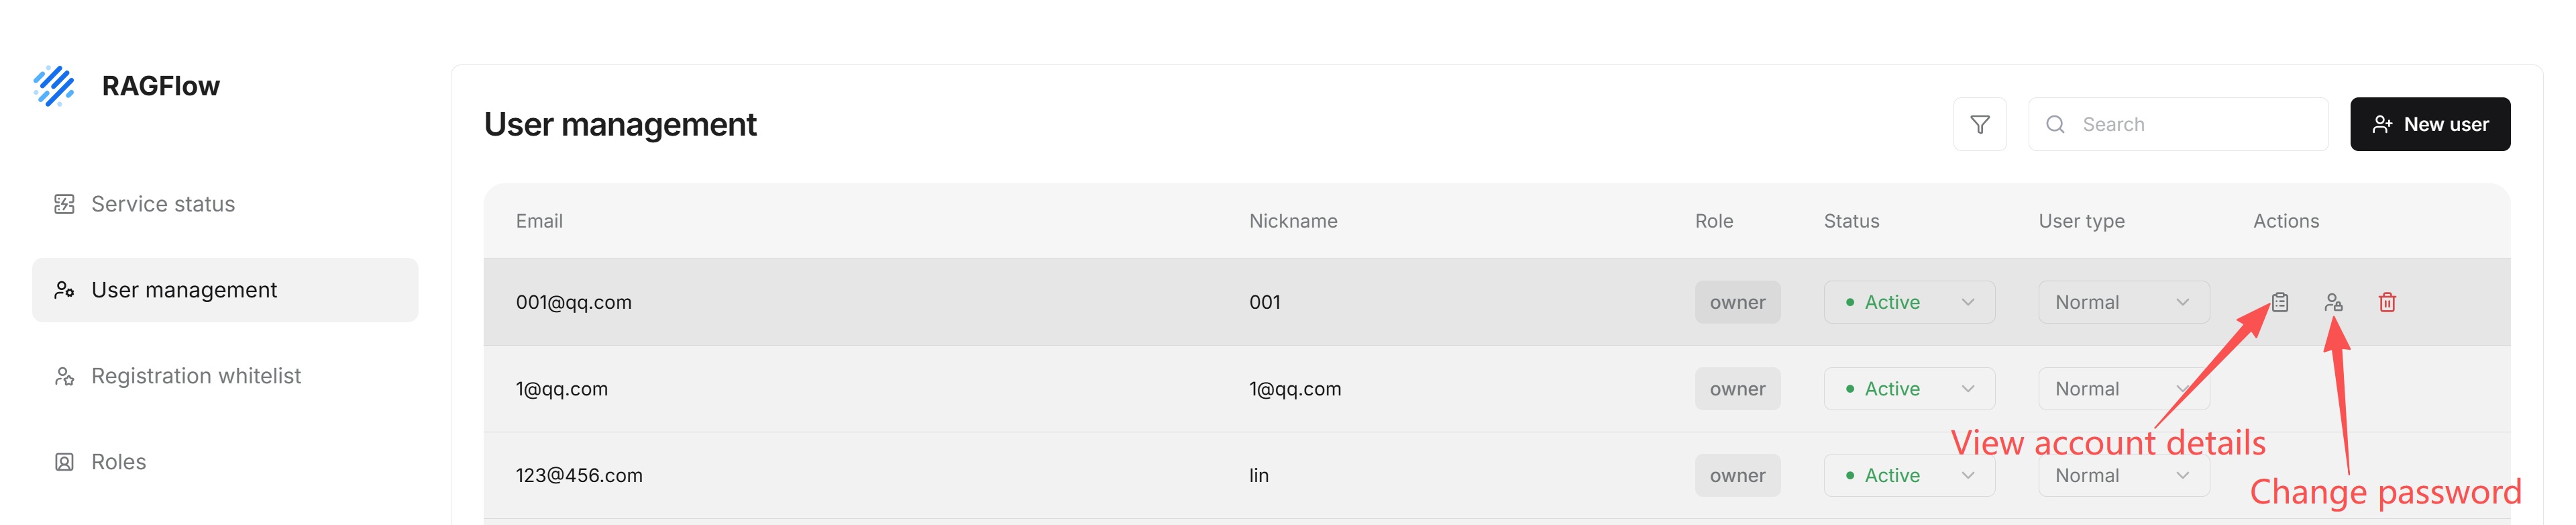
When a user forgets their password or must be forced to change it, administrators can reset another user's password from Actions in the user list. After the reset-password dialog opens, the page displays the target user's Email and requires New password and Confirm new password.
- Find the target user on the User management page. Hover over the user row to display Actions, then click the reset-password button.
- Confirm that the
Emailin the dialog is the target user. - Enter the new password and confirm it again.
- Click Change password.
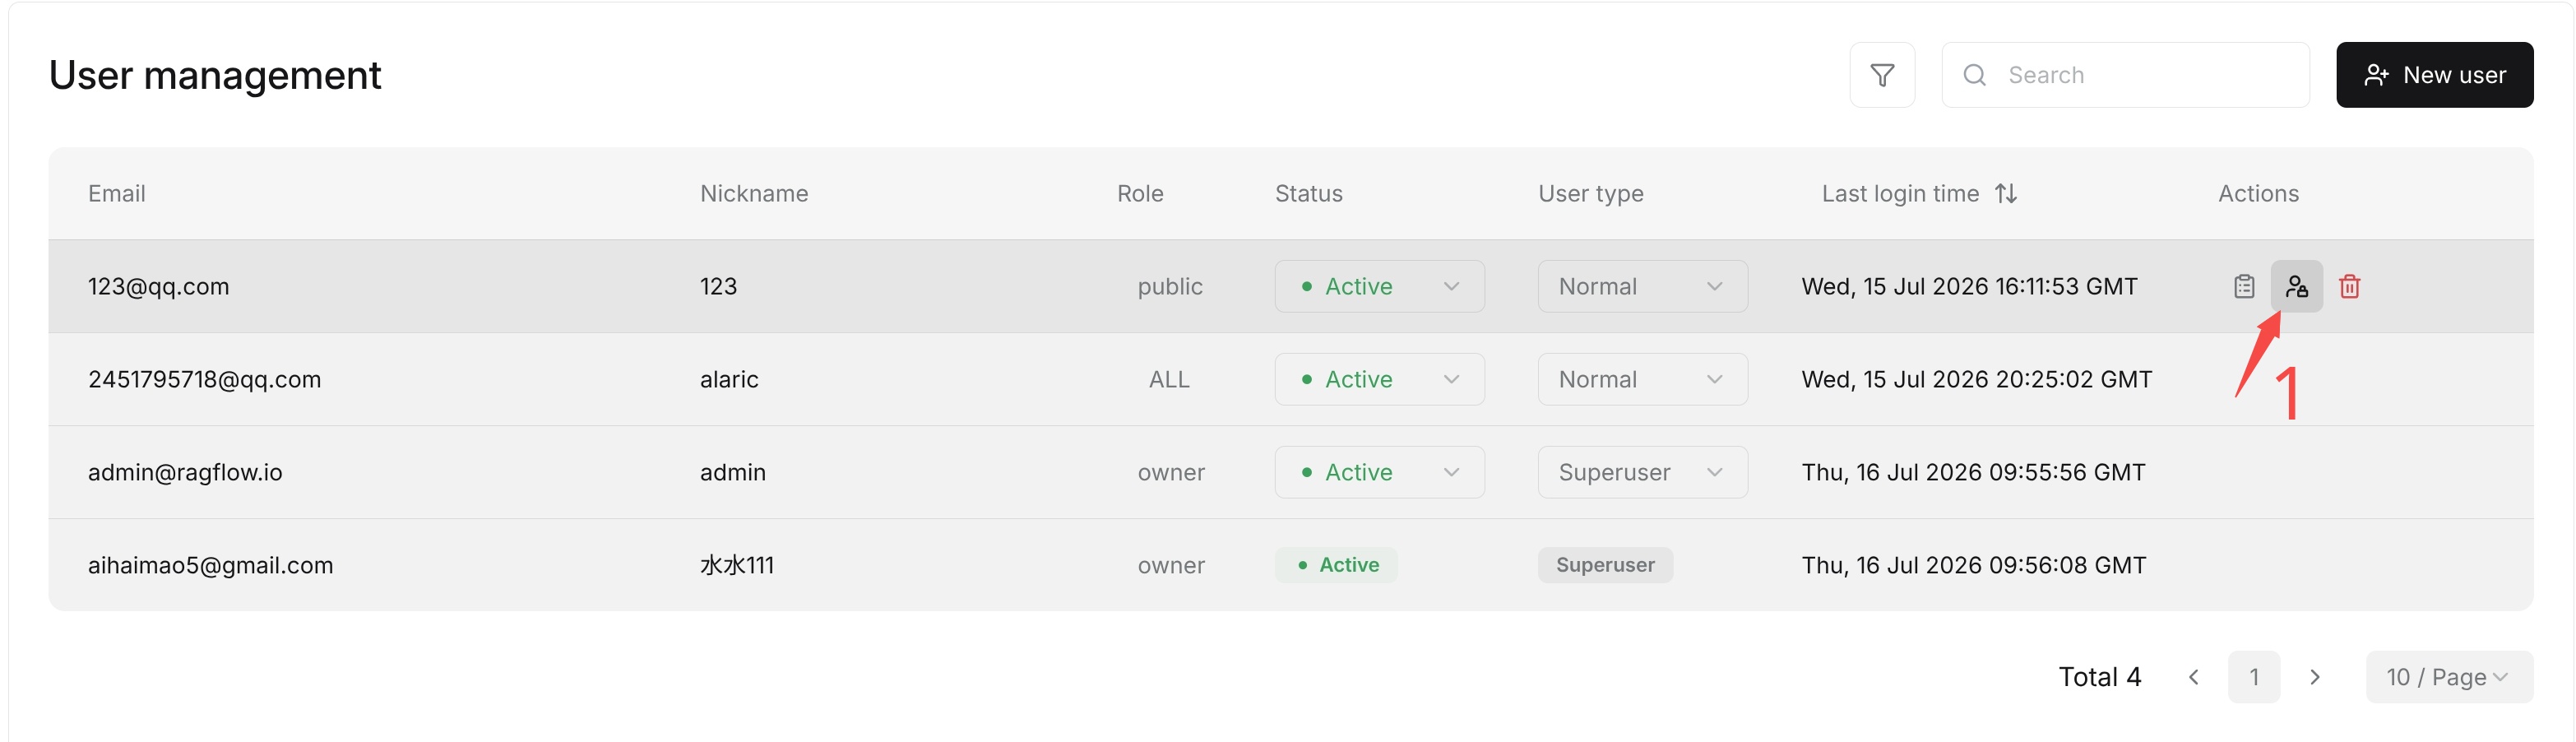
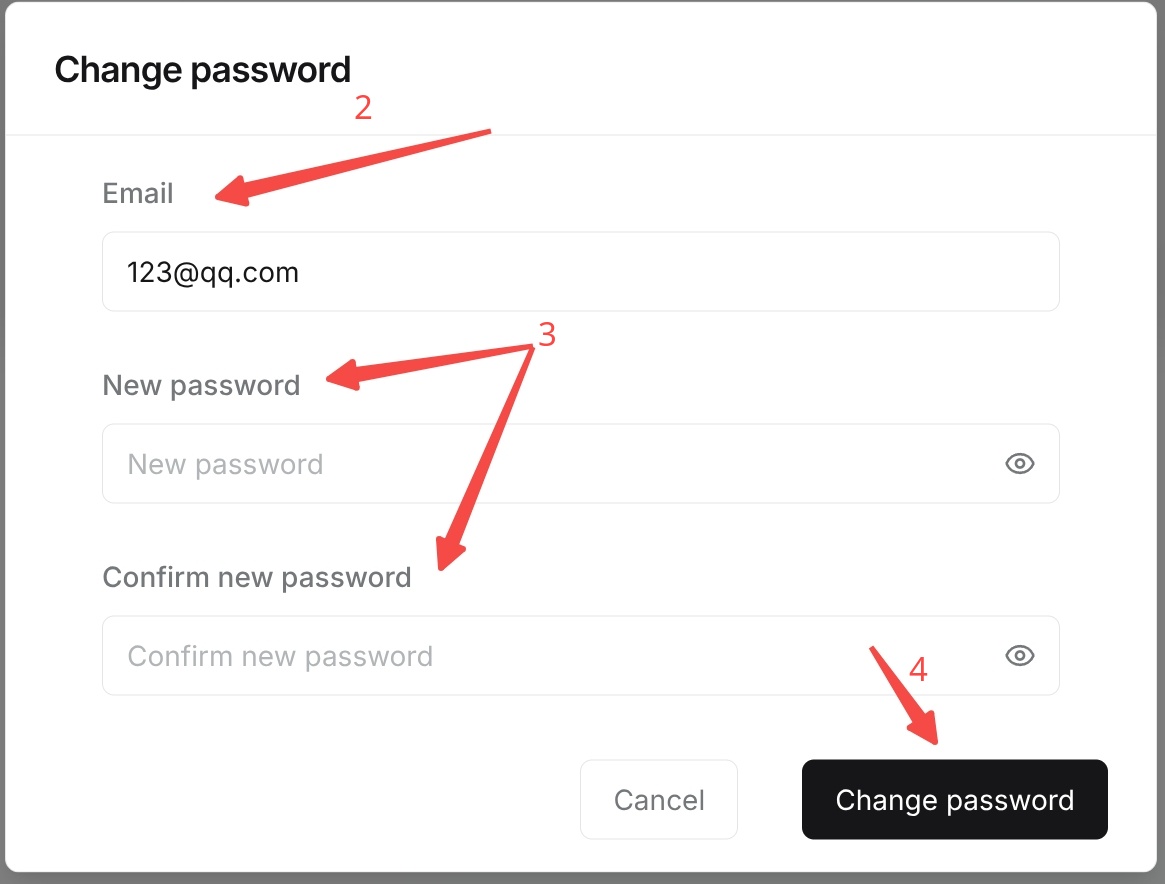
Caution: The currently logged-in administrator cannot reset their own password through list Actions.
Delete Users
When a user no longer needs system access and related resources have been handed over, administrators can delete the user from Actions in the user list. Before deletion, the page displays a confirmation dialog and shows the Email of the user to be deleted.
- Find the target user on the User management page. Hover over the user row to display Actions, then click the delete button.
- Check the user's
Emailin the confirmation dialog. - Click Delete to delete the user.
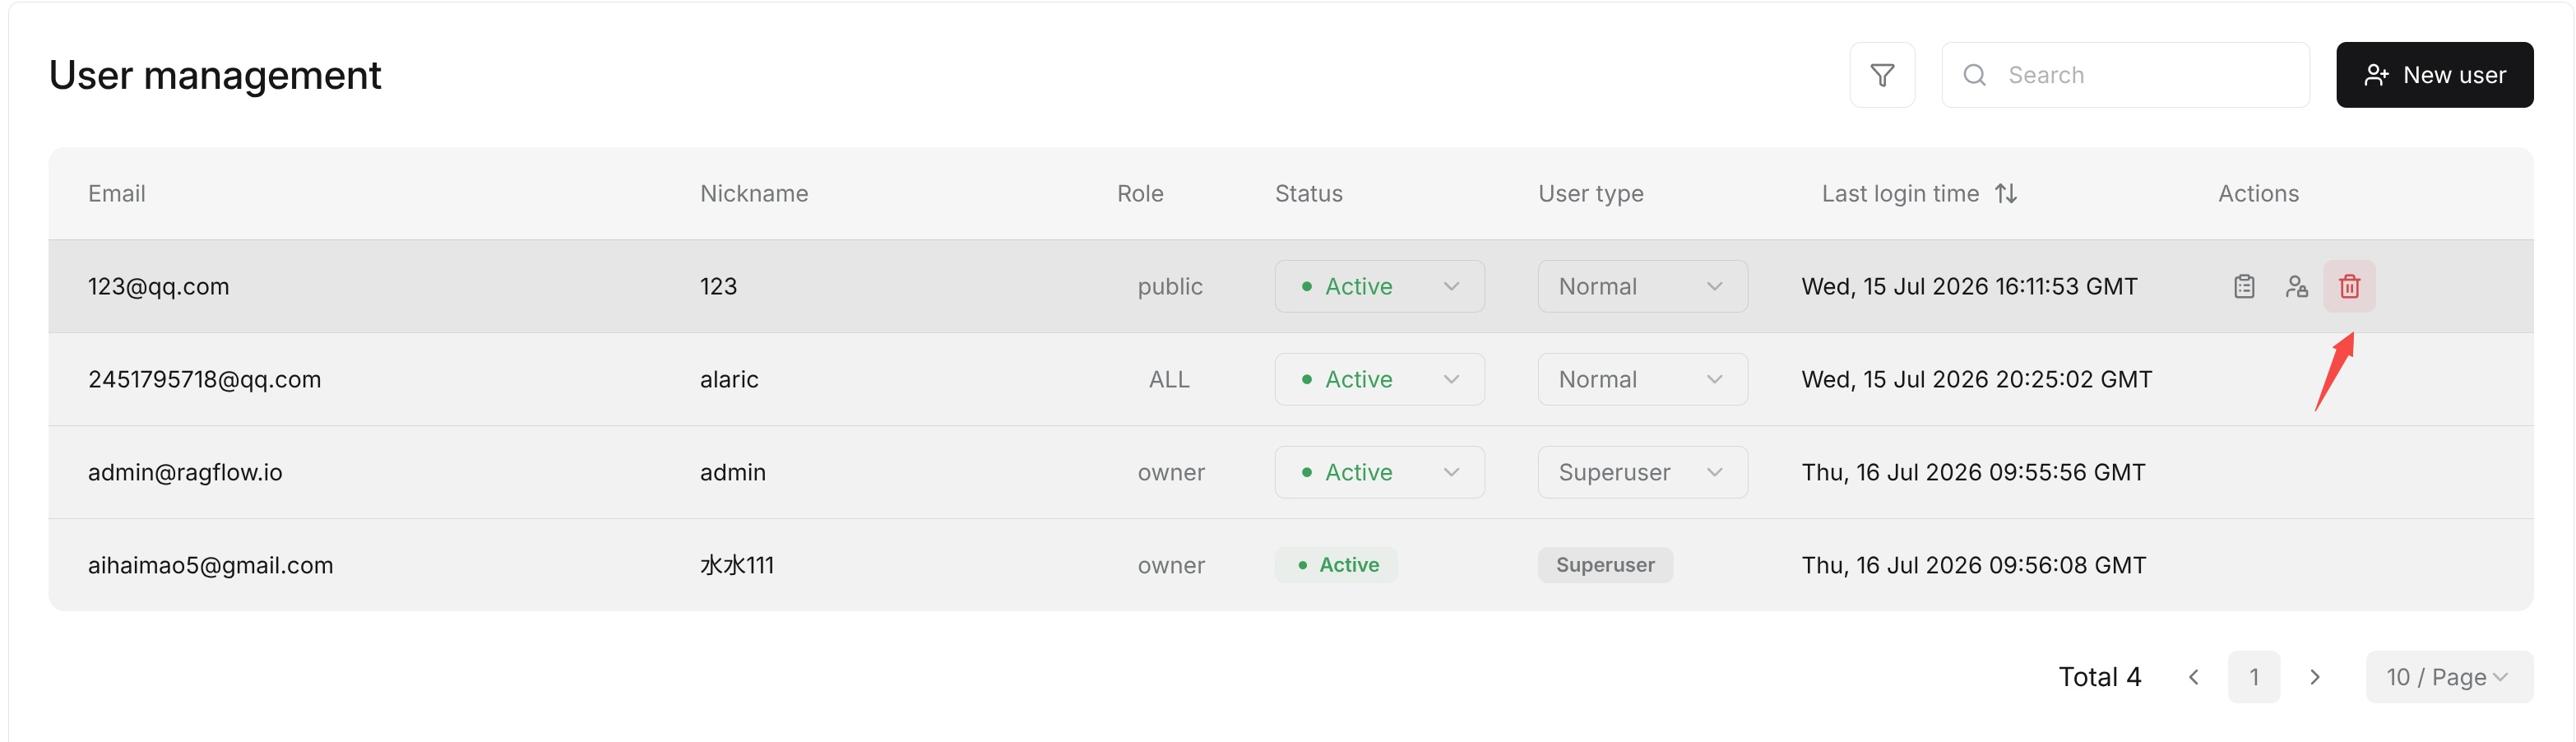
Caution: The currently logged-in administrator cannot delete their own account through list Actions.
Deleting a user is a high-risk operation. Before doing it, confirm whether the user's related data, knowledge bases, Agents, files, API keys, and business responsibilities have been handed over. If you only need to temporarily prevent login, change the account status to Inactive first.
View User Details and Resource Impact
Click the detail button in Actions on the user list to enter the user detail page. The detail page displays the user's Email, account status, Last login time, Create time, Last update time, Language, Is anonymous, and Is superuser.
Caution: Before disabling, deleting, or downgrading Superuser, administrators should check the detail page to confirm whether the user still has important resources or recent login activity.