quickstart
RAGFlow is an open-source RAG (Retrieval-Augmented Generation) engine based on deep document understanding. When integrated with LLMs, it is capable of providing truthful question-answering capabilities, backed by well-founded citations from various complex formatted data.
This quick start guide describes a general process from:
- Starting up a local RAGFlow server,
- Creating a dataset,
- Establishing an AI chat based on your datasets.
This guide deploys the Go backend with the repository's Go Docker image and Compose configuration. The supported native Docker build target is Linux x86-64. Linux ARM64 is not currently a supported native target because the Go image depends on native libraries published for x86-64.
Prerequisites
- A recommended starting configuration of 4 CPU cores (x86-64), 16 GB RAM, and 50 GB free disk space. Actual requirements depend on the document engine, data volume, parsing workload, and concurrency. Local models and OceanBase require additional resources.
- Docker ≥ 24.0.0 with Docker Compose ≥ v2.26.1 and BuildKit;
- Access to the dependency image
infiniflow/ragflow_deps:latestduring the image build, and to an LLM and embedding model at runtime.
If Docker is not installed, see Install Docker Engine.
Start up the server
-
For the default Elasticsearch document engine, ensure
vm.max_map_countis at least 262144 on the Docker host:sysctl vm.max_map_count
sudo sysctl -w vm.max_map_count=262144The change made with
sysctl -wis temporary. To keep it after a reboot, setvm.max_map_count=262144in/etc/sysctl.conf. On Docker Desktop, apply the setting to its Linux VM. -
Clone the repository:
git clone https://github.com/infiniflow/ragflow.git -
Check out the Go release tag and start the prebuilt Go image with Docker Compose:
# Enter the Docker deployment directory.
cd ragflow/docker
# Check out the Go v1.0.0-rc2 release tag.
git checkout v1.0.0-rc2
# Start the Go services and their dependencies in the background.
docker compose -f docker-compose.yml up -d
The
docker/.envfile controlsDOC_ENGINE, service ports, and dependency credentials. Change the default passwords before deploying to a network-accessible host.In the RAGFlow open-source 1.0 release, DeepDoc layout analysis, OCR, and table recognition use CPU inference.
Development checkoutsA development checkout can report a code version older than the database migration version, including immediately after its own migrations. In that case, the Go server refuses to start with
Refusing to start: database was migrated by a newer version. For local development with this checkout, setRAGFLOW_DEV_MODE=truein.envand run the Compose command again. This disables the database downgrade check; leaveRAGFLOW_DEV_MODE=falsefor production, and use a binary whose version is at least the database migration version. -
Check that the service is running:
docker ps
docker logs -f ragflow-cpu
After initialization, check the Go API and its dependencies through the web port from another terminal:
curl -f http://localhost/api/v1/system/healthzA successful response has HTTP status 200. If you changed
SVR_WEB_HTTP_PORTin.env, include that port in the URL. Wait for this check to pass before opening the web interface. -
Open
http://IP_OF_YOUR_MACHINEin a browser and log in. If you changedSVR_WEB_HTTP_PORTin.env, include that port in the URL.
The Go container runs the API server, ingestion workers, and data synchronization. Its startup script runs the Go database migrations before starting the services.
Configure LLMs
RAGFlow is a RAG engine and needs to work with an LLM to offer grounded, hallucination-free question-answering capabilities. RAGFlow supports most mainstream LLMs.
RAGFlow also supports deploying models locally using Ollama or vLLM, but this part is not covered in this quick start guide. See Deploy Local Models for instructions.
To add and configure an LLM:
-
Click on your logo on the top right of the page > Model providers.
-
Click on the desired LLM and update the API key accordingly.
-
Click Set default models to select the default models:
- Chat model,
- Embedding model,
- Image-to-text model,
- and more.
Some models, such as the image-to-text model qwen-vl-max, are subsidiary to a specific LLM. And you may need to update your API key to access these models.
Create your first dataset
You can upload files to a dataset in RAGFlow and parse them into chunks. A dataset is a collection of documents. Question answering in RAGFlow can be based on one or more datasets. Supported file formats include documents (PDF, DOC, DOCX, TXT, MD, MDX), tables (CSV, XLSX, XLS), images (JPEG, JPG, PNG, TIF, GIF), and slides (PPT, PPTX).
To create your first dataset:
-
Click the Dataset tab in the top middle of the page > Create dataset.
-
Input the name of your dataset and click OK to confirm your changes.
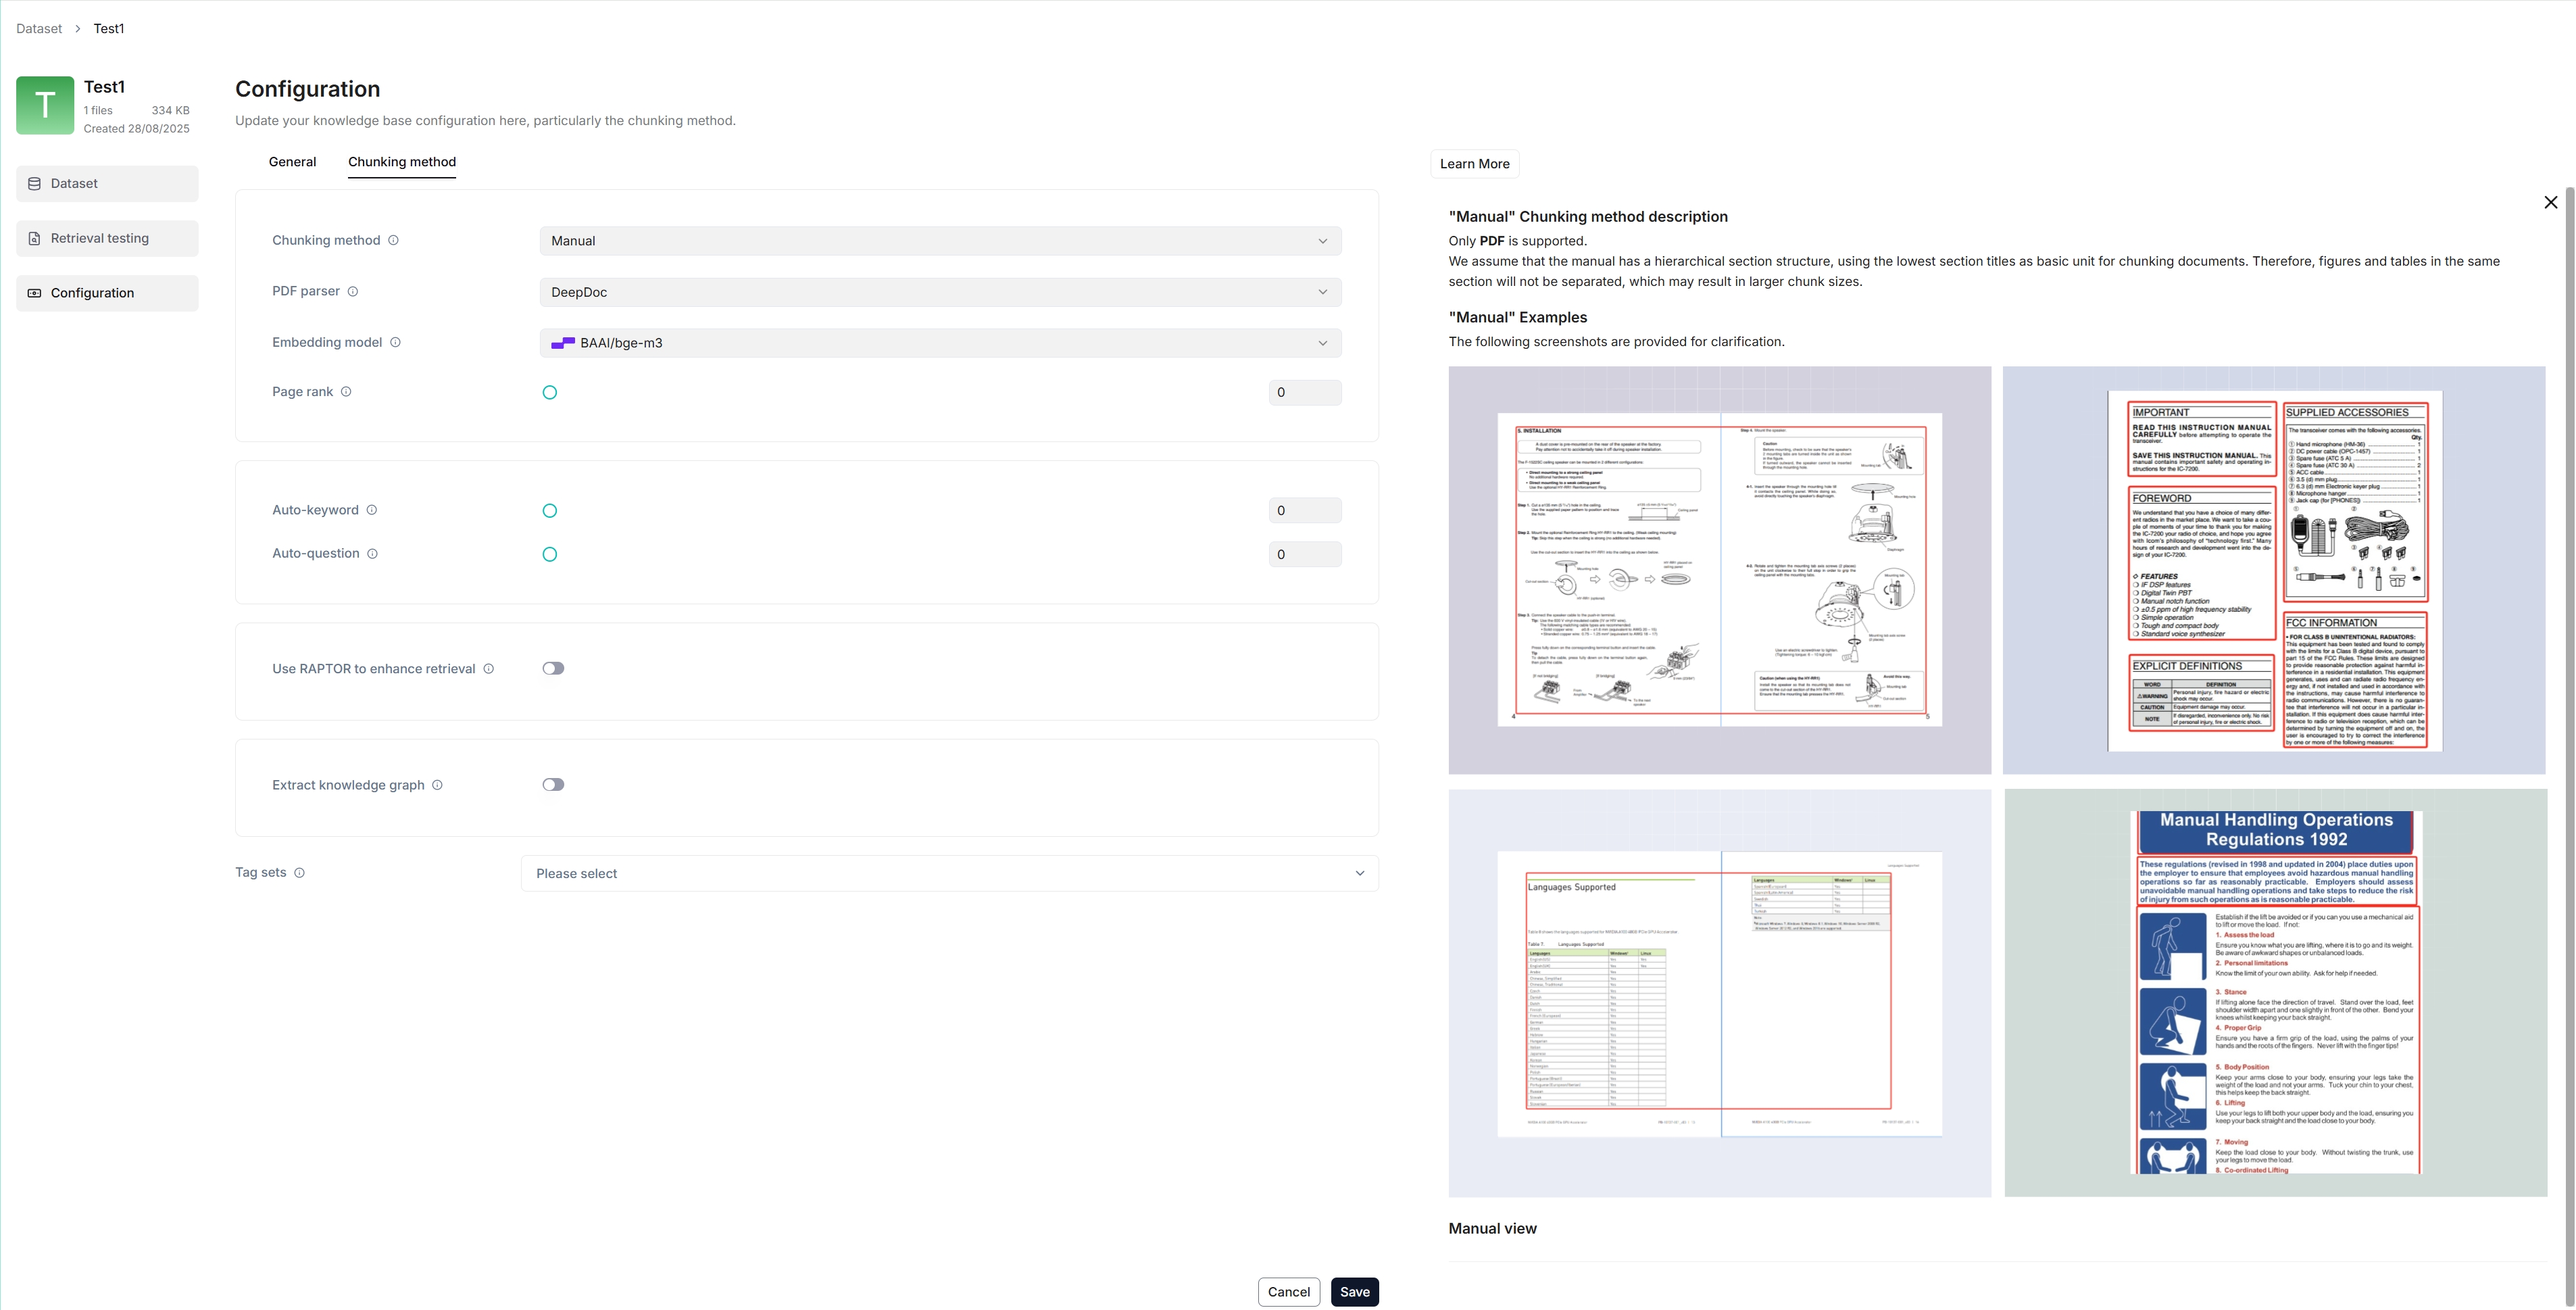
You are taken to the Configuration page of your dataset.
-
RAGFlow offers multiple chunk templates that cater to different document layouts and file formats. Select the embedding model and chunking method (template) for your dataset.
IMPORTANTOnce you have selected an embedding model and used it to parse a file, you are no longer allowed to change it. The obvious reason is that we must ensure that all files in a specific dataset are parsed using the same embedding model (ensure that they are being compared in the same embedding space).
You are taken to the Dataset page of your dataset.
-
Click + Add file > Local files to start uploading a particular file to the dataset.
-
In the uploaded file entry, click the play button to start file parsing:
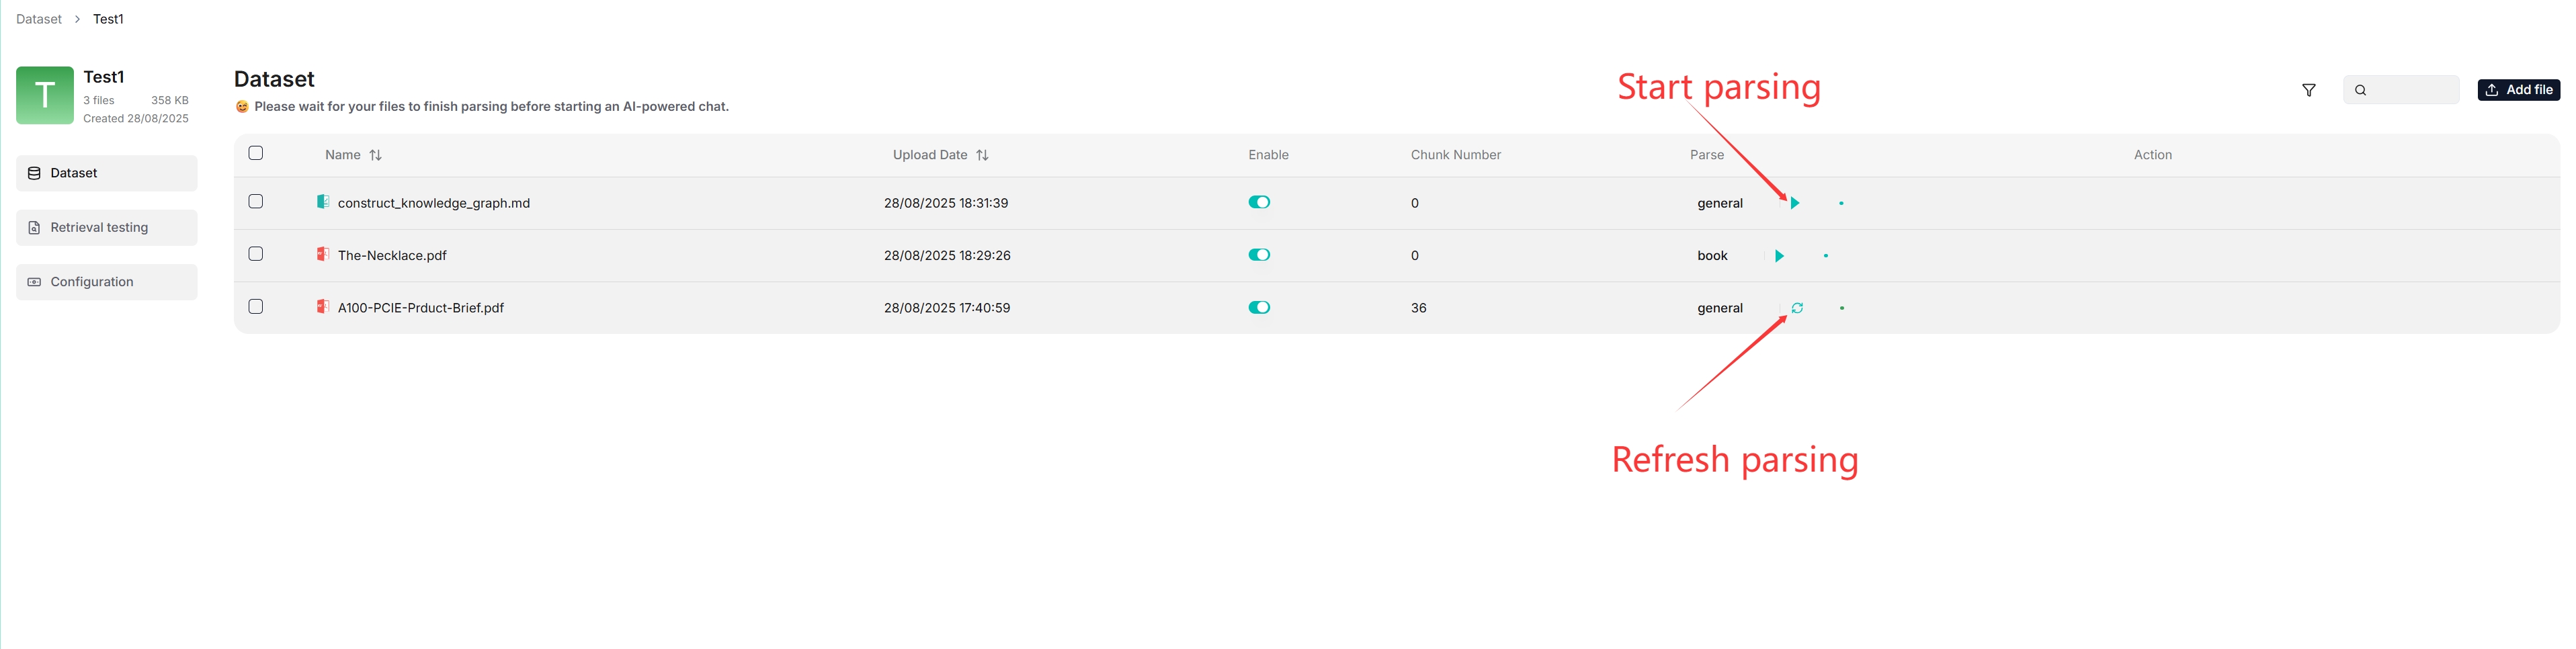
If parsing stalls, check the
ragflow-cpuservice logs with the Compose command above for ingestion errors.
Intervene with file parsing
RAGFlow features visibility and explainability, allowing you to view the chunking results and intervene where necessary. To do so:
-
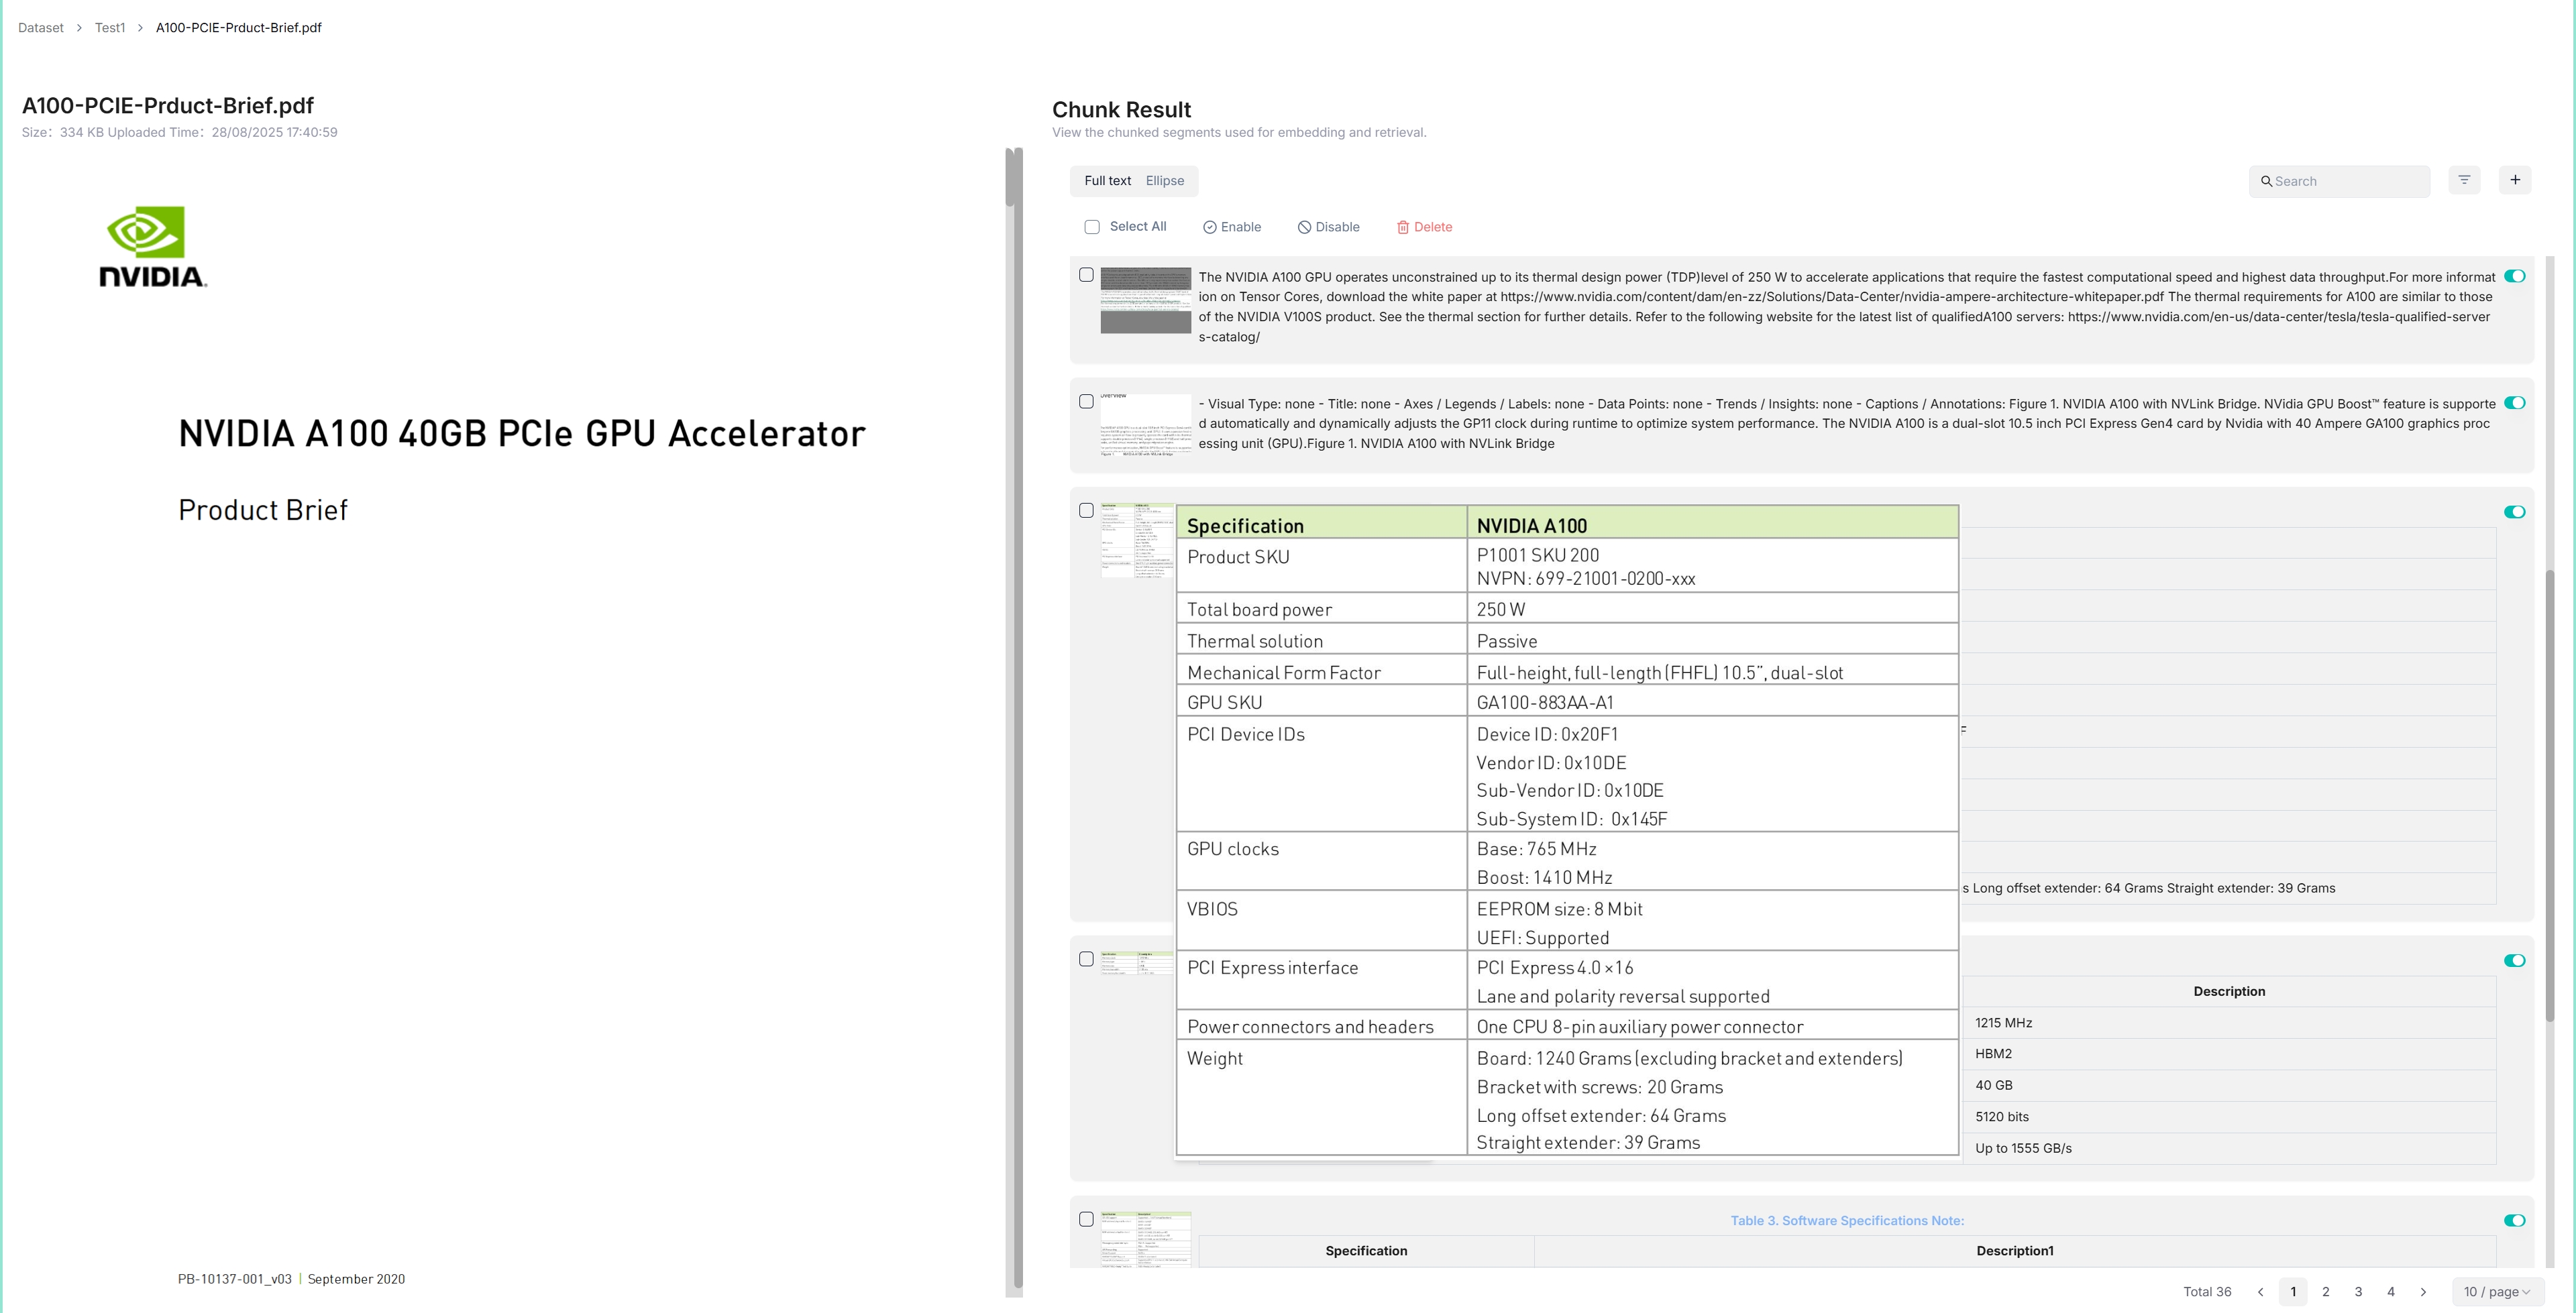
Click on the file that completes file parsing to view the chunking results:
You are taken to the Chunk page:
-
Hover over each snapshot for a quick view of each chunk.
-
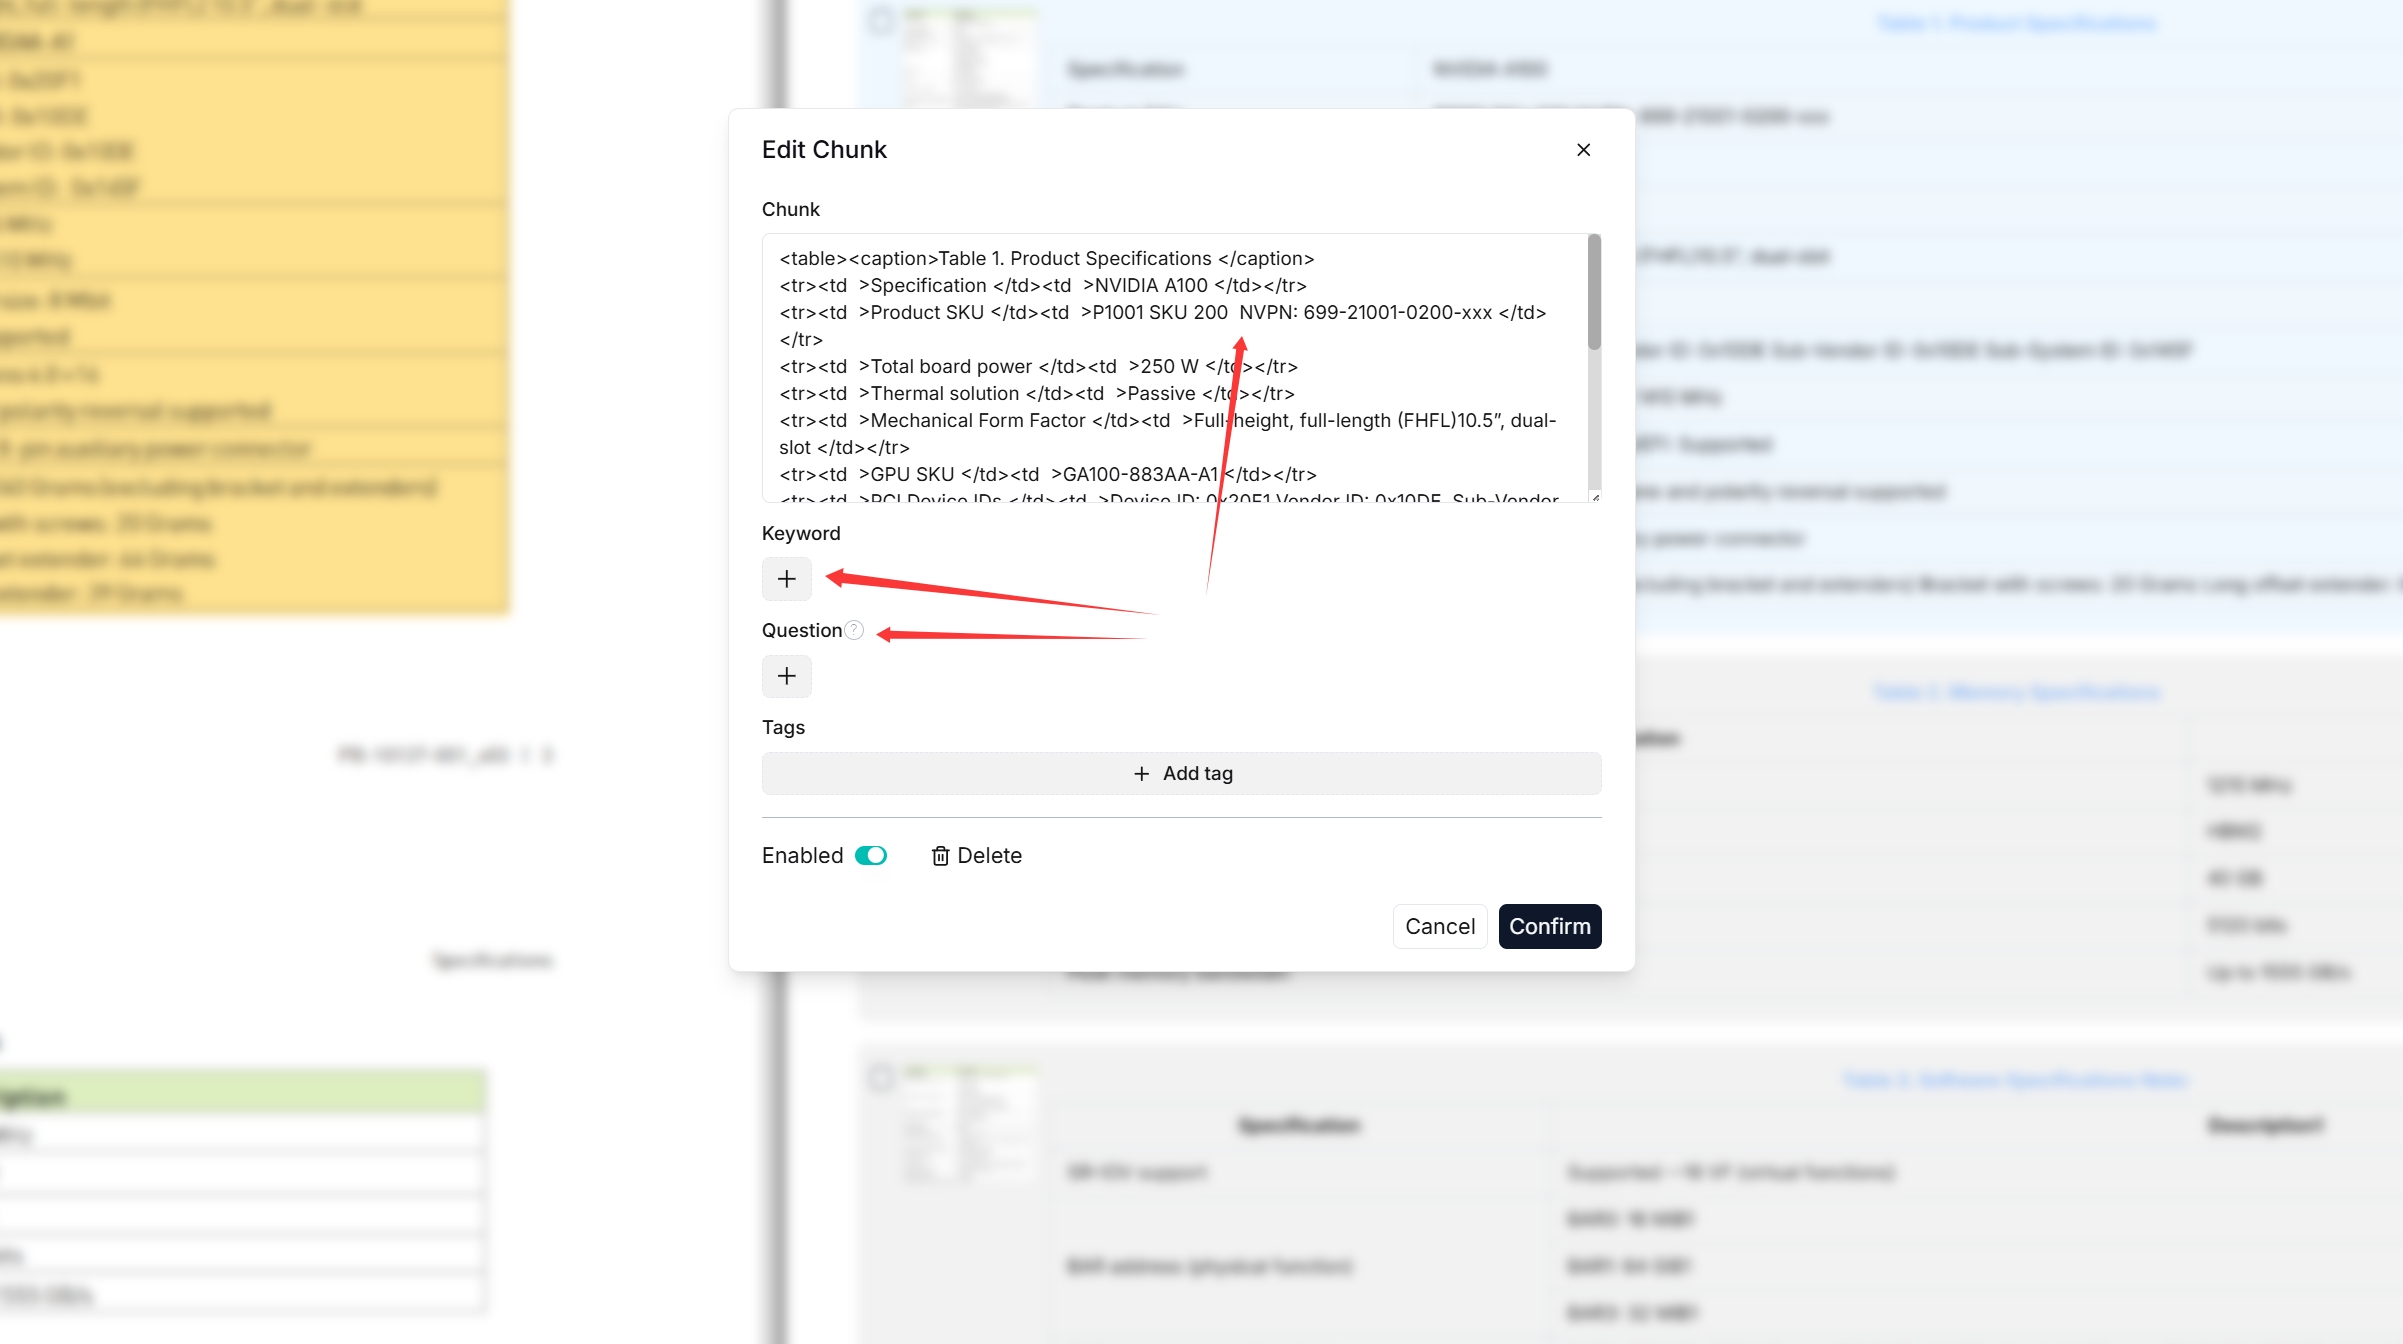
Double click the chunked texts to add keywords or make manual changes where necessary:
 NOTE
NOTEYou can add keywords or questions to a file chunk to improve its ranking for queries containing those keywords. This action increases its keyword weight and can improve its position in search list.
-
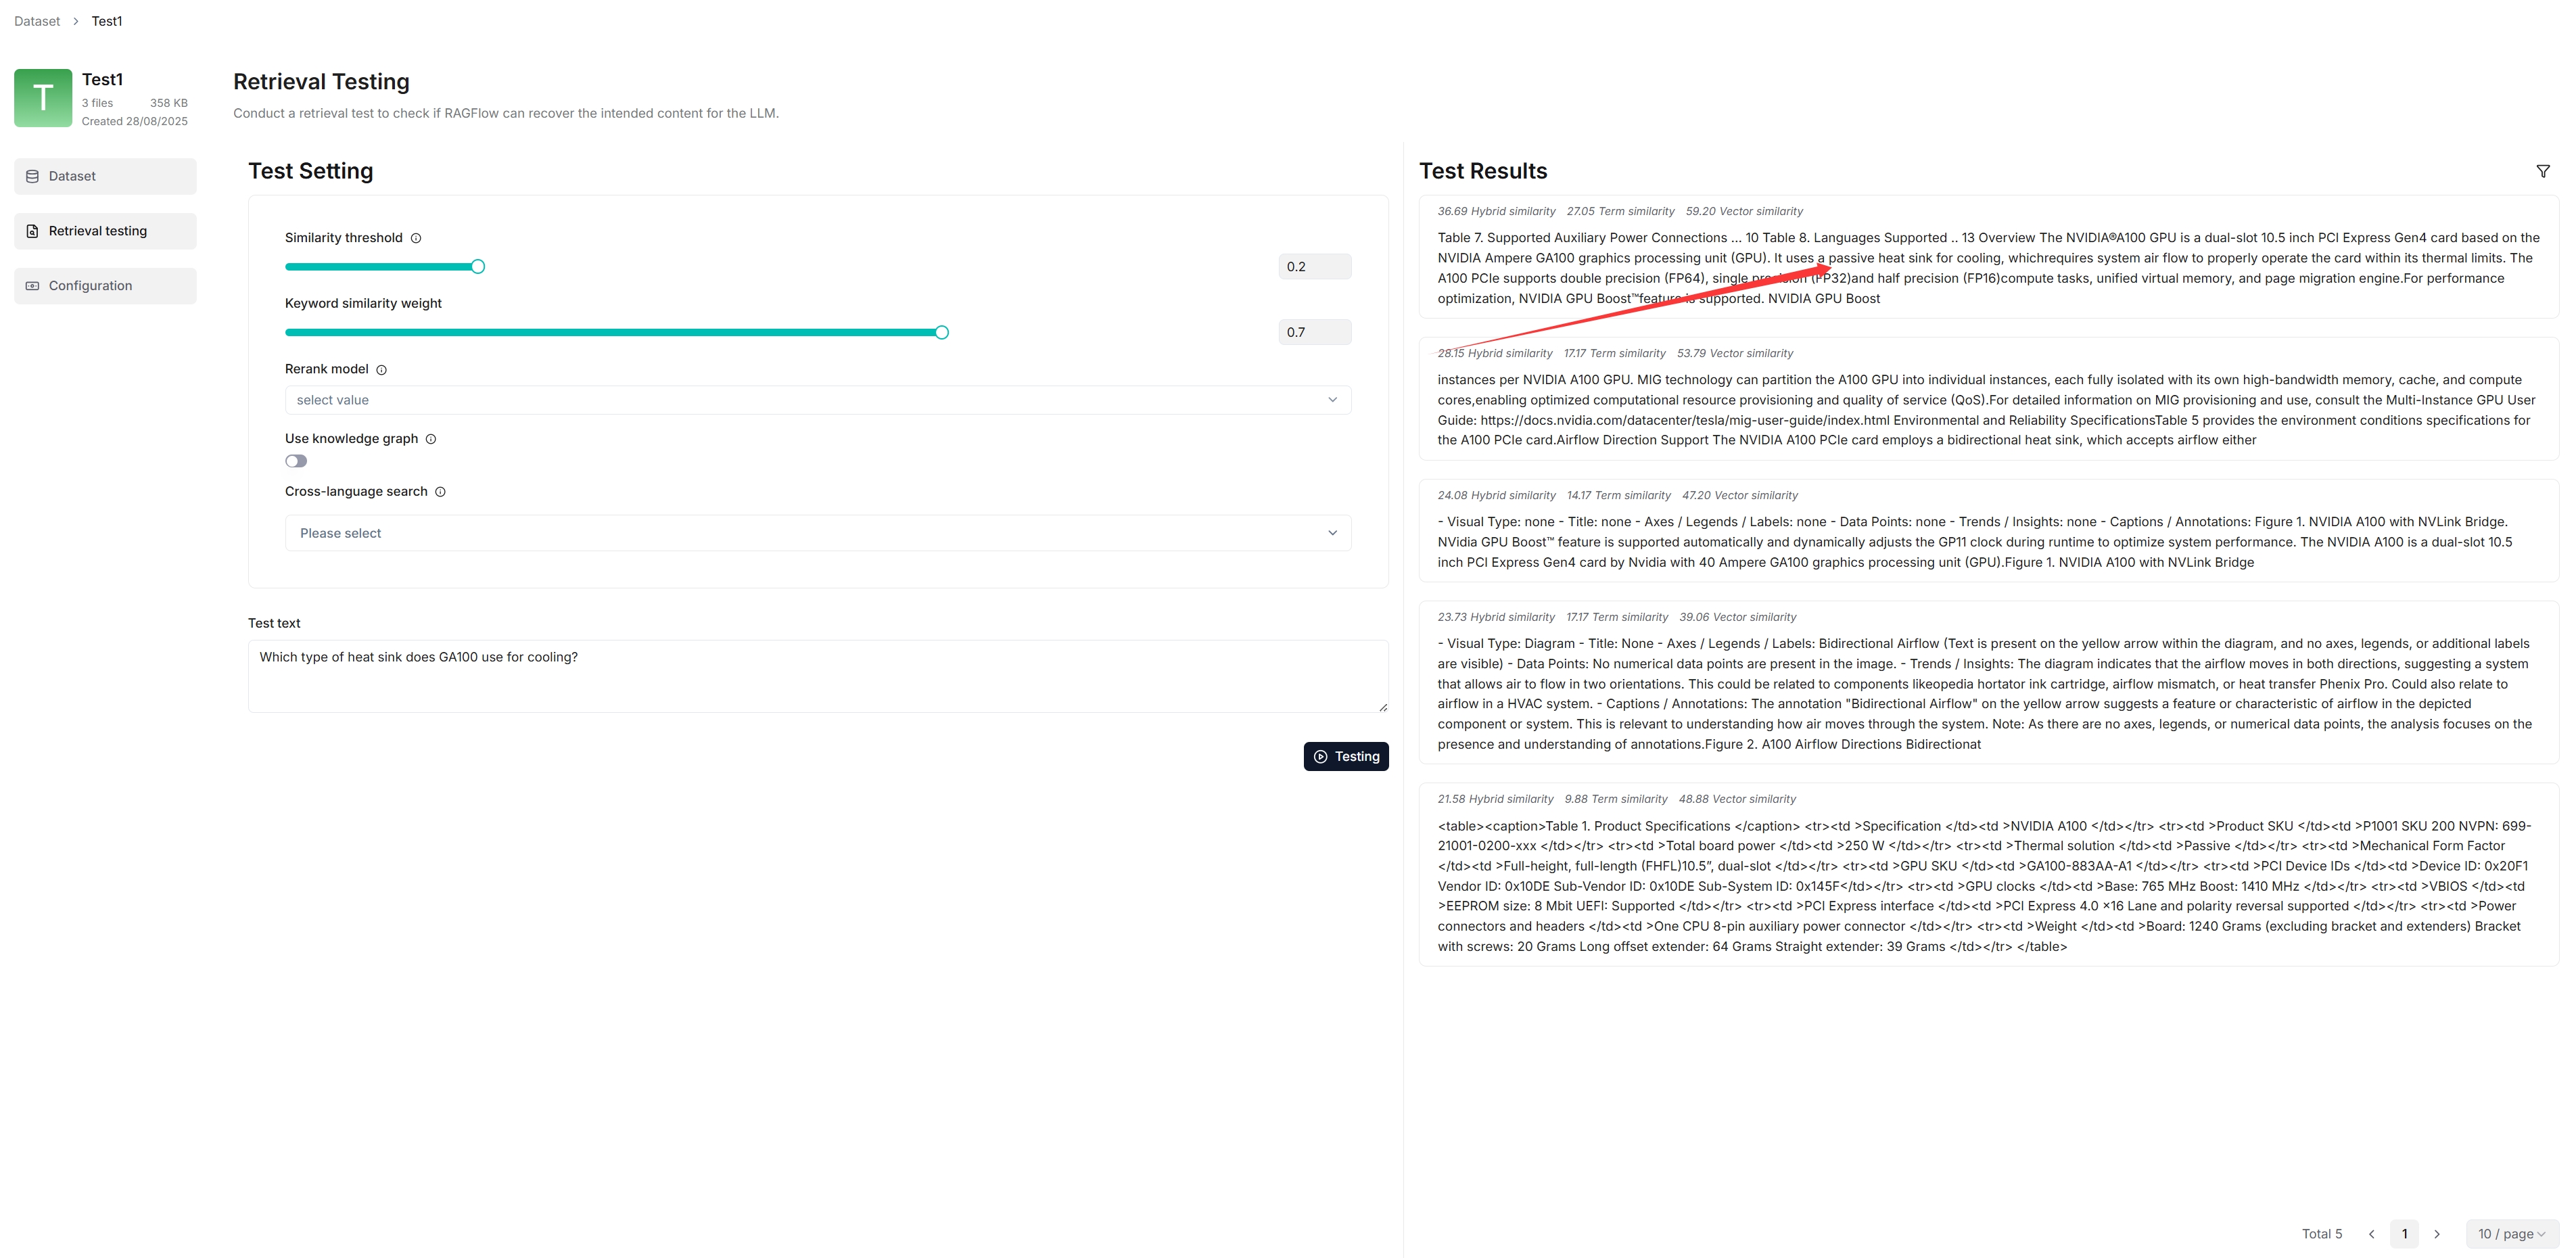
In Retrieval testing, ask a quick question in Test text to double check if your configurations work:
As you can tell from the following, RAGFlow responds with truthful citations.
Set up an AI chat
Conversations in RAGFlow are based on a particular dataset or multiple datasets. Once you have created your dataset and finished file parsing, you can go ahead and start an AI conversation.
-
Click the Chat tab in the middle top of the page > Create chat to create a chat assistant.
-
Click the created chat app to enter its configuration page.
RAGFlow lets you choose a chat model for each dialogue. You can configure the defaults under Set default models.
-
Update Chat setting on the right of the configuration page:
- Name your assistant and specify your datasets.
- Empty response:
- If you wish to confine RAGFlow's answers to your datasets, leave a response here. Then when it doesn't retrieve an answer, it uniformly responds with what you set here.
- If you wish RAGFlow to improvise when it doesn't retrieve an answer from your datasets, leave it blank, which may give rise to hallucinations.
-
Update System prompt or leave it as is for the beginning.
-
Select a chat model in the Model dropdown list.
-
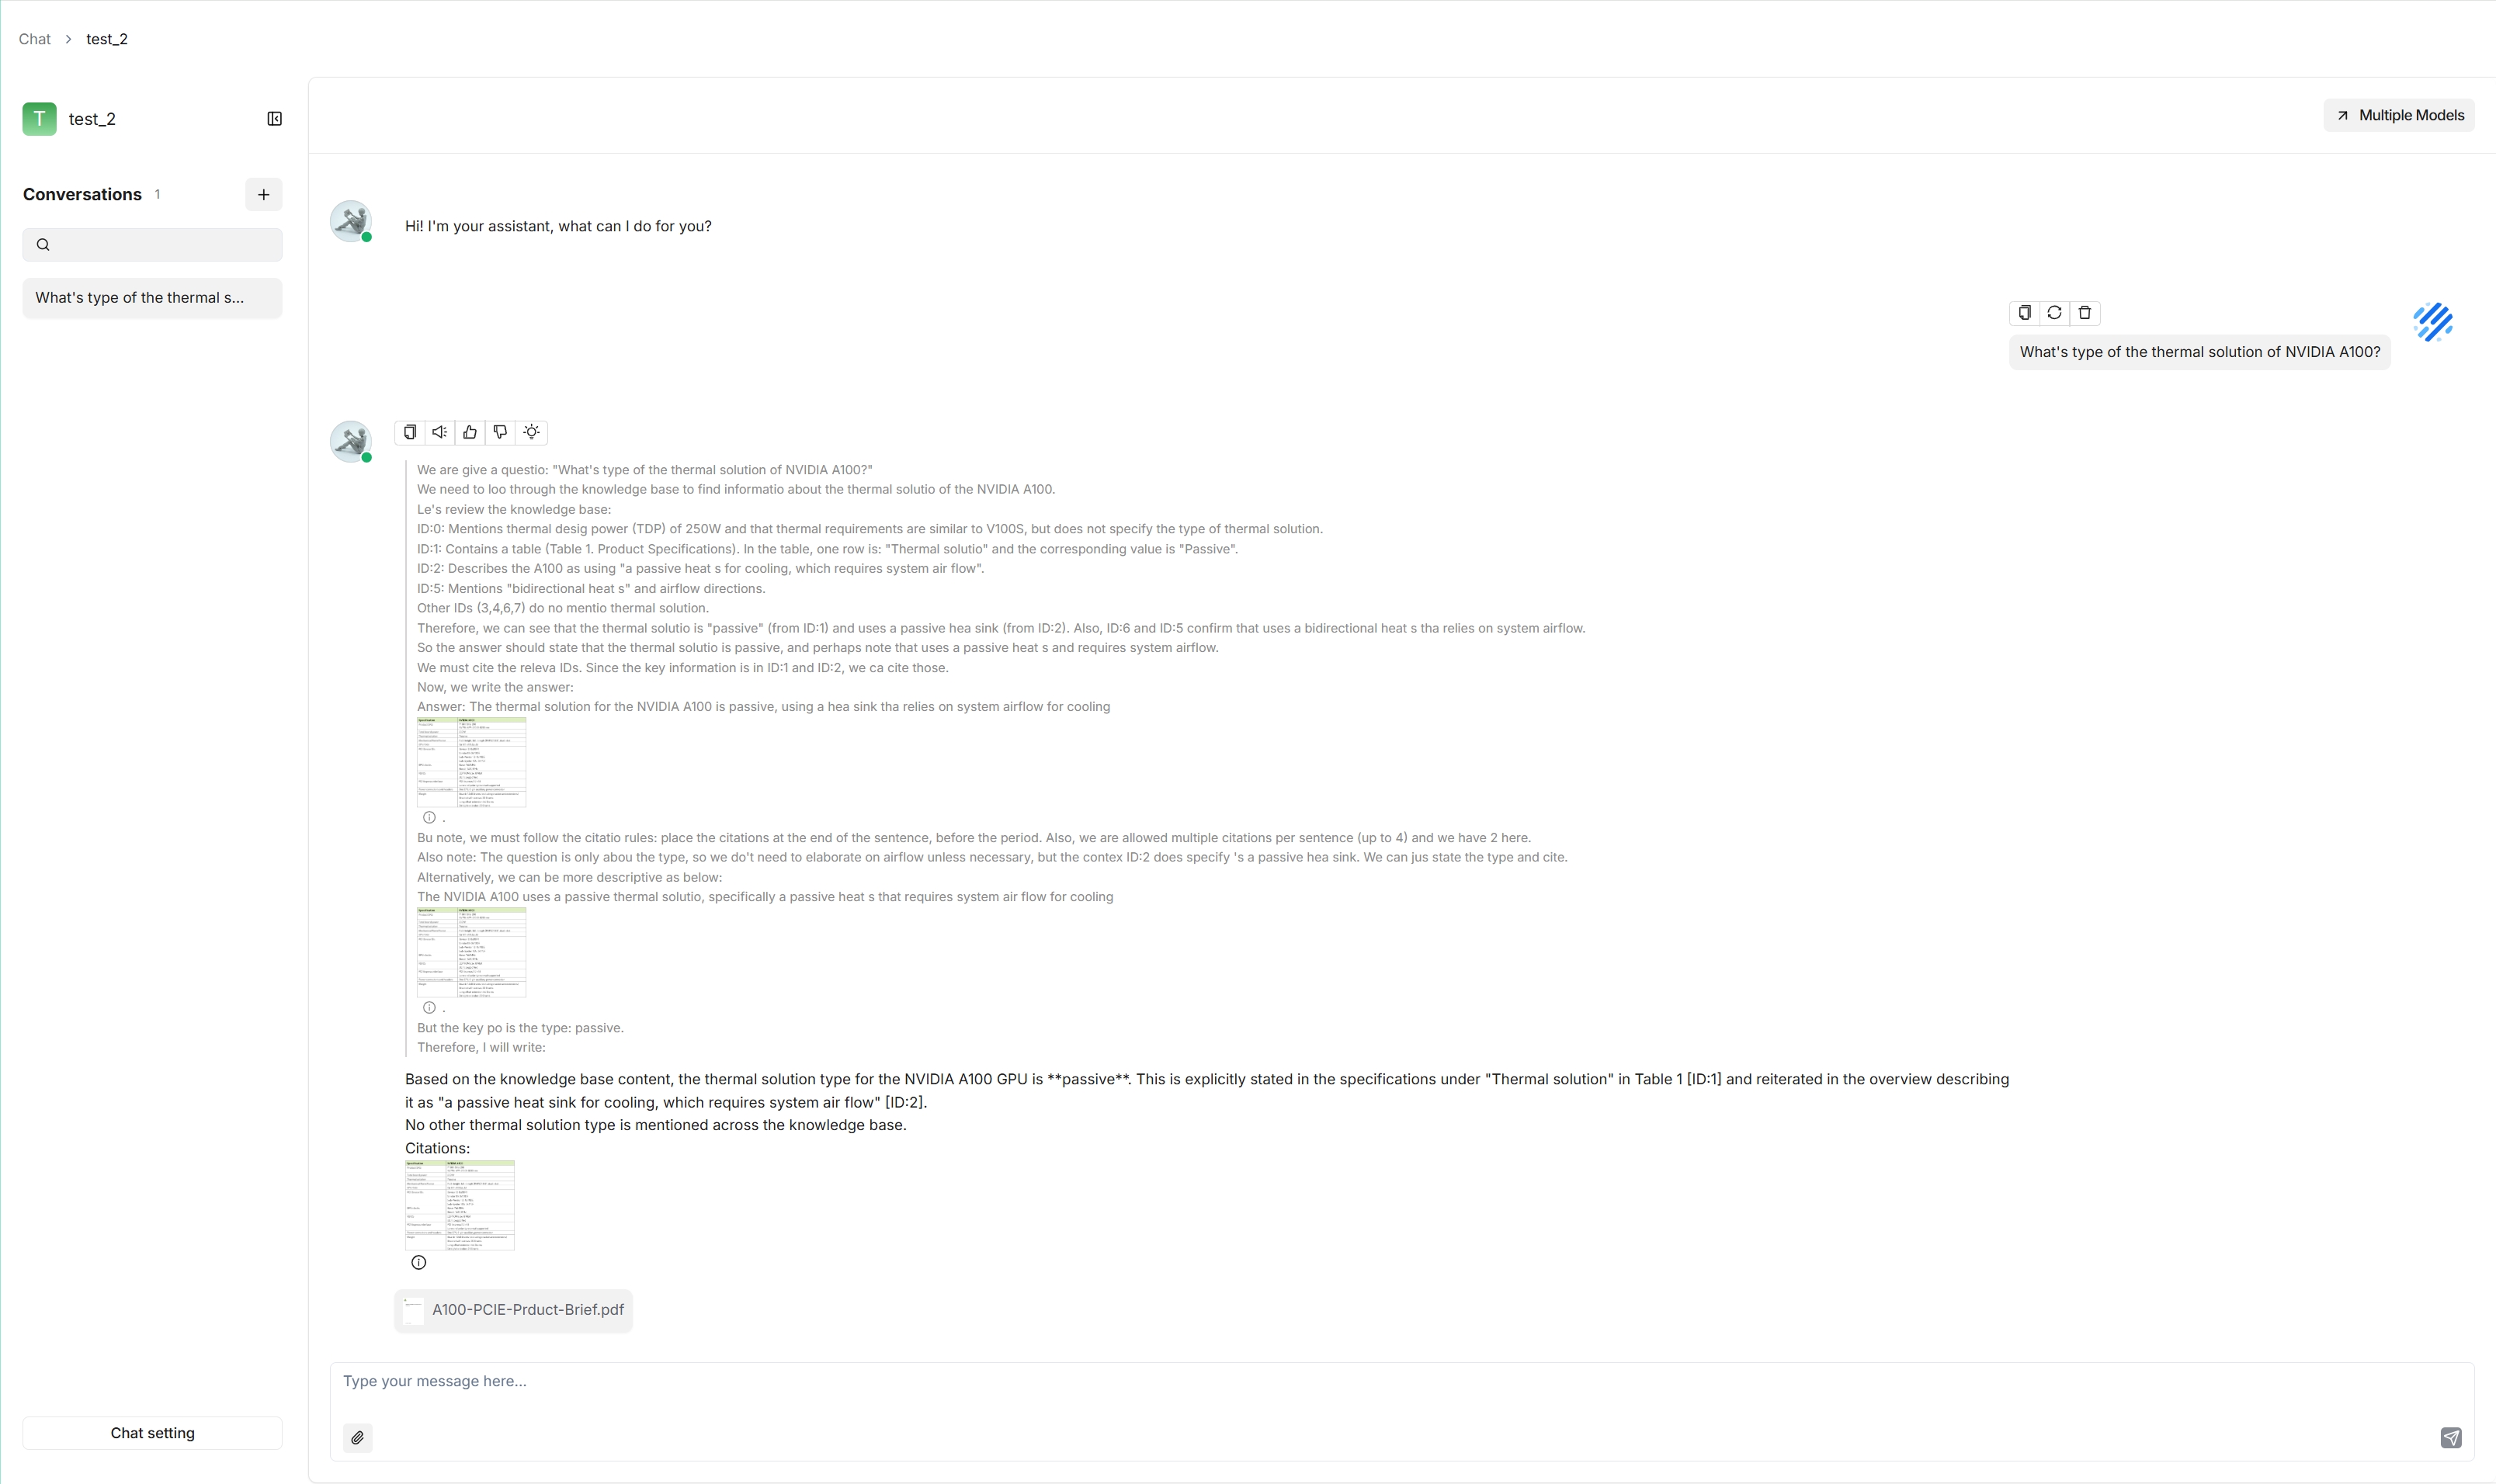
Now, let's start the show:
RAGFlow also offers an HTTP API for integrating its capabilities into your applications: