Quickstart
RAGFlow is an open-source RAG (Retrieval-Augmented Generation) engine based on deep document understanding. When integrated with LLMs, it is capable of providing truthful question-answering capabilities, backed by well-founded citations from various complex formatted data.
This guide takes you from deploying RAGFlow with Docker Compose to asking your first question about your documents. After deployment, follow the 10-minute tutorial to configure models, create a Dataset, upload a document, and start a Chat.
If RAGFlow is already running, go directly to the 10-Minute Tutorial.
Prerequisites
- A recommended starting configuration of 4 CPU cores (x86-64 or ARM64), 16 GB RAM, and 50 GB free disk space. Actual requirements depend on the document engine, data volume, parsing workload, and concurrency. Local models and OceanBase require additional resources.
- Docker ≥ 24.0.0 with Docker Compose ≥ v2.26.1 and BuildKit;
- Access to the dependency image
infiniflow/ragflow_deps:latestduring the image build, and to an LLM and embedding model at runtime.
If Docker is not installed, see Install Docker Engine.
Start Up the Server
This guide deploys RAGFlow using Docker images and the Docker Compose configuration provided in the repository. Docker images are available for Linux x86-64 and ARM64 starting with v1.0.0. Docker automatically selects the image matching your host architecture when you use the release tag.
-
For the default Elasticsearch document engine, ensure
vm.max_map_countis at least 262144 on the Docker host:sysctl vm.max_map_count
sudo sysctl -w vm.max_map_count=262144The change made with
sysctl -wis temporary. To keep it after a reboot, setvm.max_map_count=262144in/etc/sysctl.conf. On Docker Desktop, apply the setting to its Linux VM. -
Clone the repository:
git clone https://github.com/infiniflow/ragflow.git -
Check out the release tag and start the prebuilt RAGFlow Docker image with Docker Compose:
# Enter the Docker deployment directory.
cd ragflow/docker
# Check out the latest release tag; replace it with another version if needed.
git checkout v1.0.0
# Start the RAGFlow services and their dependencies in the background.
docker compose -f docker-compose.yml up -d
To deploy another version, replace
v1.0.0with a tag from the Releases page. Before starting the services, ensureRAGFLOW_IMAGEindocker/.envuses the matching image tag.The
docker/.envfile controlsDOC_ENGINE, service ports, and dependency credentials. Change the default passwords before deploying to a network-accessible host.In the RAGFlow open-source 1.0 release, DeepDoc layout analysis, OCR, and table recognition use CPU inference.
Development checkoutsA development checkout can report a code version older than the database migration version, including immediately after its own migrations. In that case, the RAGFlow server refuses to start with
Refusing to start: database was migrated by a newer version. For local development with this checkout, setRAGFLOW_DEV_MODE=truein.envand run the Compose command again. This disables the database downgrade check; leaveRAGFLOW_DEV_MODE=falsefor production, and use a binary whose version is at least the database migration version. -
Check that the service is running:
docker ps
docker logs -f ragflow-cpu
After initialization, check the RAGFlow API and its dependencies through the web port from another terminal:
curl -f http://localhost/api/v1/system/healthzA successful response has HTTP status 200. If you changed
SVR_WEB_HTTP_PORTin.env, include that port in the URL. Wait for this check to pass before opening the web interface. -
Open
http://IP_OF_YOUR_MACHINEin a browser and log in. If you changedSVR_WEB_HTTP_PORTin.env, include that port in the URL. For first-time access, register an account if registration is available, or use an account provided by your administrator.
The RAGFlow container runs the API server, ingestion workers, and data synchronization. Its startup script runs the database migrations before starting the services.
10-Minute Tutorial
Create a Dataset, upload a document, and use Chat to ask questions about its content. By the end of this tutorial, you will have a Chat that answers questions with references to your document.
Configure models → Create a Dataset → Upload a document → Start chatting
Before you begin, log in to RAGFlow and prepare:
- Access to a Chat model and an Embedding model, including any credentials required by your model provider.
- A small TXT, Markdown, or text-based PDF document containing information you want to ask about.
Document parsing and response times depend on the file size, model, and available resources.
Configure Models
The Chat model generates answers. The Embedding model makes document content searchable. If both models are already available in your account, skip to Create Your First Dataset. Otherwise, configure them as follows:
- Open User settings from your avatar, then select Model providers.
- Under Available models, select your provider and create a provider instance.
- Enter the required connection details, such as API Key and Base URL.
- Add or select the Chat and Embedding models you will use, verify them, and save the instance.
- Under Set default models, select your Chat model and Embedding model.
If your Chat and Embedding models use different providers, configure an instance for each provider.
For provider-specific instructions, see Configure Model Providers. For locally hosted models, see Deploy Local Models.
Create Your First Dataset
A Dataset holds the documents your Chat will search when answering questions.
-
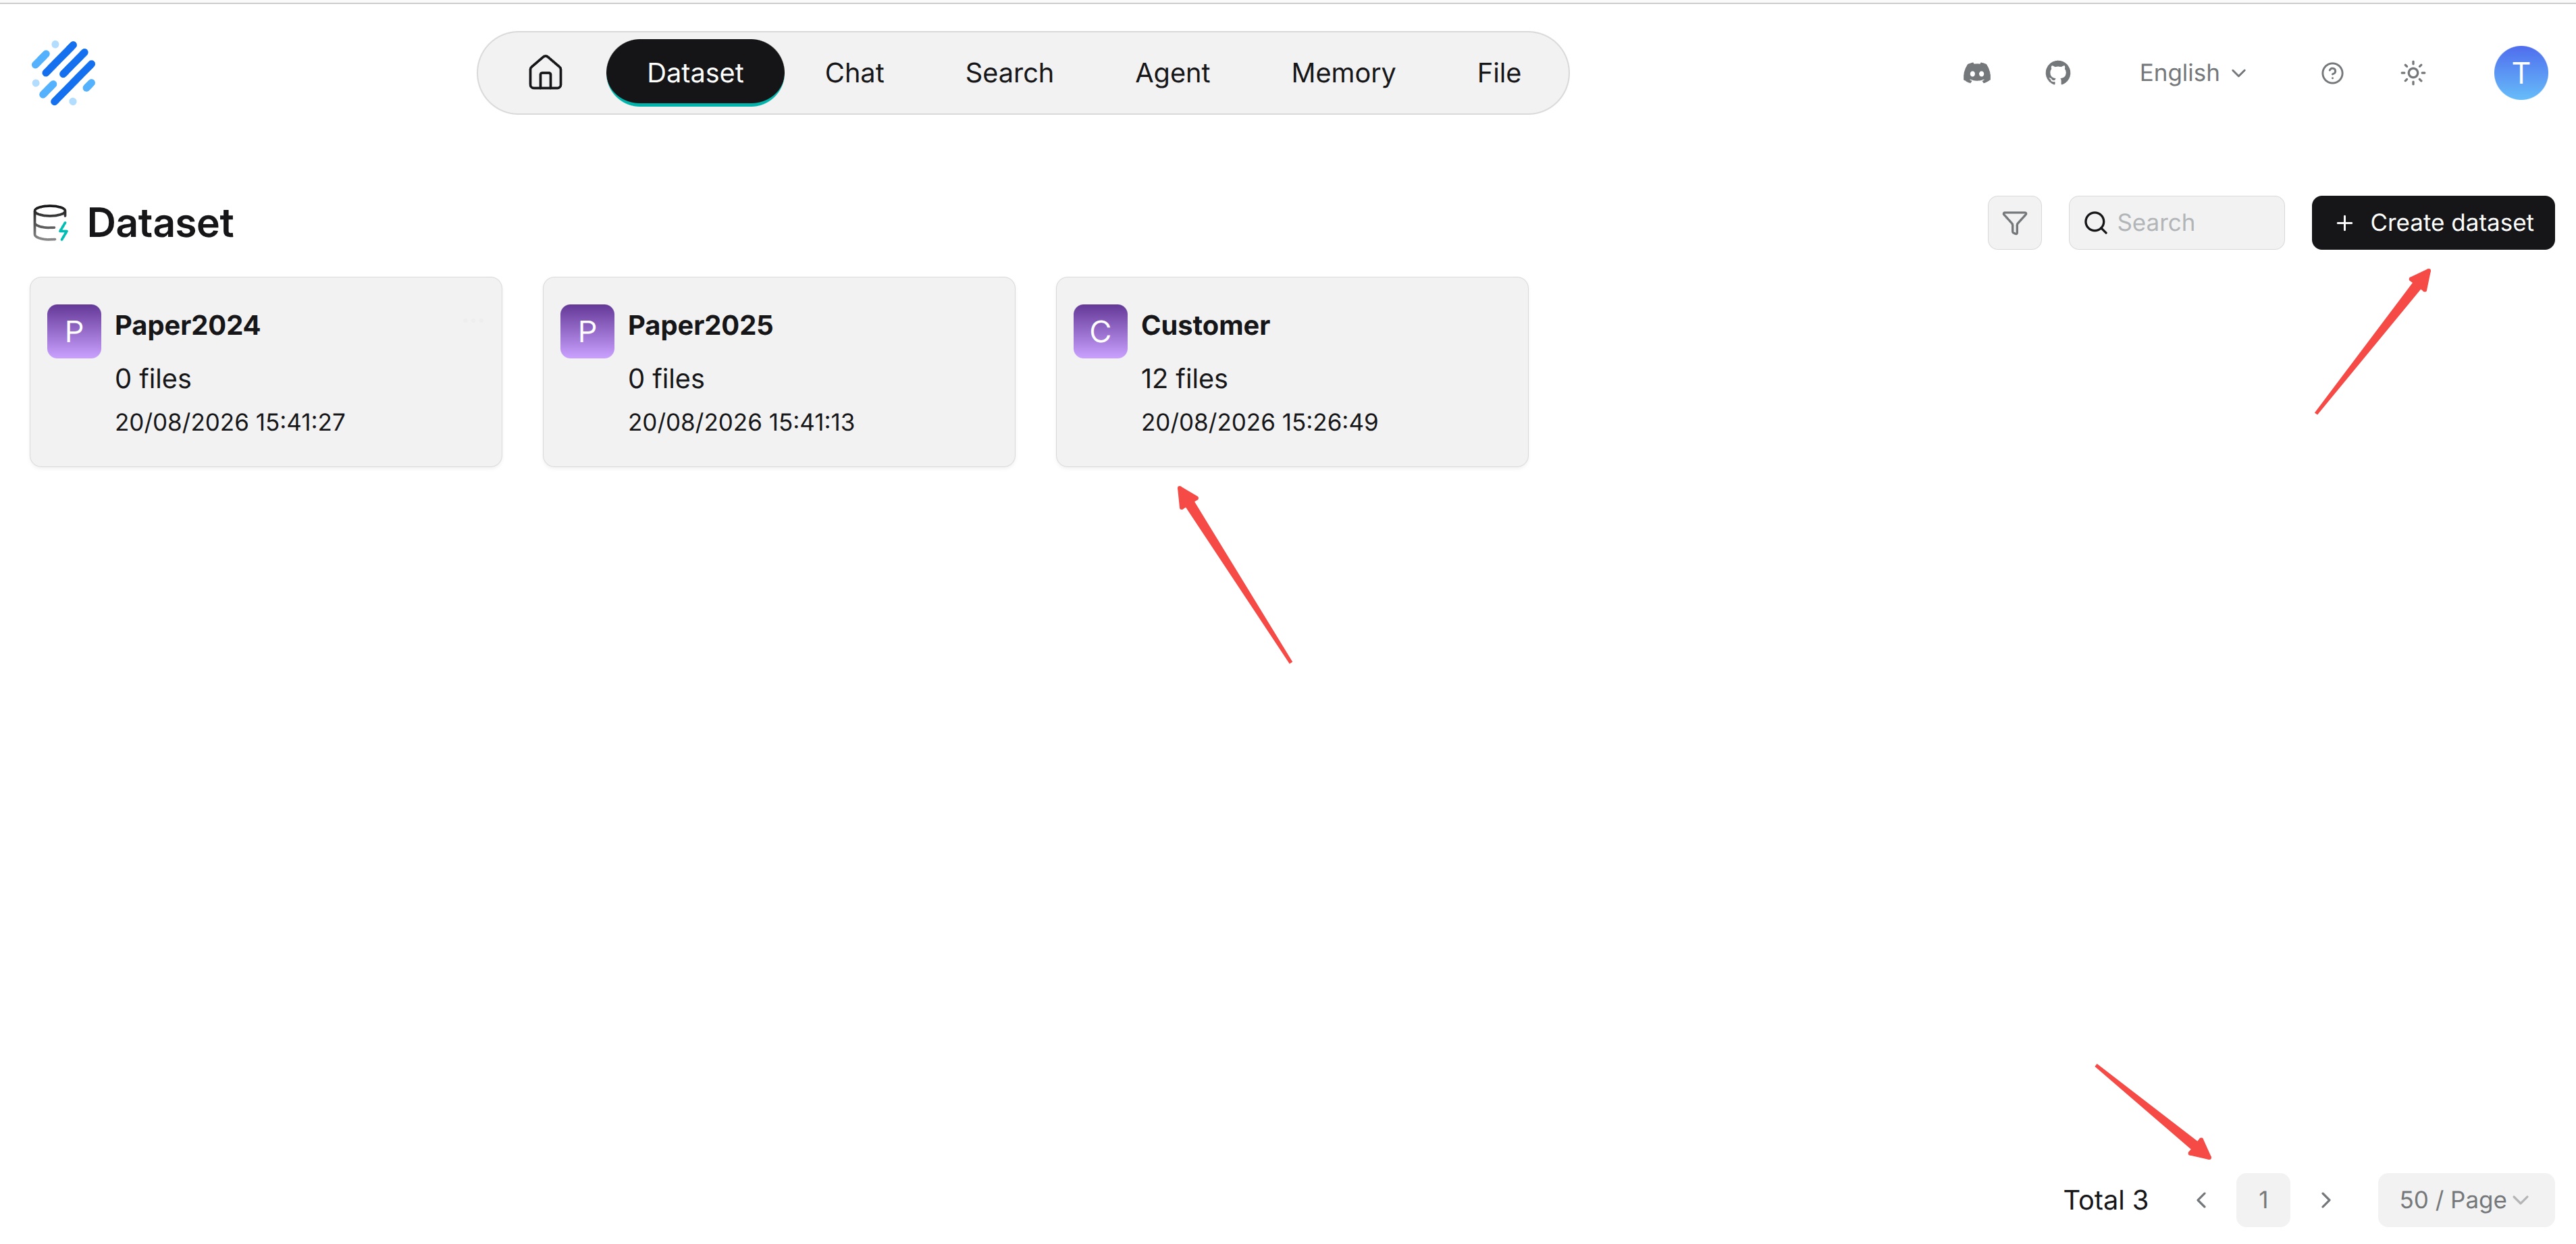
Select Dataset in the navigation bar, then click Create dataset.
-
Enter a Name, such as
My first Dataset. -
Select the Embedding model configured above.
-
In Parsing mode, select General and click Save.
Your new Dataset opens. Keep the default configuration for this tutorial and use the Files page to add your document.
Choose your Embedding model before parsing documents. For other parsing methods and model changes, see Dataset Configuration.
Upload and Parse a Document
Parsing converts your document into smaller sections, called chunks, that RAGFlow can retrieve when answering a question.
-
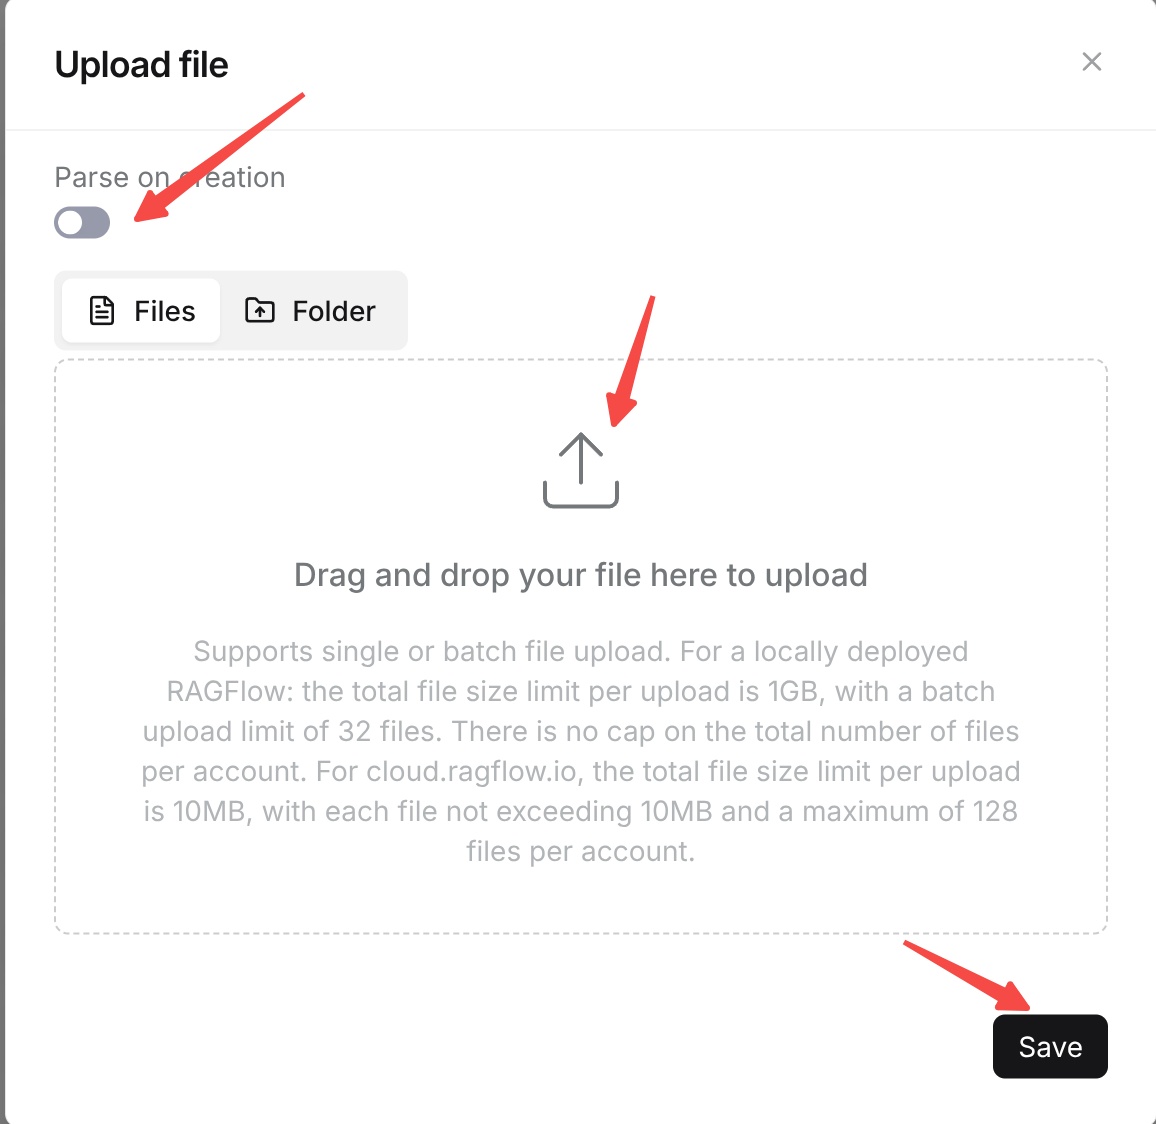
On the Dataset's Files page, click Add file > Upload file.
-
Select your document, enable Parse on creation, and click Save.
-
Wait for parsing to complete. If you uploaded without enabling Parse on creation, select the document and click Run to start parsing.
-
Check that parsing completed successfully and the document has chunks before continuing.
If parsing fails, open the document's Logs to view the error. See Dataset Document Management for parsing and troubleshooting instructions.
Create a Chat and Ask a Question
-
Select Chat in the navigation bar and click Create chat.
-
Enter a name, such as
My first Chat, and confirm creation. -
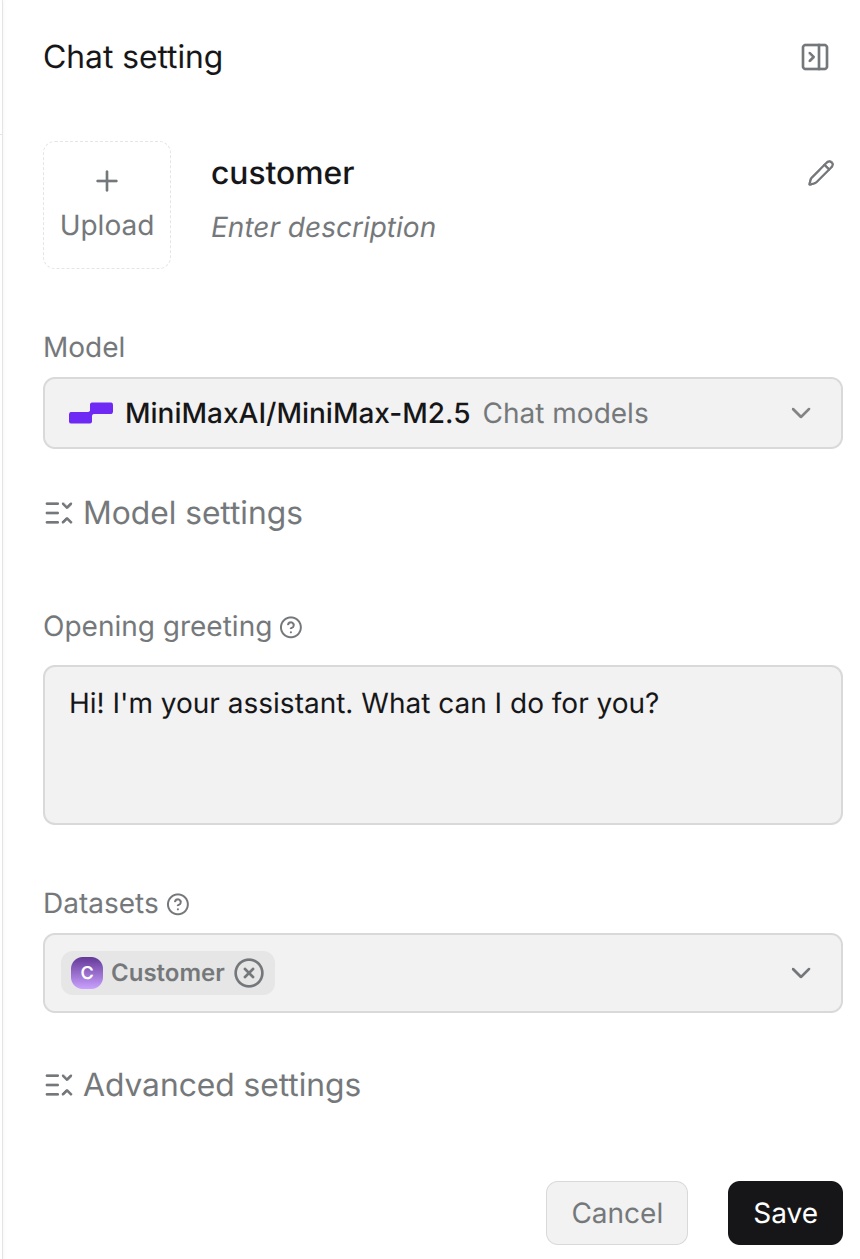
Click the gear icon to open Chat setting. In Model, select your Chat model. In Datasets, select the Dataset you just prepared.
-
Expand Advanced settings and enable Show citations. Keep the other settings at their defaults and click Save.
-
In the chat window, select Naive beside the message box and ask a question whose answer is in your document.
-
Read the answer and open its citations to check the supporting document content.
Check that the answer contains information from your document and that opening a citation shows the supporting source content. You can then continue asking questions about the same document.
For additional settings, see Chat Configuration.
Optional: Check Retrieval Results
Use this optional check to inspect the document content or investigate answers that do not match your expectations.
-
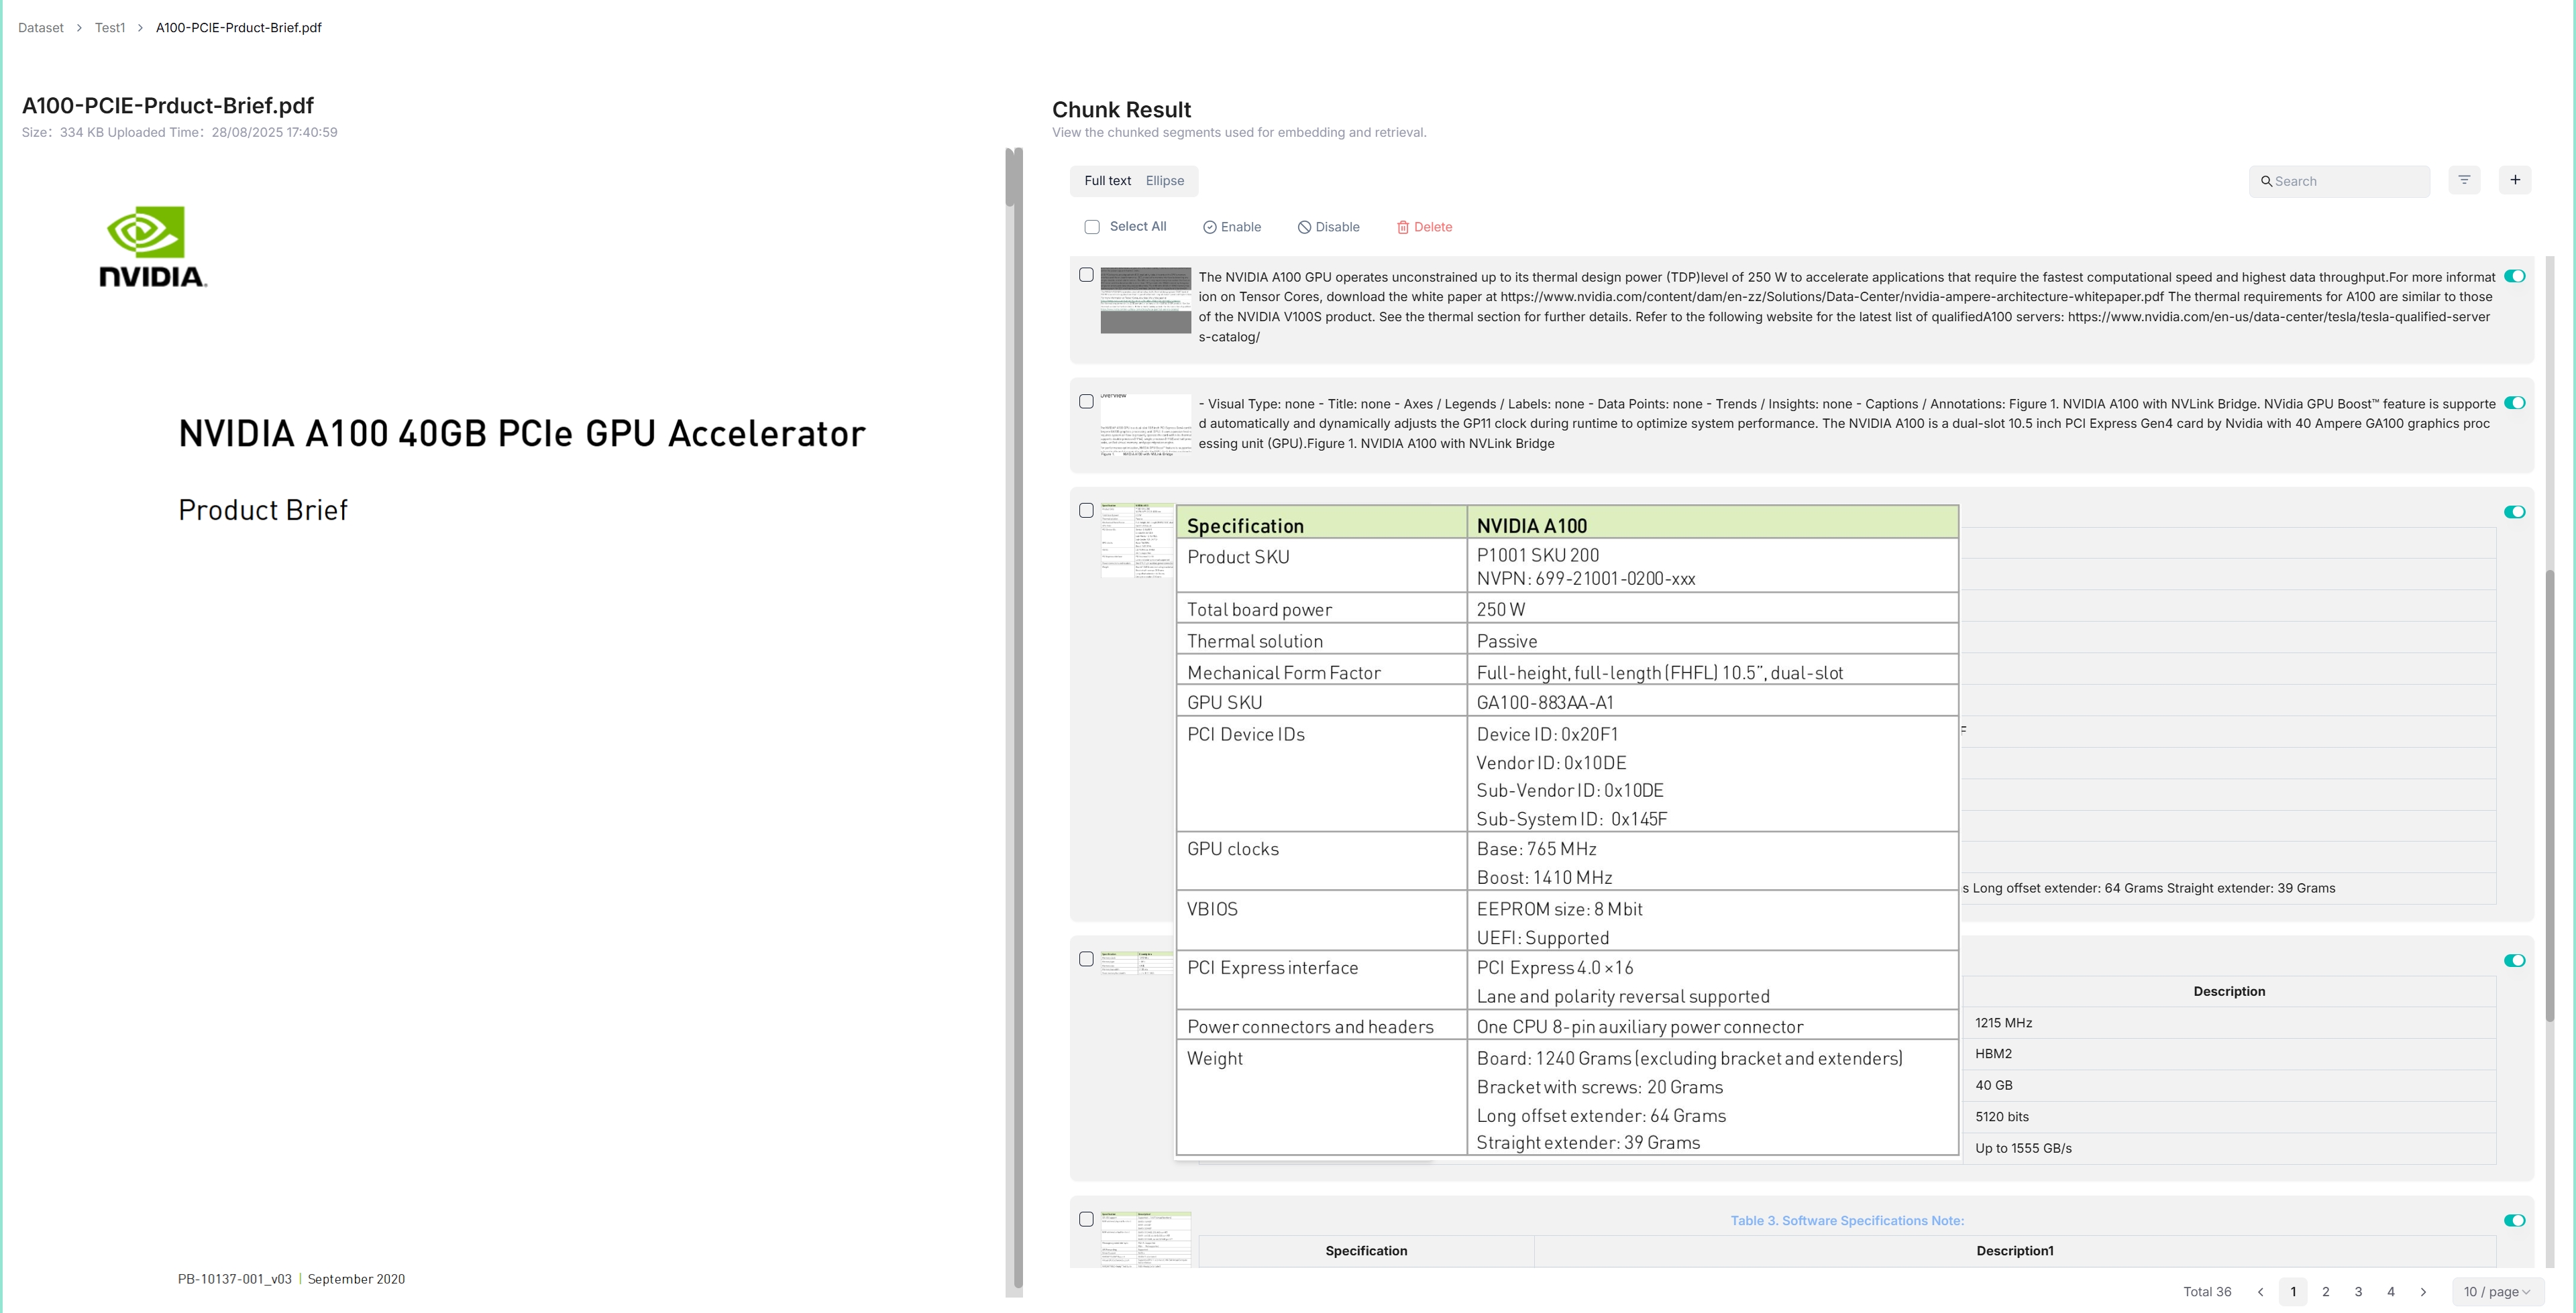
Click the parsed document's name to view its chunks. Check that the text you expect is present and readable.
-
Return to the Dataset and open Retrieval testing.
-
Enter a question whose answer is in the document in Test text, then run the test.
-
Check that the results contain content that answers your question.
If You Need Help
- A model is not available for selection: Check that it has been added and verified under User settings > Model providers. See Configure Model Providers.
- Document parsing fails: Open the document's Logs to view the error, then follow View Parsing Status.
- The answer has no citations: Check that Show citations is enabled and that your Dataset contains parsed, enabled documents. Use Retrieval testing to check whether your question finds supporting content.
Next Steps
- Sync external content: Connect a data source to keep your Dataset updated with less manual uploading.
- Collaborate with your team: Invite team members to manage and use shared Datasets together.
- Make your Chat available on your website: Embed your Chat so visitors can ask questions about your content.
For more features and detailed instructions, see the User Guides.